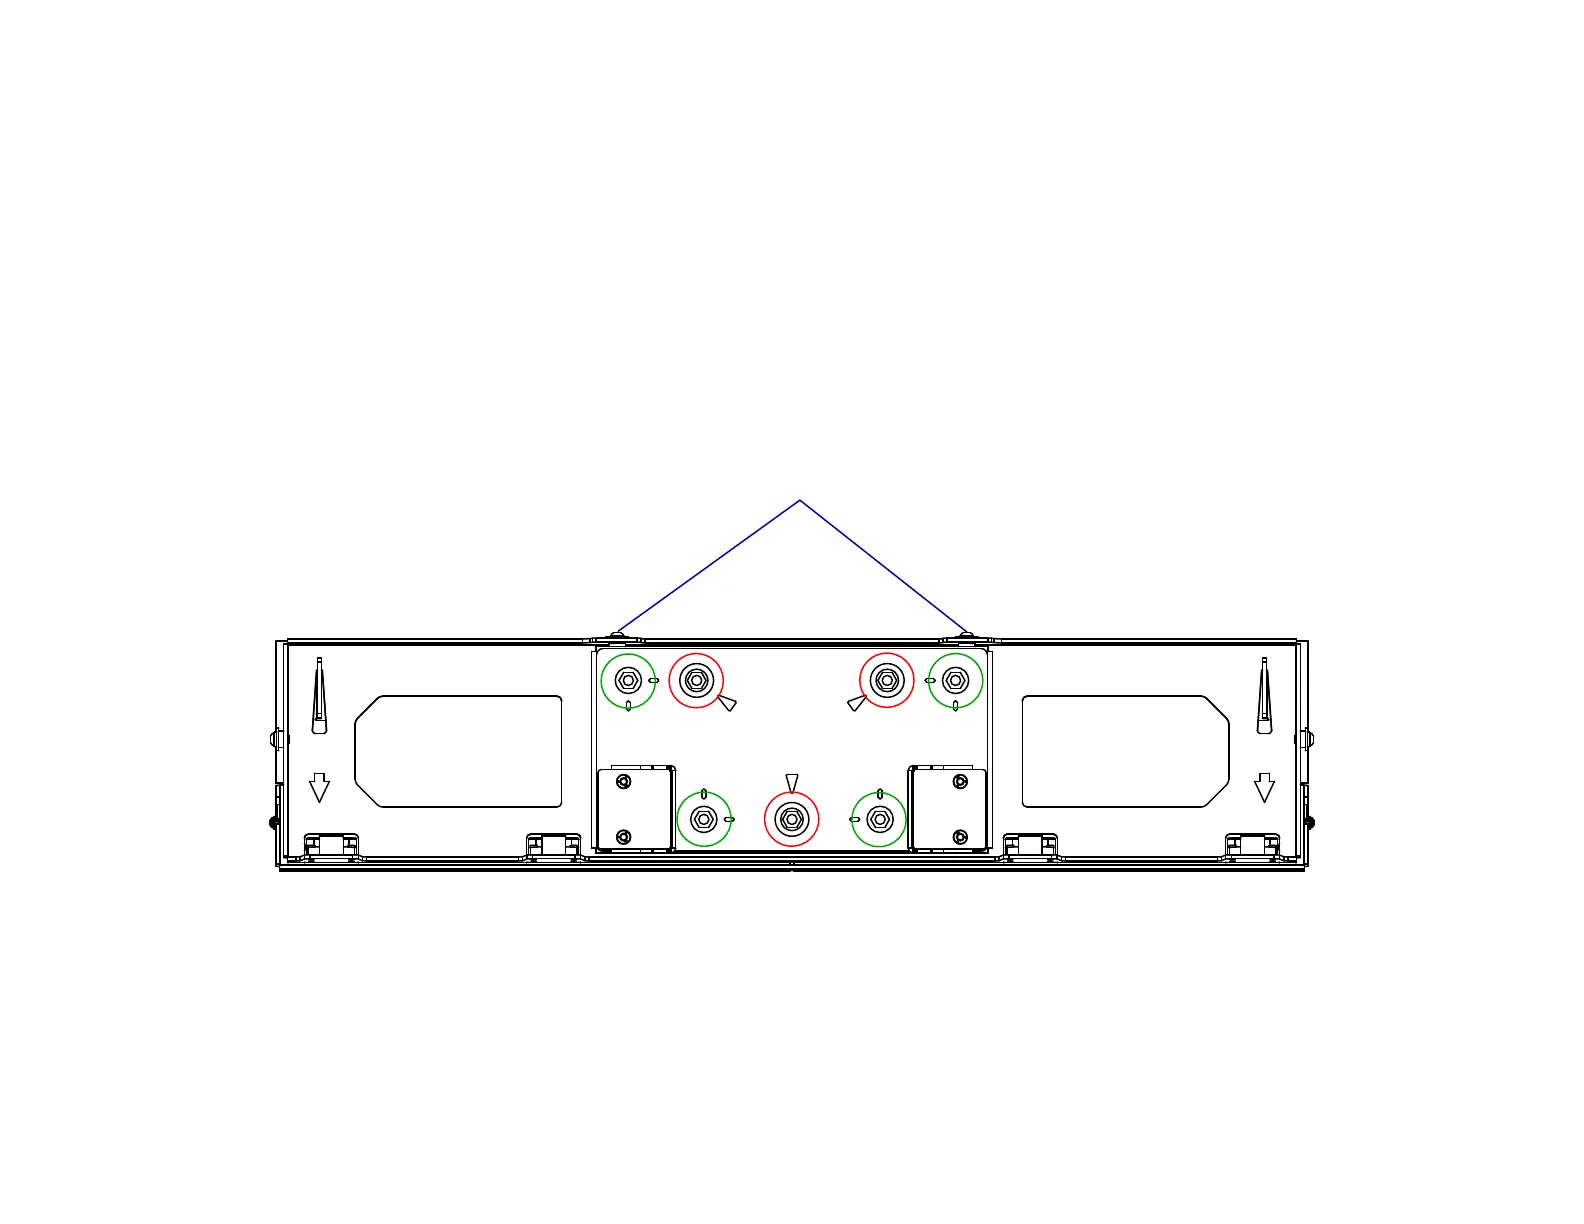
45
Red = Level Adjustment
Green = Lateral Adjustment
Ceiling Cover Assembly Top View
Locking Screws
31a. Lower the Lift System by pressing the Extend Button.
31b. Loosen the (2) Locking Screws on the back of the Ceiling Cover Assembly, then adjust the Ceiling Cover as necessary to align the Ceiling Cover to be flush with the
surrounding ceiling material using the fine adjustments on the Ceiling Cover Plate.
31c. Loosen the Lateral Adjustment Mount Bolts to slide the Ceiling Cover Plate side to side, or front to back in order to fine tune the lateral position.
31d. Turn the Level Adjustment Bolts clockwise or counterclockwise to move the ceiling panel vertically. Each Level Adjustment Mount has a max travel of 0.5 in [1.25 cm]. If the
screws stop or become difficult to turn, they have reached full travel.
31e. Repeat Steps 30 and 31 as necessary and tighten the Locking Screws once you are finished with the adjaustments.