✦ Handgrip. The handgrip serves as
a comfortable handle for the D40/
D40x that you can clasp with your
fingers to support the camera. It
also serves as the storage recepta-
cle for the camera’s battery.
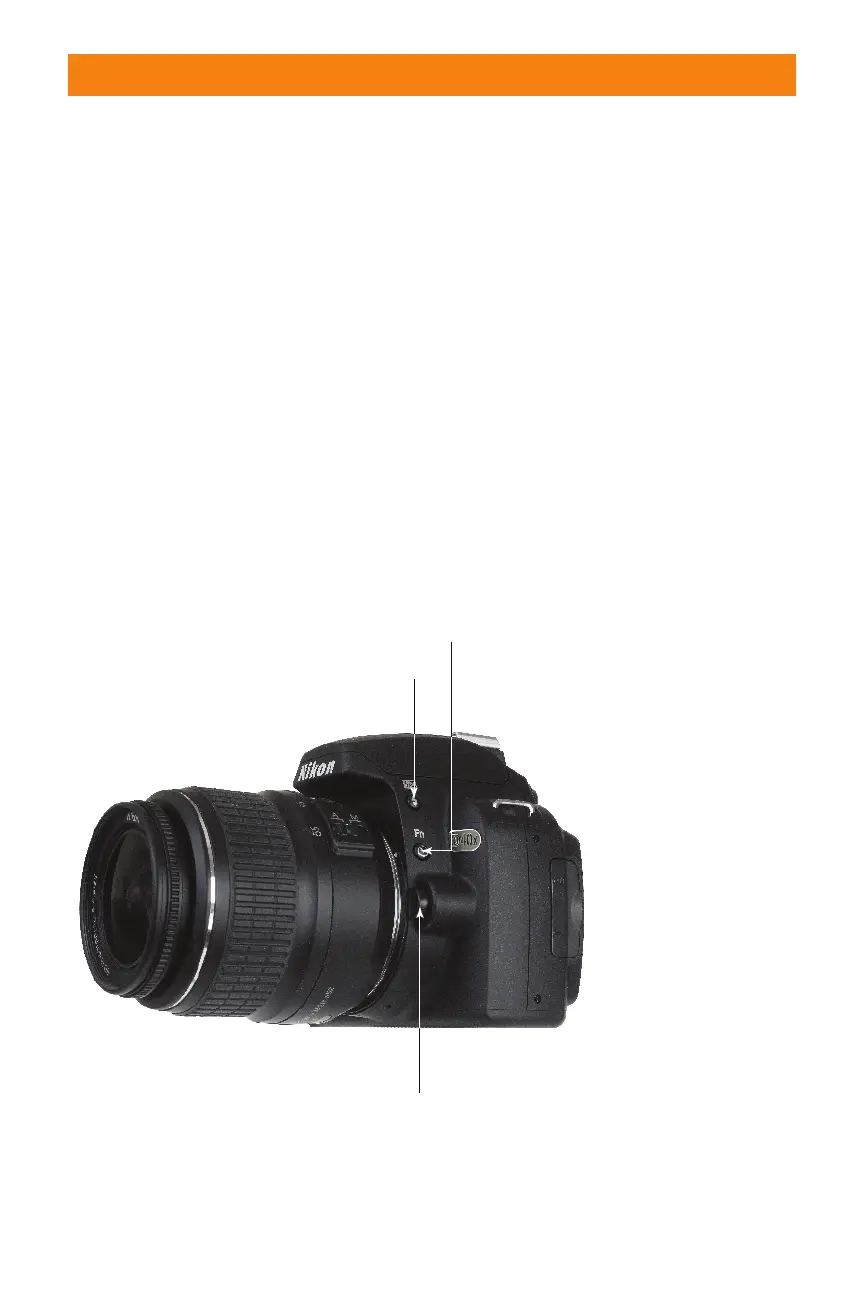
The right side of the D40/D40x has a com-
plement of controls, as you can see in figure
1.3. These include
✦ Flash mode button. Press this
button to pop up the built-in elec-
tronic flash (see figure 1.4). Hold
down the button while rotating the
command dial on the back of the
camera to change flash modes,
such as Auto Flash or Red-Eye
Reduction mode (see Chapter 6 for
a full explanation of options). Hold
down the Flash Compensation but-
ton (located southeast of the shut-
ter release) while holding down
this button to add or subtract from
the flash exposure to make your
picture lighter or darker.
✦ Function/Self-Timer button. You
can define the feature activated by
this button (learn how in Chapter
3) so you can quickly access a fea-
ture of your choice, say, to change
white balance or ISO sensitivity.
The Fn button defaults to the self-
timer function, but you can change
it (as explained in Chapter 3) to
another use.
✦ Lens release button. Hold down
this button while rotating the lens to
remove the lens from the camera.
18 Part I ✦ Using the Nikon D40/D40x
Flash mode button
Lens release button
Function/Self-Timer button
1.3 The left front side of the Nikon D40/D40x.
06_171486 ch01.qxp 8/8/07 6:20 PM Page 18