EM-38
< REMOVAL AND INSTALLATION >
[VQ40DE]
OIL PAN AND OIL STRAINER
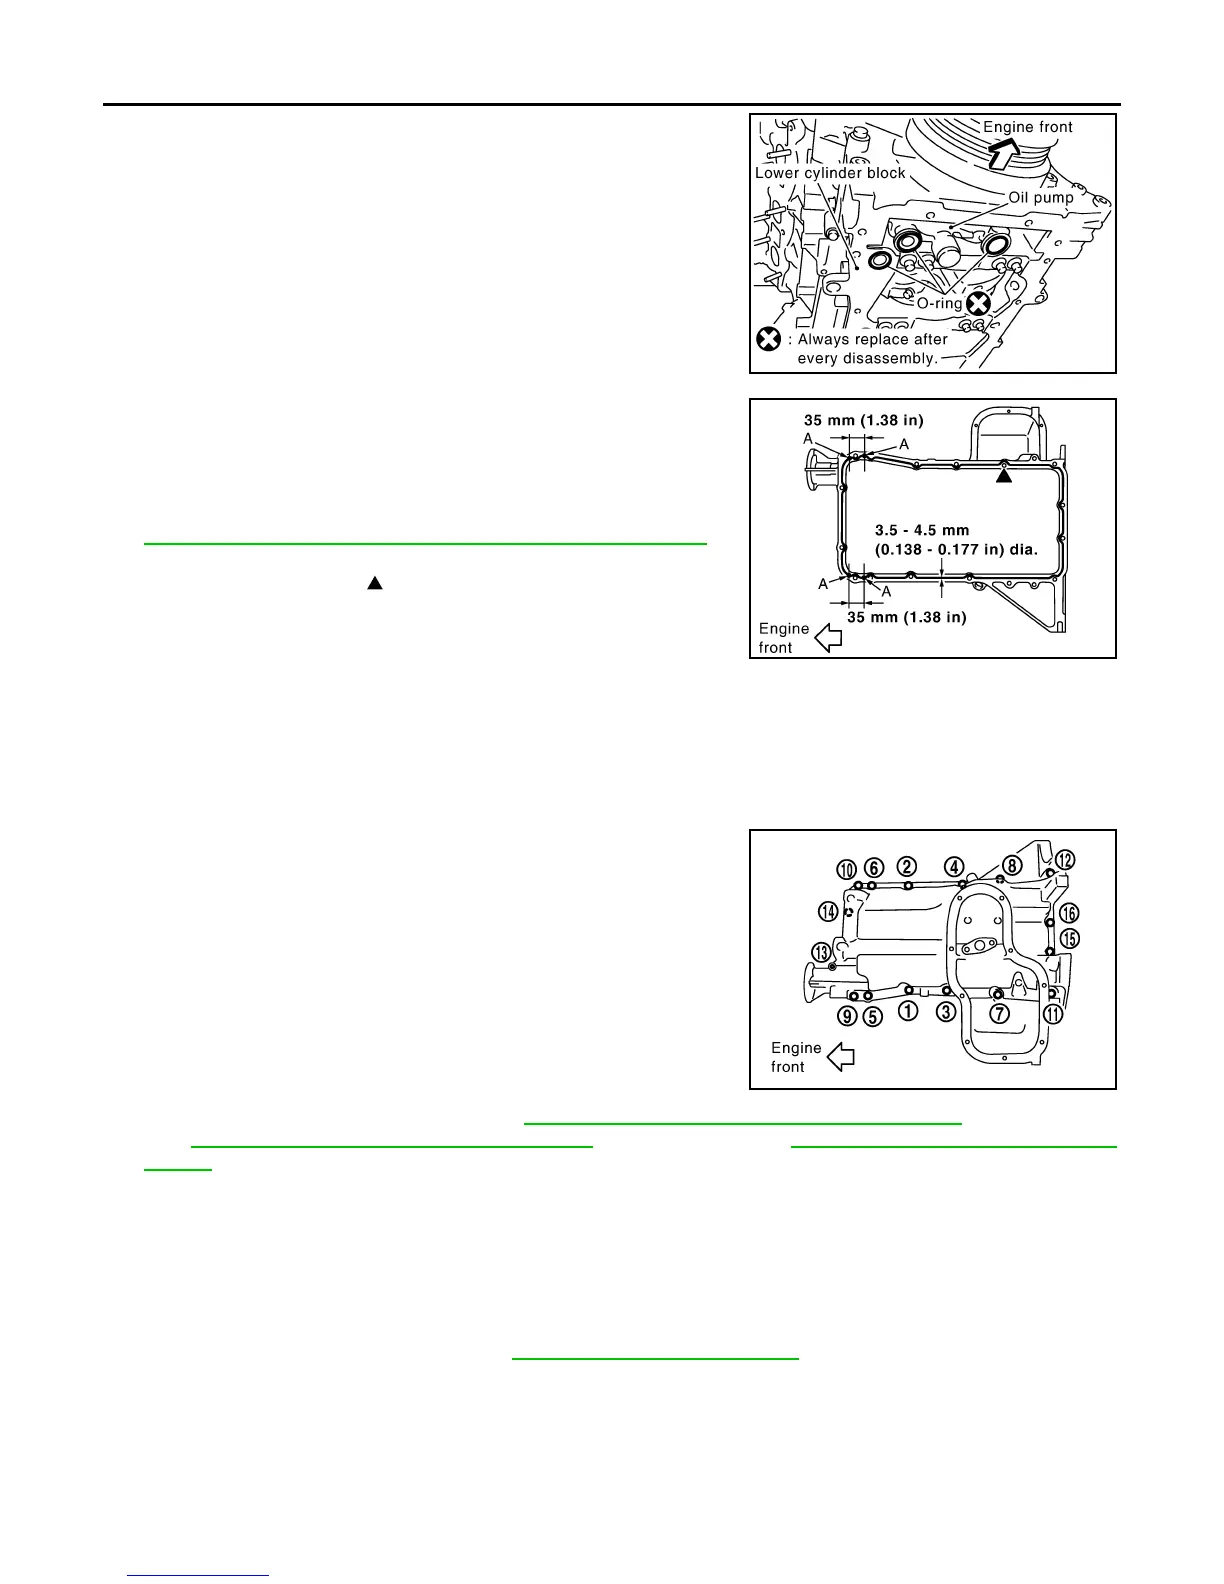
b. Install new O-rings on the bottom of lower cylinder block and oil
pump.
CAUTION:
• Do not reuse the three O-rings.
• Install a new O-ring in the upper oil pan and two new O-
rings in the front cover.
c. Apply a continuous bead of liquid gasket using Tool to the lower
cylinder block mating surfaces of oil pan (upper) as shown.
Use Genuine RTV Silicone Sealant or equivalent. Refer to
GI-17, "Recommended Chemical Products and Sealants"
.
CAUTION:
• For bolt holes with mark, apply liquid gasket outside
the hole.
• Apply a bead of 4.5 to 5.5 mm (0.177 to 0.217 in) in diame-
ter to area (A).
• Installation should be done within 5 minutes after coating.
d. Install oil pan (upper).
CAUTION:
• Do not reuse the three O-rings.
• Install a new O-ring in the upper oil pan and two new O-rings in the front cover.
• Install avoiding misalignment of both oil pan gaskets and O-rings.
• Tighten oil pan (upper) bolts in numerical order as shown.
• There are two types of bolts.
e. Tighten transmission joint bolts. Refer to TM-21, "Removal and Installation from Vehicle"
(4WD M/T mod-
els), TM-248, "Removal and Installation (2WD)"
(2WD A/T models), TM-250, "Removal and Installation
(4WD)" (4WD A/T models).
2. Install oil strainer to oil pan (upper).
3. Installation of the remaining components is in the reverse order of removal.
CAUTION:
Do not fill the engine with oil for at least 30 minutes after oil pan is installed.
INSPECTION AFTER INSTALLATION
• Before starting engine, check oil/fluid levels including engine coolant and engine oil. If less than required
quantity, fill to the specified level. Refer to MA-13, "Fluids and Lubricants"
.
• Use procedure below to check for fuel leakage.
• Turn ignition switch ON (with engine stopped). With fuel pressure applied to fuel piping, check for fuel leak-
age at connection points.
• Start engine. With engine speed increased, check again for fuel leakage at connection points.
• Run engine to check for unusual noise and vibration.
NOTE:
PBIC2885E
Tool number : WS39930000 ( — )
PBIC2886E
M8 × 100 mm (3.97 in) : 7, 11, 12, 13
M8 × 25 mm (0.98 in) : All except the above
PBIC2887E
Revision: January 2013 2013 Xterra