[ Edit: 2016/ 11/ 24 Model: E12-A ]
4. Stalks
REMOVE
GUID-11CCAB22-20F3-4693-9CF0-77CAA799ED49
SSS1037
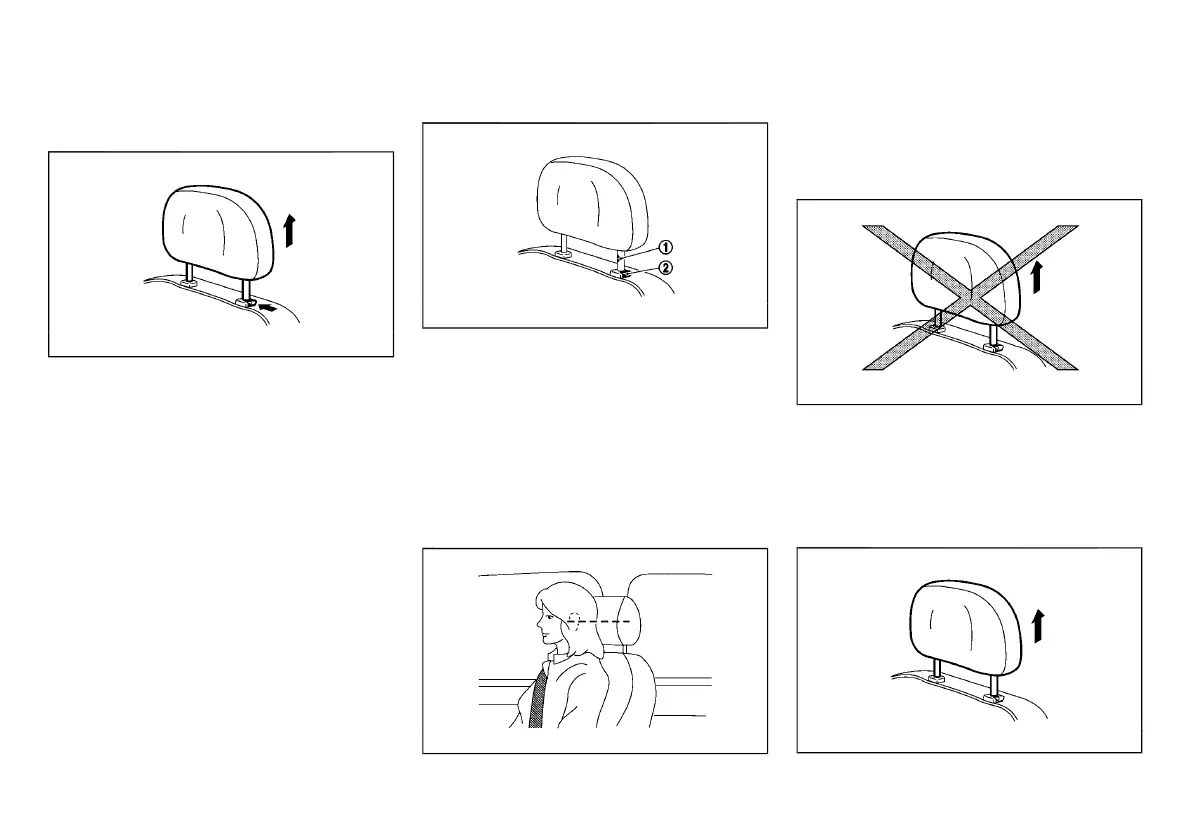
Use the following procedure to remove the head
restraint.
1. Pull the head restraint up to the highest position.
2. Push and hold the lock knob.
3. Remove the head restraint from the seat.
4. Store the head restraint properly in a secure place
so it is not loose in the vehicle.
5. Reinstall and properly adjust the head restraint
before an occupant uses the seating position.
INSTALL
GUID-A01D253C-2D93-456A-A454-C47E5332E947
SSS1038
1. Align the head restraint stalks with the holes in the
seat. Make sure that the head restraint is facing
the correct direction. The stalk with the adjustment
notch
*
1
must be installed in the hole with the
lock knob
*
2
.
2. Push and hold the lock knob and push the head
restraint down.
3. Properly adjust the head restraint before an
occupant uses the seating position.
ADJUST
GUID-5BA5ED64-BA3B-4ACE-90F3-52B36C7A81D6
SSS0997
For adjustable head restraint
Adjust the head restraint so the center is level with the
center of your ears. If your ear position is still higher
than the recommended alignment, place the head
restraint at the highest position.
JVR0259X
For non-adjustable head restraint
Make sure the head restraint is positioned from the
stored position or any non-latch position so the lock
knob is engaged in the notch before riding in that
designated seating position.
Raise
GUID-D78D1B3A-C458-472D-94BA-FAFF92D58B51
SSS1035
To raise the head restraint, pull it up.
Safety — seats, seat belts and supplemental restraint system 1-5
Condition:
 Loading...