Repairing tyre
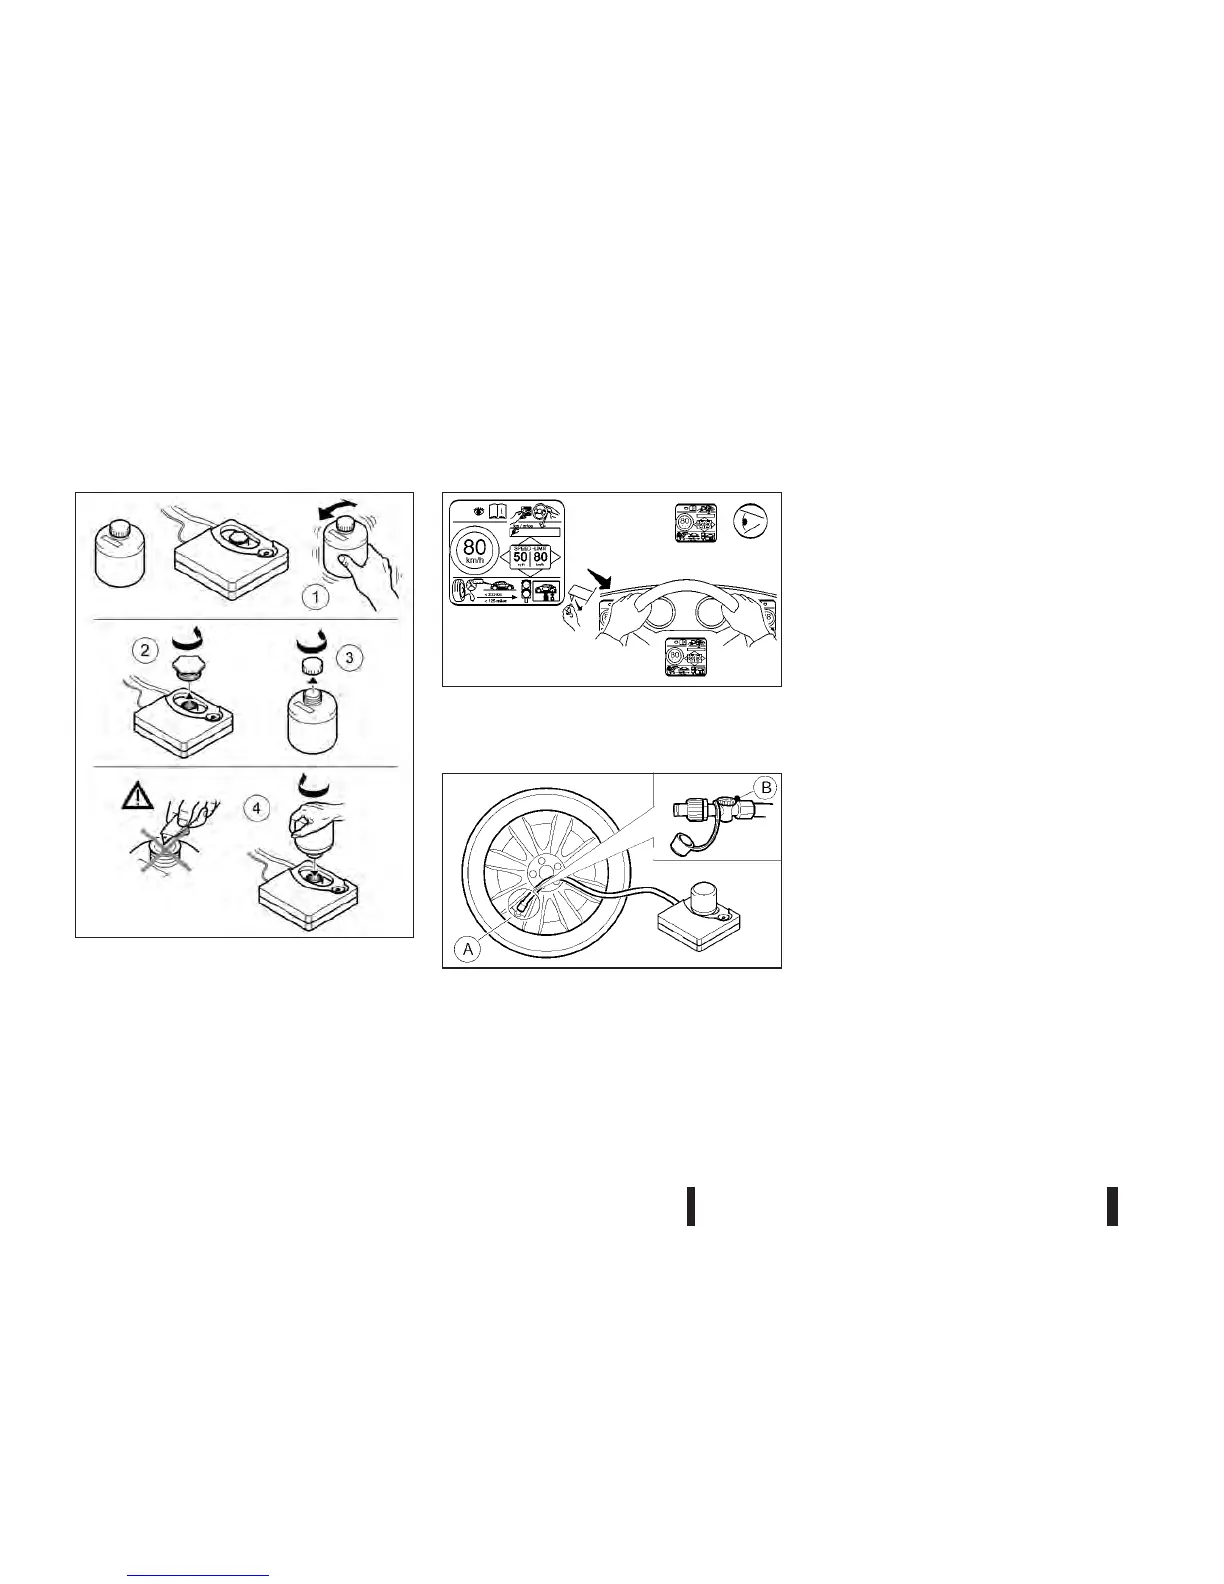
1. Shake the sealant bottle well.
2. Remove the bottle cap
j3 and the orange plug
j2 from the top of the compressor.
3. Screw the bottle
j4 into the opening of the com-
pressor (where the orange plug was).
4. Remove the speed restriction sticker from the
compressor, then place it in a location where the
driver can see it while driving.
5. Screw the air tube
jA of the compressor se-
curely onto the tyre valve. Make sure that the air
compressor switch is in the “OFF” (0) position
and the pressure release valve
jB is securely
closed, then insert its power plug into the power
outlet in the vehicle.
6. Insert its power plug to the power outlet in the
vehicle. For details, see “Power outlet” in the
“2. Instruments and controls” section.
7. Turn the ignition switch to the Acc position.
8. Switch on the compressor, and inflate the tyre to
the pressure that is specified on the tyre placard
affixed to the driver’s side centre pillar.
CAUTION
Do not operate the compressor for more than 10
minutes.
If the tyre pressure does not increase to the speci-
fied pressure within 10 minutes, the tyre may be
seriously damaged and the tyre cannot be repaired
with this tyre repair kit. Contact a NISSAN dealer
or qualified workshop.
9. Remove the air compressor from the tyre valve.
Immediately drive the vehicle at a speed of
80 km/h (50 MPH) or less.
10. After 10 minute or 10 km (6 miles) drive, check
the tyre pressure. The temporary repair is com-
pleted if the tyre pressure does not drop.
If the tyre pressure is lower than specified, re-
peat the steps from step 5.
If the pressure drops again or under 130 kPa
(1,3 bar, 19 psi), the tyre cannot be repaired
with this tyre repair kit. Contact a NISSAN
dealer or qualified workshop.
NCE343
NCE315
NCE344
6-10 In case of emergency