Do you have a question about the NiteRider Lumina 650 and is the answer not in the manual?
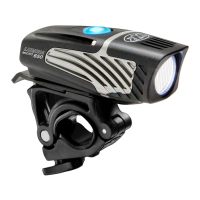
Introduction to the Lumina headlamp, its features, and battery type.
Lists and identifies all components included in the Lumina system.
Detailed steps for attaching the headlamp to bicycle handlebars.
Instructions for attaching the headlamp to a helmet.
How to unlock the headlamp and cycle through various light modes.
Instructions for turning the headlamp off and engaging lock mode for transit.
Information on low battery indicators, reserve mode, and battery charging.
Essential safety tips and precautions for cycling at night.
Importance of locking the headlamp for transit and protecting it during storage.
Contact information for customer support and details on product warranties.
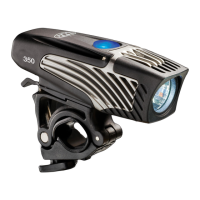
The NiteRider Lumina Series User Guide describes a range of self-contained, high-powered white LED headlamps designed for cycling. These headlamps, including the Lumina 350, 500, and 650 models, are equipped with a rechargeable and replaceable Lithium Ion battery, making them suitable for various lighting needs during night riding and other activities. The manual emphasizes familiarization with safety and operating instructions to ensure optimal performance and longevity of the light.
The NiteRider Lumina headlamps serve as a primary lighting source for cyclists, enhancing visibility and control during night rides. They are designed to provide powerful illumination through their white LED headlamp, improving the rider's view of the path ahead and making them more visible to others. The self-contained design, integrating the light and battery into a single unit, offers convenience and ease of use. The Lumina series features multiple lighting modes, including low, medium, and high beam, as well as a daylight visible flash mode and a walk mode, catering to different lighting requirements and battery conservation needs. The inclusion of a lock mode is a crucial safety feature, preventing accidental activation during transport and mitigating potential damage from overheating. A low battery indicator and a reserve mode further enhance usability by alerting the rider to diminishing power and automatically adjusting the light output to prolong illumination.
The Lumina headlamps offer versatile mounting options, allowing them to be attached to either a handlebar or a helmet. The Lumina Handlebar Mount is designed for broad compatibility with various handlebar types. To mount the headlamp, the user first removes the headlamp from the mount by pressing a release lever and sliding it off. The handlebar mount itself features a knob and hinge mechanism; turning the knob counter-clockwise opens the hinge, allowing the mount to be placed on either side of the stem. The hinge is then swung down to contact the handlebar, and a hex bolt is swung up to seat the knob into its recess. Turning the knob clockwise tightens and secures the mount. Once the handlebar mount is securely in place, the headlamp slides into position. The headlamp's aim can be adjusted by swiveling it back and forth.
For helmet mounting, the straps on each side of the helmet mount are unclamped and pulled free. The plastic mounting plate should be positioned as close to the helmet's centerline as possible, with the parallel grooves on the slider clip oriented towards the rear. Each strap is then fed into and out of two helmet vents, circling back to the upper edge of the corresponding clamp. Finally, the straps are fastened by inserting them into the clamps and snapping them shut.
Operating the Lumina headlamp begins with unlocking it, as it is shipped in a lock mode. To unlock, the power button must be pressed and held for several seconds until it turns or flashes blue, then released. To turn the light on, the power button is pressed and released. Users can cycle through the low, medium, and high brightness levels by repeatedly pressing and releasing the power button. To access the daylight visible flash mode, the power button is pressed and held for more than 3 seconds or until the headlamp starts flashing. From flash mode, pressing and releasing the power button accesses walk mode. To return to normal mode from walk mode, the power button is pressed and released again. To turn the light off from any mode (normal, flash, or walk), the power button is pressed and held until the light turns off.
A critical usage feature is the lock mode, which should always be engaged during transport to prevent accidental activation. To engage lock mode, the power button is pressed and held for several seconds until the headlamp turns off, and then continued to be held down through flash mode until the power button turns or flashes red. Releasing the power button and tapping it to confirm that the light does not turn on verifies that lock mode is engaged. Unlocking the device follows the same procedure as initial unlocking.
Proper maintenance of the NiteRider Lumina headlamp primarily revolves around battery care to maximize its lifespan. The manual advises charging the battery every 3 months when storing the device for an extended period. Charging is straightforward: one micro USB end of the charging cable is plugged into the Lumina's charging port, and the other end into a computer. The LED charging indicator on the Lumina will glow red while charging and switch to blue once fully charged. The manual explicitly states that leaving the headlamp connected to the USB charging cable indefinitely will not harm the battery.
The device is designed to perform in wet weather conditions, but it is crucial to avoid submerging it in water, as this will damage the system. The low battery indicator, which changes from blue to red when approximately 15-20% battery capacity remains, helps users anticipate the need for recharging. The reserve mode automatically shifts the light to a low beam when the battery is very low, disabling high and medium beams to extend the remaining light duration, thus providing a maintenance-related warning and function to prevent sudden power loss.
For support, NiteRider offers free telephone support on weekdays and can also be reached via email for product installation or operation difficulties. The product comes with a lifetime warranty on all mechanical components, 2 years on electrical components, and 180 days on rechargeable batteries, underscoring the importance of proper care and offering recourse for manufacturing defects. To obtain warranty service, retaining the original sales receipt and contacting customer service for a Return Merchandise Authorization (RMA) number is recommended. The RMA number must be prominently displayed on the outside of the package, and the product should be properly packaged to prevent damage during transit.
| Lumens | 650 |
|---|---|
| Battery Type | Lithium-Ion |
| Mounting Type | Handlebar mount |
| Water Resistance | IP64 |
| Charging Time | 4 hours |
| Run Time | 1.5 to 12 hours |