– 4 –
1. First, apply a liberal amount of record cleaning fl uid to the fi bers of the VAC-
SWEEP (“velvet” slot liner); then, spindle the record and record turner.
2. Apply fl uid generously across the grooved section of the disc and/or to the fl uid
applicator (Record Cleaning Brush). As you rotate the record with the turner,
brush back and forth in the direction of the grooves. As you scrub the
top side of the disc, the underside is getting scrubbed, as well. (If you prefer
additional scrubbing of the lower grooves, fl ip the record over and repeat the
procedure…no need to add additional fl uid.)
3. Once the scrub cycle is completed, turn on the vacuum motor and slowly
rotate the record over the vacuum slot. Three revolutions will dry the grooved
surface, as well as the VAC-SWEEP fi bers. Flip the record over and repeat the
vacuuming process on the second side.
4. Waste fl uid is collected in a tank inside the machine. It will usually evaporate
if just a few records are cleaned each day. However, with heavier use, you
may drain this tank by removing the black rubber stopper on the bottom of the
machine and placing a dish beneath the unit. (Please see pages 2 and 3.)
INSTRUCTIONS FOR USE OF THE MODEL 1.0 or 2.0
YOUR SYSTEM SHOULD INCLUDE: 1 “velvet” record cleaning brush,
1 four-ounce bottle of PURE 2™, 1 black plastic record turner, and 1 small whisk.
ACCESSORIES FOR YOUR SYSTEM: DC1 soft vinyl dust cover, DC2 smoked
acrylic dust cover, NITTY GRITTY Professional Grade Record Sleeves, VAC-
SWEEP™ Replacement Kit.
– 5 –
1. Before spindling the record, swivel the 45/78/LP selector arm so that the entire
vacuum slot is exposed. Apply a liberal amount of Pure 2 (or Pure 1 for 78s)
to the VAC-SWEEP fi bers, then spindle the record and record turner.
2. Apply fl uid generously across the grooved section of the disc and/or to the fl uid
applicator (Record Cleaning Brush). As you rotate the record with the turner,
brush back and forth in the direction of the grooves. As you scrub the
top side of the disc, the underside is getting scrubbed, as well. (If you prefer
additional scrubbing of the lower grooves, fl ip the record over and repeat the
procedure…no need to add additional fl uid.)
3. Once the scrub cycle is completed, position selector arm so that it covers the
exposed portion of the vacuum slot. Turn on the vacuum motor and slowly rotate
the record over the slot. Three revolutions will dry the grooved surface, as well
as the VAC-SWEEP fi bers. Flip the record over, and repeat the vacuuming
process on the second side.
4. Waste fl uid is collected in a tank inside the machine. It will usually evaporate
if just a few records are cleaned each day. However, with heavier use, you
may drain this tank by removing the black rubber stopper on the bottom of the
machine and placing a dish beneath the unit. (Please see pages 2 and 3.)
INSTRUCTIONS FOR USE OF RECORD MASTER 1 or 2
YOUR SYSTEM SHOULD INCLUDE: 1 “velvet” record cleaning brush,
1 four-ounce bottle of both PURE 2™and PURE 1™ (for 78s), 1 black plastic record
turner and 1 small whisk.
ACCESSORIES FOR YOUR SYSTEM: DC1 soft vinyl dust cover, DC2 smoked
acrylic dust cover, NITTY GRITTY Professional Grade Record Sleeves, VAC-
SWEEP™ Replacement Kit.
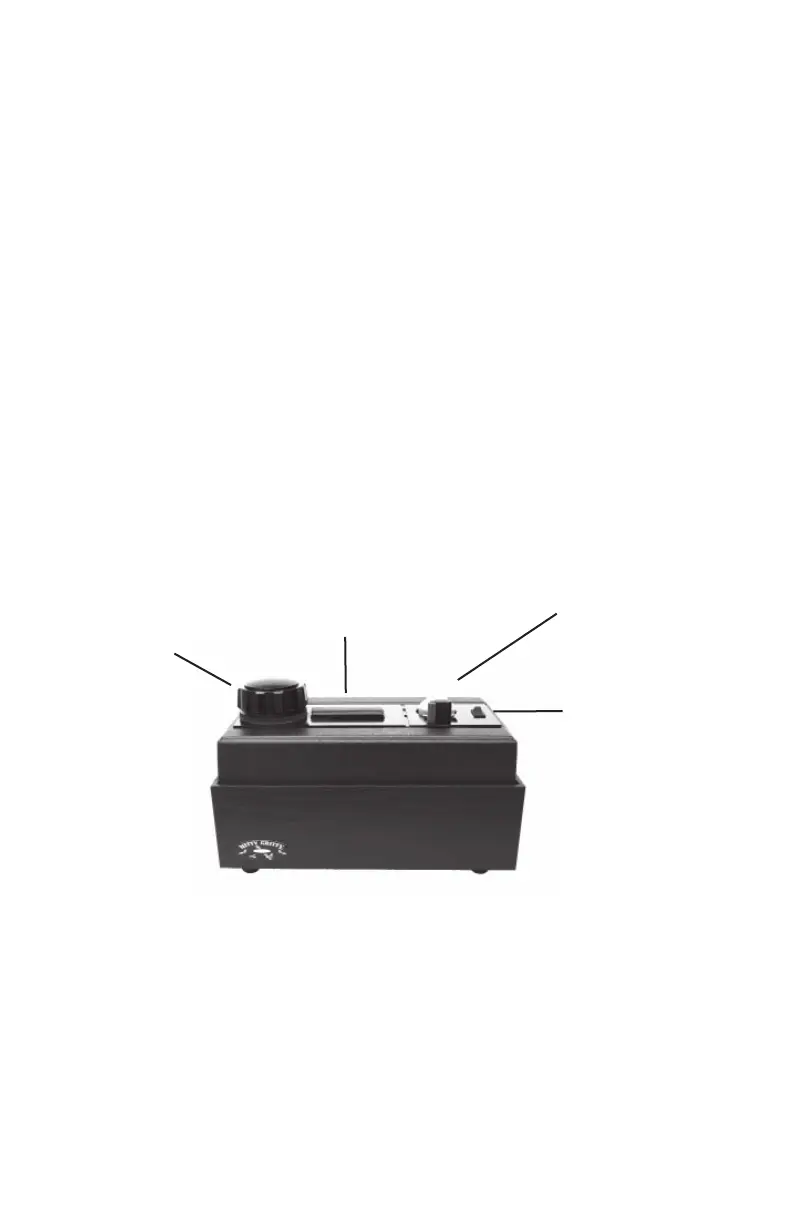
Record Turner
over the
Record Platter
Vacuum Slot
with
VAC-SWEEP
Record Brush and
4oz bottle of PURE 2
on/off Switch
Record Turner
over the
Record Platter
Vacuum Slot
with
VAC-SWEEP
Record Brush and
4oz bottle of PURE 2
on/off Switch
45/78/LP
Selector Arm
 Loading...