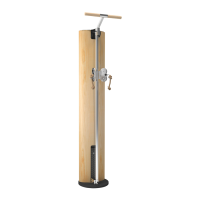
Nasuňte držiak (L) na hlavnú vodiacu tyč (I). Jemne odtlačte hlavnú vodiacu tyč od
korpusu smerom dopredu a posuňte držiak dolu. Zafixujte ho cca. 10 cm nad základovou
UPOZORNENIE: Kladky držiaka (L) sa nachádzajú na ľavej strane hlavnej vodiacej
tyče (I).
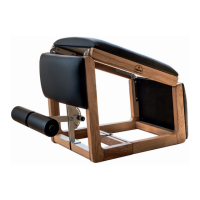
Umiestnite a zafixujte motýľa (B) na hlavnej vodiacej tyči (I) približne v jej strede (obr.
2.2).
Upozornenie: upevňovacia skrutka motýľa sa nachádza na zadnej časti hlavnej
vodiacej tyče.
Slide the spanner bracket (L) onto the main guide rod (I). By softly pulling the main
guide rod forward you will be able to slide the spanner bracket all the way down. Fix the
spanner bracket approximately 10 cm above the baseplate (figure 2.1).
ATTENTION: The pulleys of the spanner bracket are on the left hand side of the main
guide rod (I).
Slide the butterfly (B) onto the main guide rod (I) and fix it approximately in the middle
(figure 2.2).
ATTENTION: The fixing screw of the butterfly is located at the back of the main guide rod.