Pred uzavretím prístroja zadnou doskou (M), Vám odporúčame natrieť vodiace tyče na
závažie (H) špeciálnym olejom (15.211).
Uzavrite prístroj zadnou doskou (M) pomocou 10 ks skrutiek (R).
UPOZORNENIE: Pred uzavretím prístroja si skontrolujte, že sa lanko hladko a potichu
pohybuje.
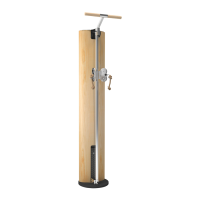
Pri upevnení SlimBeamu na stenu použite priložený upevňovací materiál a do steny
vyvŕtajte dva otvory s priemerom 10 mm. Dajte pozor, aby ste pri vŕtaní nepresekli žiadne
káble, vodovodné alebo iné potrubia.
UPOZORNENIE: SlimBeam upevňujte iba na pevnú stenu. Zariadenie neupevňujte na
preglejku a sádrokartón.
Before you close the machine with the backplate (M), we recommend to oil the weight
guide rods (H) with our special lubricat (15.211).
Now fix the back plate (M) with 10 x screws (R).
ATTENTION: Before you close the machine with the back plate make sure the cable runs
smoothly and noiseless.
You need to mount the SlimBeam to the wall. Use the included fixation material and drill
two holes with a 10 mm diameter into a solid wall. Make sure you don’t hit a cable,
waterpipe or an other pipe that runs in the wall.
ATTENTION: Mount the SlimBeam to a solid wall only (stone, concrete).
Don’t fix the Slimbeam to plywood or plasterboard wall.