15
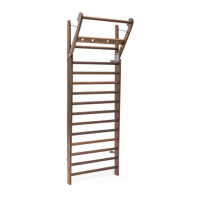
Schritt 2
Führen Sie jetzt die nächsten Sprossen (U) (bei einer 10er Sprossenwand sind
es vier Sprossen, bei einer 14er Sprossenwand sind es acht Sprossen) ein.
Verwenden Sie nun die langen 70 mm Befestigungsschrauben (H).
Step 2
Insert the next rungs (U) into the side plank (A).
Use the 4 rungs for the 10-bar WallBars and 8 rungs for 14-bar WallBars
Use the long bolts (H) to fix the rungs to the side planks.