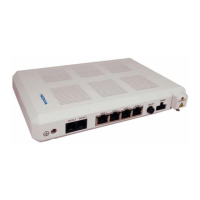
7368 ISAM ONT E-240G-B Product Guide Install an E-240G-B ONU
Issue: 01 3FE-46261-AAAA-TCZZA 69
11 Connect the fiber optic cable to an E-240G-B ONU.
i Route the fiber optic cable to the ONU.
ii Loosen the lock screw on the fiber optic connection clip.
iii Lift the connection clip up.
iv Plug the fiber optic cable with SC/APC adapter into the fiber optic connector located on
the back of the E-240G-B, as show in Figures 19 and 24.
v Lower the clip so that it secures the fiber optic cable.
vi Tighten the lock screw.
12 Install the power supply according to manufacturer specifications.
13 Connect the power cable to the ONU.
14 Power up the ONU by using the ON/OFF power switch.
15 For information on downloading, activating, and committing ONU software for an E-240G-B
ONU, see the Operations and Commands manuals for your OLT.
16 Activate and test the services; see the 7368 Hardware and Cabling Installation Guide.
17 For an E-240G-B ONU installed in an outdoor enclosure, close the access cover of the
outdoor enclosure and secure using the pin-in-hex screw.
18 STOP. This procedure is complete.
Danger — Fiber cables transmit invisible laser light. To avoid eye
damage or blindness, never look directly into fibers, connectors, or
adapters.
Warning — Be careful to maintain a bend radius of no less than 1.5
inches (3.8 cm) when connecting the fiber optic cable. Too small of a
bend radius in the cable can result in damage to the optic fiber.
Caution — ONUs must be powered by a Listed or CE approved and
marked limited power source power supply with a minimum output rate of
12 V dc, 1.25 A.
Release 06.01.01 | June 2019 | Edition 09
 Loading...