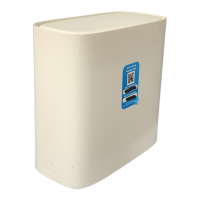
7368 ISAM ONT E-240G-B Product Guide Replace an E-240G-B ONU
Issue: 01 3FE-46261-AAAA-TCZZA 89
7.7 ONU replacement in an MNTS-A shelf
This section describes the additional steps required to replace an ONU in an MNTS-A shelf.
For more details, and for illustrations, see “ONU mounting in an MNTS-A shelf” in the previous
chapter “Install an E-240G-B ONU”.
1 Make sure all cables are unplugged from the ONU, including the PON and power.
2 Loosen the two panel screws on the faceplate and slide out the ONU and faceplate assembly
from the shelf.
3 Loosen the ground lug on the faceplate.
4 Unlock the tabs.
5 Slide the ONU out of the faceplate.
6 Remove the ground lug from the faceplate and install it in the new ONU.
7 Place the new ONU on the faceplate, making sure that the 4 tabs on the bottom of the
faceplate are inserted into the ONU.
8 Slide the ONU to the appropriate position.
9 Make sure all tabs are locked.
10 Tighten the ground lug with an M5 screw.
Danger — Fiber optic cables transmit invisible laser light. To avoid eye
damage or blindness, never look directly into fibers, connectors, or
adapters.
Caution — Be careful not to damage the PON connector.
Note — If you are removing the ONU but not replacing it at this time,
leave the ground lug on the faceplate.
Release 06.01.01 | June 2019 | Edition 09
 Loading...