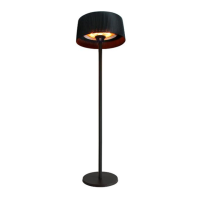
Do you have a question about the Nordic ZHQ1821SH-BC-B and is the answer not in the manual?
| Brand | Nordic |
|---|---|
| Model | ZHQ1821SH-BC-B |
| Category | Patio Heater |
| Language | English |
Securely attach the bottom tube to the heater base by screwing.
Route the power cord through the base and bottom tube, leaving approximately 2m of cable.
Join the base tube, middle tube, and bottom tube together by screwing.
Thread the power cord through all tubes and connect it to the heater head socket.
Mount the heater head onto the top tube and secure it with screws.
Fasten the power cord to the base using the provided M4 screws.
Use three bolts to firmly attach the heater to the floor for stability.
Complete assembly by tightening all screws with a spanner.
Details user age limits and supervision requirements for safe operation.
Caution regarding hot parts of the product and attention needed for vulnerable persons.
Instruction for replacing a damaged supply cord to prevent hazards.
Prohibits placement below electrical outlets, near water, or in small rooms without supervision.
Warning against using external switching devices to avoid thermal cut-out issues.
Lists areas where the heater must not be used, like near flammable goods or unventilated spaces.
Guidelines on moving, cleaning, not covering, and grounding the unit during operation.
Highlights high temperatures, residual heat, and fire risks from flammable objects.
Instructions for connecting the heater to a safe, dry 13 amp electrical supply.
Details on using the switch for different heat settings (900W, 1200W, 2100W) and off position.
Notes on shower proofing and the importance of disconnecting power when not in use.
Guidance on cleaning the exterior with a damp cloth, avoiding harsh cleaners.
Specifies that qualified electricians should perform maintenance or repairs.
Advice on storing the heater in a cool, dry location, preferably in original packaging.
 Loading...