ASSEMBLY
Assembly requires two people. Set the treadmillina cleared area and removeall packing materials.Do not
disposeof the packingmaterials untilassembly is completed.Assembly requires the included allen wrench
and your own phillips screwdriver (_, wire cutters _5_ , and rubber mallet _::=:::_."==
Note: The undersideof the treadmillwalkingbelt iscoated with high-performancelubricant.During shipping,a
small amountof lubricantmay be transferredtothe top of thewalking belt or the shippingcarton. This is a normal
conditionand does not affect treadmillperformance.If there is lubricanton top of the walkingbelt, simplywipe off
the lubricantwith a softclothand a mild, non-abrasivecleaner.
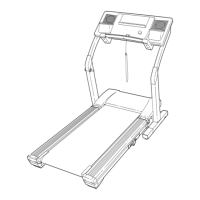
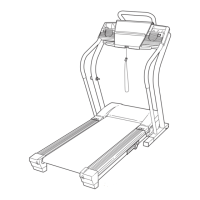
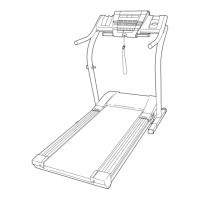
1. With the help of a second person, carefully raise the
Uprights(69) untilthetreadmillis in the positionshown.
Refer to the insetdrawing. Insertone ofthe Extension
Legs (102) intothe treadmillas shown. Make surethat
the Extension Leg isturned sothe Base Pad (99) is on
the bottom. Note: It may be helpfulto tipthe Uprights(69)
forward and tap on the Extension Leg witha rubbermal-
letas you insertthe Extension Leg.
InserttheotherExtension Leg (not shown)in the same
way.
2. Press the Lock Knob Sleeve (70) into the left Upright (69).
Remove the LockKnob (68) from the Lock Pin (74). Make
sure that the Lock Pin Collar (72) and the Spring (71) are
on the Lock Pin.
Insertthe Lock Pin (74) intothe Lock KnobSleeve (70)
and the leftUpright(69).
Tightenthe Lock Knob(68) backontothe Lock Pin (74).
68
71
70
72
74
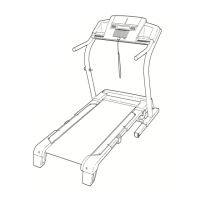
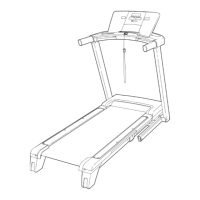
3. With the help ofa second person, carefully tip the
Uprights (69) down as shown. Make sure that the
Extension Legs (102) remain in the Uprights.
Attach each Extension Leg (102) with two 1"Screws
(148) and a Base Pad (99) as shown. Note: Attach the
lower Screw (without the Base Pad) first.
With the help of a second person, carefully tip the
Uprights (69) back to the vertical position.
Note: One replacement Base Pad (99) may be included.
Use the Base Pad to replace any Base Pad that becomes
worn.
_691
102-1
148
6

 Loading...