13
24
24
24
24
13
82
74
75
74
81
73
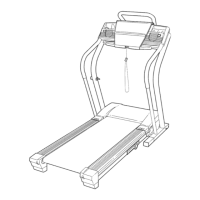
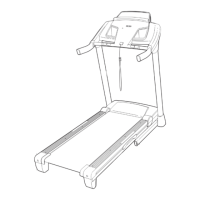
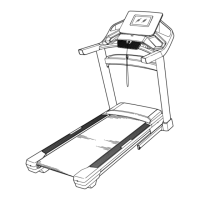
14. Raise the Frame (52) to the position shown.
Have a second person hold the Frame until
step 15 is completed.
Orient the Storage Latch (56) so that the decal is
facing away from the treadmill as shown.
Attach the lower end of the Storage Latch (56) to
the bracket on the Upright (84) with a 5/16" x 1
3/4" Bolt (3) and a 5/16" Nut (9).
Raise the Storage Latch (56) to a vertical posi-
tion. Then, remove and discard the tie (H).
84
56
3
52
Decal
9
H
14
B
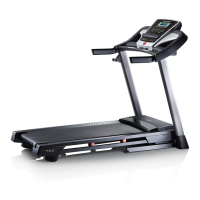
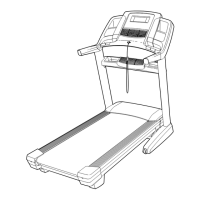
13. Set the Left Handrail Top Cover (73) on the left
Handrail (74). Start four #8 x 3/4" Truss Head
Screws (24) into the Left Handrail Bottom Cover
(75), the left Handrail, and the Left Handrail
Top Cover. Next, slide the Left Handrail Top
and Bottom Covers forward against the console
assembly (B) as shown. Then, tighten all four
Screws. IMPORTANT: Do not confuse the #8
x 3/4" Truss Head Screws with the #8 x 3/4"
Screws (5). The #8 x 3/4" Truss Head Screws
have flatter heads.
Attach the Right Handrail Top and Bottom
Covers (81, 82) to the right Handrail (74) as
described above.
 Loading...