TDMG0002 Icon-5 Maintenance Guide – Version: 02 – Release date: 2020-04-27
Step 4: Cleaning of the sample rotor brake
Frequency:
1 year or 10000 samples
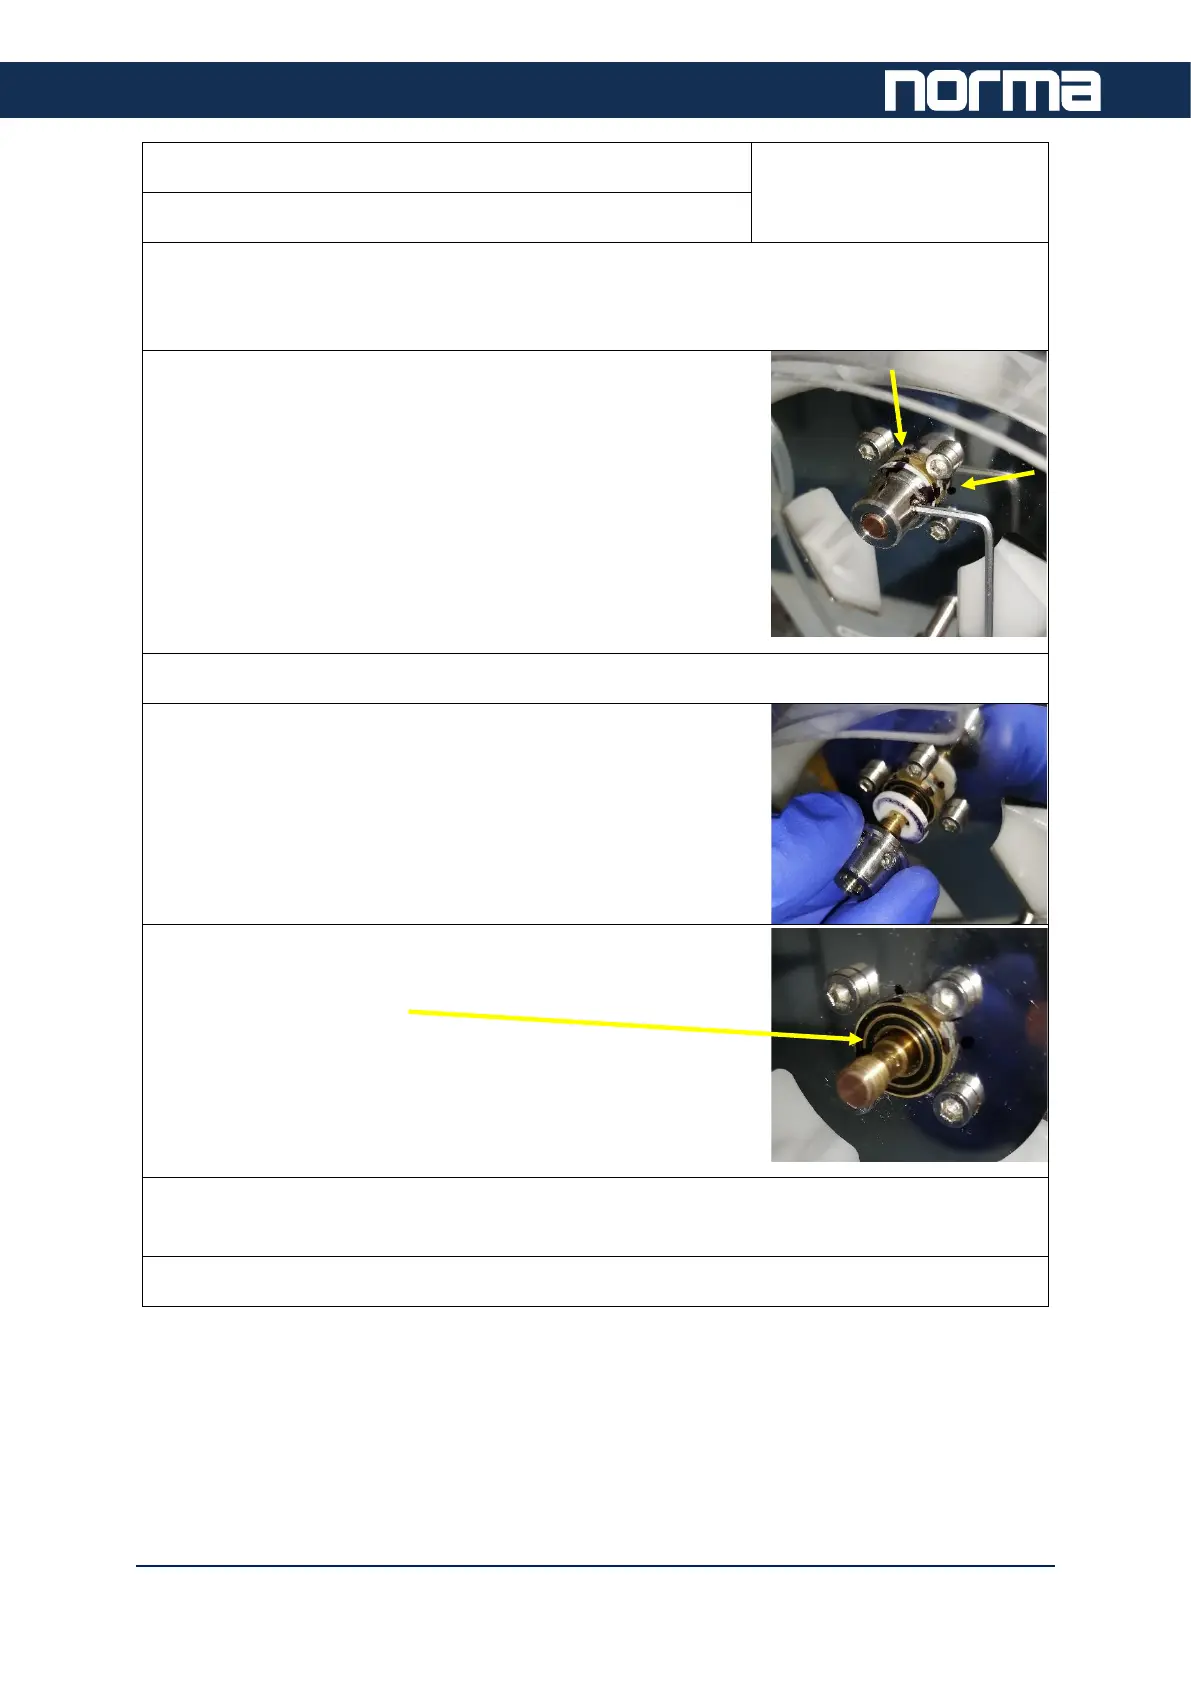
The sample rotor movement is dampened by the so-called “brake” component. If the brake
is tight or dirty, then vial position cannot be guaranteed, and the system will report “Sample
rotor errors”.
The sample rotor brake is tightened at a predefined torque in
the factory. It is mandatory to set the brake to the same
position.
To be able to do so, use a marker to mark the brake’s
actual position on two places.
By doing so, it will be easy to find the proper positioning
during reassembling.
Loosen the two small hex screws of the brake.
Unscrew the brake from the axle.
Remove the white plastic part. Use a clean cloth to wipe it
dry. You can use some alcohol-based cleaning liquid to clean
the parts. Make sure the two O-rings and the brake are clean,
too.
Reassemble the brake. Install the o-rings, and the plastic washer. Screw on the steel nut.
Use the pre-marked line as guide and tighten the screws to secure the position of the nut.
Use the Sample Rotor test functions in Service level to check proper operation.