-1-
① 2.4GHz wireless camera×1
② 2.4GHz wireless receiver×1
③ Adapter for camera×1
④ Adapter for receiver×1
⑤ AV cable×1
⑥ Earphone×1
① ② ③
PACKING LIST
④ ⑤
DIAGRAM
Camera
Camera Adapter
Receiver
Receiver Adapter
Monitor/TV
VCR
AV Output
⑥
-2-
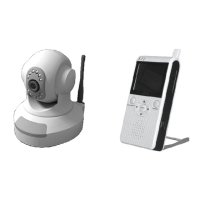
STRUCTURE
CAMERA
RECEIVER
Base
Lens
Infrared Lights
Rotate Axis
(by Remote control)
Indicator
Channel Switch
Power Jack
Power Switch
Antenna
Earphone Socket
Battery
Cover
Bracket
Antenna
Volume Control
Brightness Control
Power Switch
Channel
Indicator
LCD Screen
Camera Power Button
Camera Auto
Horizontal Rotation
Channel Button
Camera Manual
Horizontal Rotation
Camera Manual
Vertical Rotation
Power Jack
AV Output
INSTALLATION
1. Locate the camera to a specific position.
-3-
2. Connect the camera to the adapter (DC 9V 1.5A) and then slide the
power switch to ON position. The power indicator lights up.
3. Connect the receiver to the adapter (DC 9V 1.5A) and slide the power
switch to ON position.
Notes:
This receiver can also work on dry battery. Please load 4 AAA batteries
to the battery compartment with their polarities matched.
-4-
The AC adapter will work instead of batteries after it is plugged. If the
receiver is left unused for a long time, please unplug the adapter and
remove the batteries.
4. Set the channel of receiver same as that of camera by pressing the
channel button continuously, and the pictures are displayed on the
LCD screen.
Monitor/TV
Note: For more clear pictures, please connect the receiver to a
monitor/TV with AV cable.
5. Adjust the brightness and volume of the receiver to a satisfied level.
Volume Control
Brightness Control
 Loading...