DR400 Quick Start Guide
To purchase more patch electrodes contact your distributor or go to www.nemon.com
• Use a power source (not the PC) to charge the DR400
• DR400 will flash orange while charging, and flash green every 4
seconds when fully charged; remove from power source
Install and run
PCPatch utility
• If you have not already done so, download PCPatch utility at
www.nemon.com and install on PC with analysis or remote software
• If you have not already done so, copy and save previous patient’s
data from DR400 before erasing
Update Settings at this time
• Determine the best location to attach the patch and optional lead
wire onto the patient, but do not attach at this time.
• Prepare the patient’s skin. If the patient has hair in any of the patch
site, shave it with a safety razor. Use an alcohol pad and rub the sites
briskly until the skin reddens. Let the skin air dry before proceeding.
Prepare DR400 and
attach to patient
• Attach 1-lead electrode patch (1CH) or 1-lead electrode patch w/ lead
wire (3CH) to the DR400 recorder
•
Remove backing from leads and attach firmly to patient
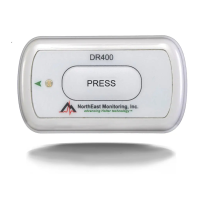
Start Recording by
holding DR400
“EVENT” button
down until green
light goes out
• If you have the Bluetooth USB adapter, you can view the hook-up and
ECG quality via the PCPatch utility at start up
• DR400 will flash green for 30 seconds (v5.04) or 60 minutes (v5.06)
when recording starts
• At any time, press EVENT button for > 3 seconds to transmit
Bluetooth signal to view ECG via PCPatch utility
For Holter analysis:
Remove DR400 from
patient and upload
data via PCPatch
• Remove from patient and plug DR400 into the PC USB cable. The
DR400 will stop recording after 2 minutes.
• Start PCPatch utility to save DR400 Holter data to HE/LX Analysis (or
LX Remote patient directory)
• Open analysis software to view and analyze patient data
Download PCPatch at www.nemon.com and
install on PC where analysis software
is installed.
Note: You do not need a Bluetooth USB
Adapter to use the DR400. The adapter is only required to
view ECG using the PCPatch utility. Contact your distributor
to find out more about this feature.
w/optional lead wire (3CH)
If using the 1-lead electrode
patch with the optional ECG
lead wire:
• Attach the ECG lead wire first
• ECG lead wire attaches to
snap closest to USB port
The lead plastic should
cover the USB port
To attach the 1-lead electrode
patch for 3CH recording:
• Patch goes on diagonally
• Press down firmly so that all
snaps are locked in place
Copyright 2020
Last updated: March 20, 2020
NEMM049 - Rev-D - English
Download and install the PCPatch utility at
www.nemon.com before getting started.