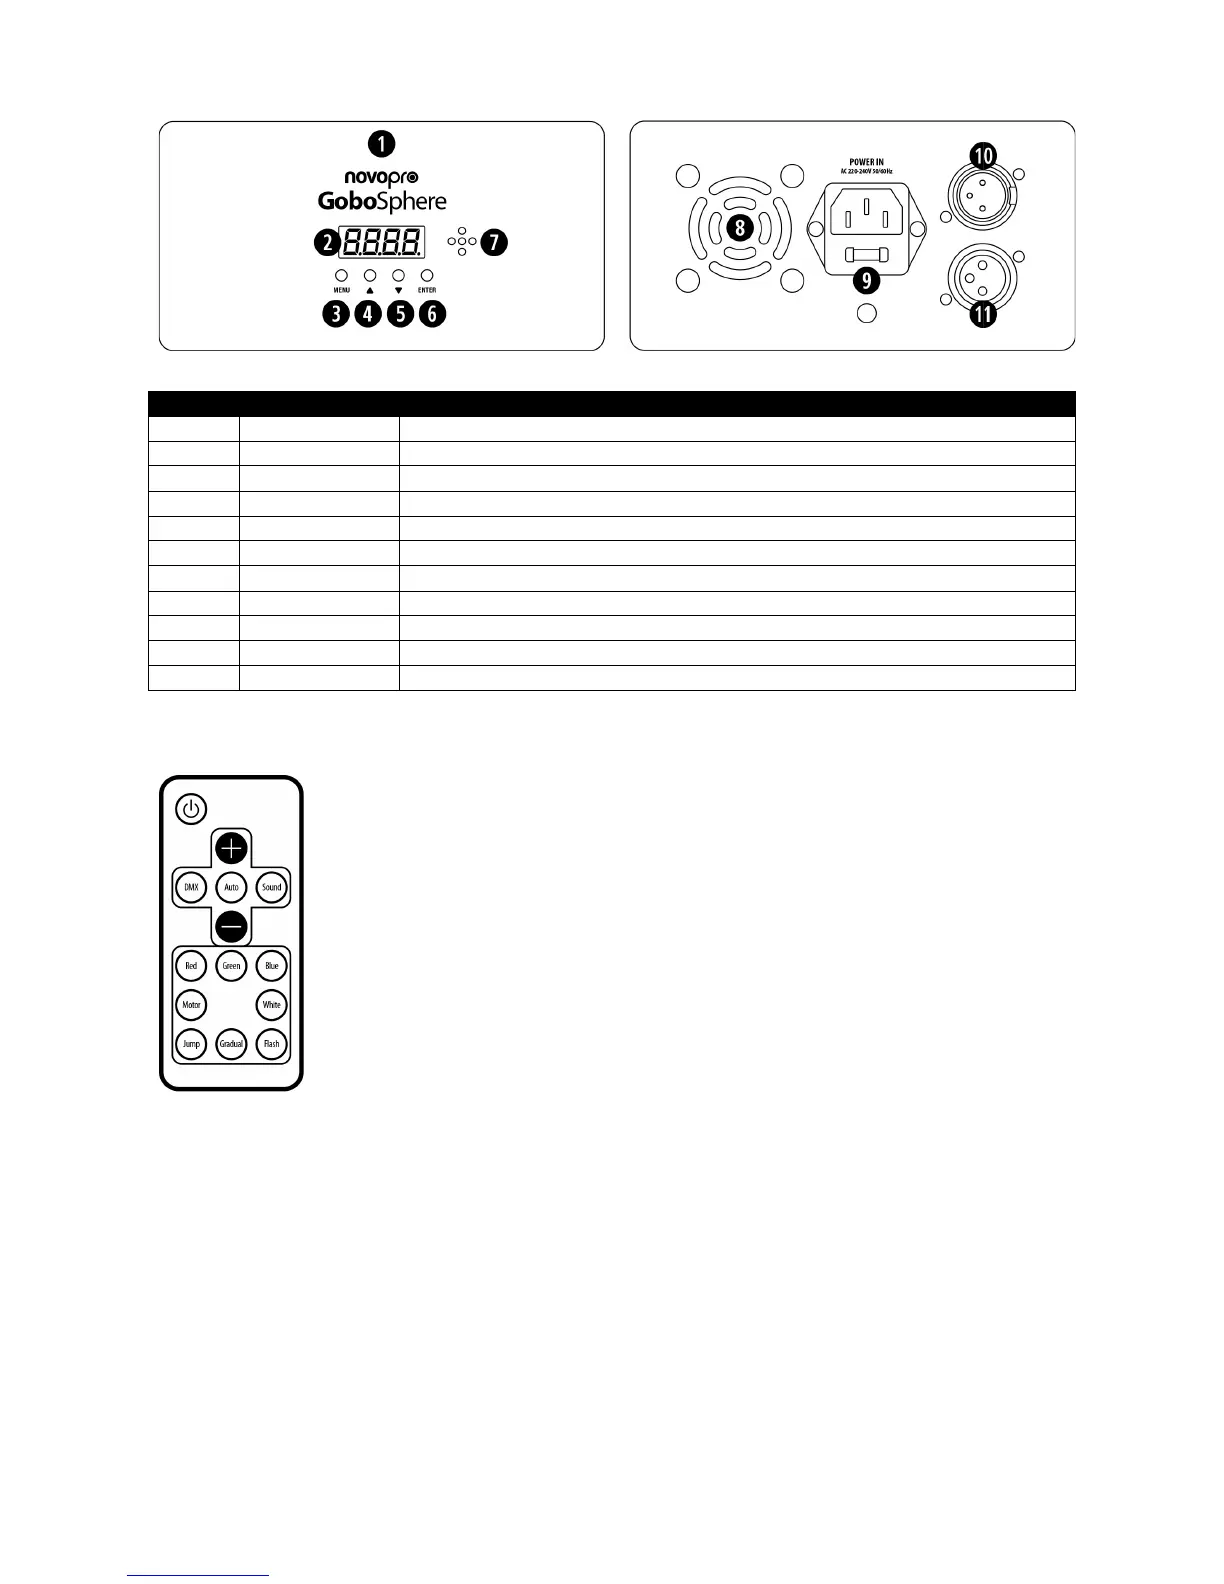
- button – move down one level or increase the effect or colour.
DMX mode button.
Auto mode button.
Sound mode button.
Red button – press to select red. Use the + and – buttons to increase or decrease the brightness level.
Green button – press to select green. Use the + and – buttons to increase or decrease the brightness level.
Blue button – press to select blue. Use the + and – buttons to increase or decrease the brightness level.
White button – press to select white. Use the + and – buttons to increase or decrease the brightness level.
Motor button – press to select motor speed. Use the + and – buttons to change the speed.
Jump button – press to select jump colour changes. Use the + and – buttons to change the speed.
Gradual button – press to select gradual colour changes. Use the + and – buttons to change the speed.
Flash button – press to select flashing effects. Use the + and – buttons to change the speed.
Troubleshooting the remote control
The remote control comes supplied with a CR2025 battery. To ensure that the battery isn’t discharged during transport, the
factory inserts a small piece of transparent plastic between the battery and the contacts. This small plastic sheet must be
removed before the remote control will operate. When changing the battery, note the polarity of the battery being removed, the
new battery must be facing the same way up as the old battery. With the remote face down (buttons facing the floor) the plus
("+") side of the battery should be facing upwards (i.e. towards the ceiling). If the remote control doesn’t appear to work, first
check that the unit is set to respond to the remote by following the instructions at the top of this section. If the remote still
doesn’t work, replace the battery with a new CR2025 battery. Always ensure that there is an uninterrupted line of site between
the remote and the unit’s IR remote control sensor (on the side of the unit).
 Loading...