7
ASSEMBLY INSTRUCTIONS
9) Insert the top piece of the canopy frame bars
(F) into the "U" bracket on the canopy frame
center piece (C). Line up the holes and insert an
M4 x 20 L bolt (AA). Fasten with an M4 nut (FF)
using an M4 hex wrench and Phillips head
screwdriver to tighten the M4 x 20 L bolts (AA).
Do not overtighten! See Figure 9.
Figure 9
FF
AA
C
F
Hardware Used
Part Description Quantity Picture
AA
M4 x 20 L bolt 4
FF
M4 nut 4
10) Place the wind vent canopy (H) over the top of
the canopy frame bar (F). Slip the poles into
each corner pocket of the wind vent canopy (H),
completely covering the canopy bars. See
Figure 10.
Figure 10
H
H
F
F
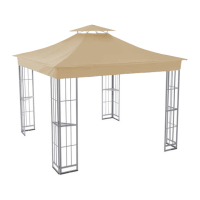
11) Place the fully assembled canopy on the top of
the assembled panel posts. Line up the holes on
each of the short connect bars (G) with the
holes on the "L" connect brackets (HH).
Insert an M6 x 40 L bolt (CC) and M6 metal
washer (EE), through the "L" connect bracket
(HH), and the short connect bars (G), and then
add one more M6 metal washer (EE). Fasten
with an M6 nut (GG) using the provided
wrenches to tighten the M6 x 40 L bolts (CC).
IMPORTANT! Do not tighten c
ompletely!
Repeat this procedure for the three remaining
corners.
Use the provided wrenches to securely tighten all
of the M6 x 40 L bolts (CC). Do not
overtighten!
Place an M6 nut cap (KK) over each M6 nut
(GG). Place an M6 bolt cap (LL) over each M6
x 40 L bolt (CC). See Figure 11.
Figure 11
G
IKK
GG
G
EE
EE
I
CC
LL
HH
Hardware Used
Part Description Quantity Picture
CC
M6 x 40 L bolt 4
EE
M6 metal washer 8
GG
M6 nut 4
LL
M6 bolt cap 4
KK
M6 nut cap 4
 Loading...