11
Adding Content to the Hard Drive
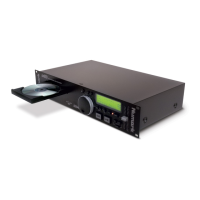
In addition to being a full featured CD player, the HDX also has a removable 80 gigabyte hard drive for storage
and playback of thousands of audio files.
There are four ways to add songs to your hard drive:
1. Connect the unit to your computer via USB to use the high speed USB 2.0 connection to transfer
songs. This is the fastest method.
2. Insert an audio CD or CDR and rip the files to the hard drive. If the CD is a store-bought,
prerecorded audio CD, then there is a good chance it will be recognized by the onboard Gracenote
®
Music Recognition database, allowing the artist and song information to be loaded automatically.
The music files will be compressed in the background allowing you to continue to use the unit
normally.
3. Insert a data CD with MP3 or WMA files and rip the files to the hard drive.
4. Record using the LINE IN connectors on the underside of the unit.
Music recognition technology and related data are provided by Gracenote. Gracenote is the industry
standard in music recognition technology and related content delivery. For more information visit
www.gracenote.com.
1. USB 2.0 File Transfer
To connect your HDX to a computer, first power off the HDX, then connect a USB cable from the HDX to
your computer, then power the HDX on.
When connected via USB to a computer, your HDX will behave as a Mass Storage Class device, which
means it will appear as a normal hard drive to your computer and can be found either in the “My
Computer” window (on Microsoft Windows operating systems) or on the desktop (on the Apple Macintosh
operating system).
To transfer songs to the HDX, simply open the HDX drive icon and drag your audio files from your
computer to the HDX and drop them in the “Audio” folder. You can also perform the normal file
management functions (renaming, deleting etc.) right from this window.
Note: Do not unplug the USB cable while transferring files or the file system directory on the
HDX could be damaged.
2. Copying An Audio CD From The Internal CD Drive
If you want to rip a CD to store on the hard drive for playback after the CD has been removed, press the
MENU button and choose “Rip/Rec Options” then select “Rip CD” to display the current compression
settings. To begin recording the CD, press the track select knob, or press the DSPLY/BACK button to
back out of the menu.
Note: You can change the compression settings by going to MENU > Rip/Rec Options >
Encoding Options.
Once the recording process has begun, you can continue to play other tracks from the CD or hard drive
while the CD is being ripped. If you play a CD while it is being ripped, the time to rip the CD will increase
dramatically. When ripping is complete the CD will be ejected.
Note: At any time during the ripping process you can check the rip status by pressing MENU,
selecting UTILITY, then STATUS.
ALWAYS USE THE POWER SWITCH ON THE HDX TO TURN THE UNIT OFF!
Never turn off the HDX by unplugging it or by using an external power switch (such as on a
power strip). If power is interrupted while it is performing a write operation to the hard disk,
the hard disk’s file system directory could become corrupted, making it unplayable. Using the
HDX’s power switch will allow it to power down gracefully so this does not happen.
NEVER INSERT OR REMOVE THE HARD DISK WHILE THE UNIT IS ON!
This could result in corrupted data on the drive or damage to the drive. Always power down
the unit before inserting or removing the hard drive caddy.
 Loading...