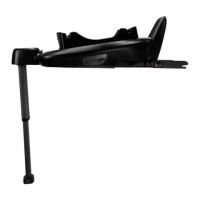
5 After placing the base on the vehicle seat, extend
the load leg to oor (6). When the load leg indicator
shows green means it is installed correctly, red
means it is installed incorrectly. (6)-2
The load leg has 19 positions. When the load leg
indicator shows red this means the load leg is in
the wrong position.
Make sure the load leg is in full contact with the
vehicle oor pan.
To shorten the load leg, squeeze the load leg
release button and pull the load leg upwards. (6)-1
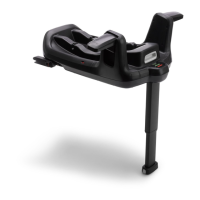
The completely assembled base is shown as (7).
The ISOFIX connectors must be attached and
locked onto the ISOFIX anchor points. (7)-1
The load leg must be installed correctly with green
indicator. (7)-2
6 To remove the base, press the secondary lock
button (8)-1 rst and then the button (8)-2 on the
latch connectors before removing the base from
the vehicle seat.
7 Press the ISOFIX adjust button to fold the ISOFIX.
The information contained herein is subject to change without notice.
Bugaboo International BV shall not be liable for technical errors or
omissions contained herein. The purchased product may differ from the
product as described in this user guide. Our most rnt user guides can
be requested at our service departments or at www.bugaboo.com.
© 2019 Bugaboo International BV. BUGABOO, BUGABOO CAMELEON,
BUGABOO BEE, BUGABOO DONKEY, BUGABOO FOX, BUGABOO TURTLE,
BUGABOO ANT, BUGABOO LYNX, BUGABOO STARDUST and the Bugaboo
logos are registered trademarks. The Bugaboo
®
strollers are patented and
design protected.
© NUNA International B.V. Nuna and all associated logos are trademarks.
8 9
BGB Nuna Turtle Air Wingbase UG A6 Part1.indb 8-9BGB Nuna Turtle Air Wingbase UG A6 Part1.indb 8-9 14-07-2020 17:1314-07-2020 17:13