109
CARI next instruction CARI next instruction
EN
EN
Product Use
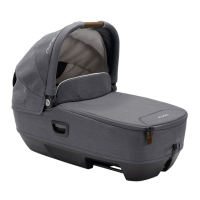
Canopy
1 - Pull up the canopy as illustrated while pressing the buttons on both
sides. (1)
2 - Check to make sure the handle is secure before placing the child in the
carry cot. (2)-1
Make sure that the handle is in the correct position of use before carrying
or lifting.
3 - To use the dream drape™, secure it to the two sides of carry cot with
magnets. (3)
4 - The canopy window can be opened for ventilation. (4)
Carry Cot Attachment on Stroller Frame
1 - To attach the post adapters, place the post adapters on the seat mounts.
A “click” sound means the post adapters are attached. (5)(6)
2 - Place the carry cot directly down until it latches into place. The carry cot
is securely attached with a positive “click”. (7)
Please check that the mesh at the bottom of the carrycot is properly fixed
before installing carry cot. (7)-1
Always remove the stroller seat before using the carry cot.
Do not fold the stroller when the carry cot is still attached.
3 - The carry cot can be installed rear facing on the post adapters. (8)
4 - The carry cot can be used with NUNA TRIV or DEMI grow or MIXX next
strollers.
5 - To remove the carry cot, squeeze the carry cot release buttons on both
side of the carry cot and lift up. (9)
Securing Child
1 - Open the carry cot cover. (10)
2 - Please remove infant insert. (11)
3 - Press the harness adjustment button while pulling the both shoulder
harnesses of the carry cot to the desired length. (12)(13)
4 - Unlock the buckle by pressing the red button. (14)
5 - Place child into the carry cot and engage the buckle. (15)(16)
6 - Tighten the shoulder harness straps by pulling the adjustment webbing.
(17)
Make sure the space between the child and the shoulder harness straps
is about the thickness of one hand.
7 - Attach the cover to the carry cot with the zippers on either sides. (18)
Carry Cot
1 - Unlock the buckle by pressing the red button. (19)
2 - Please remove shoulder harness covers, crotch harness cover and infant
insert. (20)(21)
3 - Put the shoulder harness and crotch harness through the mattress and
into the storage box. (22)
4 - Please do not use the restraint system when using the carry cot by itself.
(23)(24)(25)
5 - Please make sure to use the carry cot cover when using CARI next as
carry cot
Detach & Assemble Soft Goods
Follow steps (26) - (39) to detach soft goods.
To re-attach the soft goods please repeat the above steps in the reverse step.


 To Next Page
 Loading...