Page 4
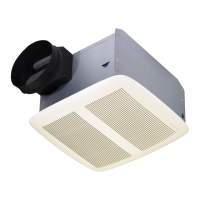
MODEL QTNLEDB
SERVICE PARTS
99045485B
KEY NO. PART NO. DESCRIPTION
1 SQTHB1 HANGER BAR KIT
2 475 DUCT REDUCER 6” TO 4”
3 97018562 DUCT CONNECTOR - 6”
4 99111293 SPACER (2 REQ’D)
5 97016466 HOUSING
6 98010102 WIRING PLATE
7 99170245 SCREW, #8-18 X .375
8 97018552 WIRE PANEL/HARNESS ASSEMBLY
9 97020045 CONTROL ASSEMBLY
10 97020046 SERVICE ASSEMBLY, BLOWER
(INCLUDES KEY NO. 11)
11 99420665 THUMBSCREW, #8-18 X .375
12 99140199 GRILLE SPRING (2 REQ’D)
13 97018561 GRILLE ASSEMBLY
14 99271381 BULB, GU24, 18W FLUORESCENT (2 REQ’D)
15 99111532 RING
16 99111529 LENS
* Not shown assembled.
Order service parts by “Part No.” - not by “Key No.”
INSTALL GRILLE
5. Finish ceiling.
Install ceiling material. Cut out around housing.
7. Attach grille to
housing.
Squeeze grille springs
and insert them into tabs
on each side of housing.
9. Remove light
lens.
Carefully insert a small
flat-blade screwdriver
between grille and lens.
Pry lens out.
8. Push grille
against ceiling.
SERVICE NOTE
To remove Blower
Assembly: Unplug motor.
Remove thumbscrew (11)
from motor plate flange.
Find the single TAB on the
motor plate (located next
to the receptacle). Push
up near motor plate tab
while pushing out on side
of housing. Or insert a
straight-blade screwdriver
into slot in housing (next to
tab) and twist screwdriver.
10. Install light bulbs.
Purchase (2) 18W (max.),
type GU24 fluorescent
lamps with M.O.L.
(maximum overall length)
of 3.9” (100mm) as
illustrated below.
Insert lamps and bulb into
their sockets. Replace lens.
3.9" (100mm) M.O.L.
6. Plug in wiring.
Plug wiring into proper receptacles.
DIAGONAL LED PLATE OPTION
To rotate LED plate to
diagonal position:
1. Remove grille from ceiling and
unplug wiring from housing.
2. Remove lens.
3. Remove three (3) screws from
retention ring.
4. Remove LED plate and rotate
plate clockwise to diagonal
position.
5. Re-assemble grille assembly
and re-install to fan housing.
LENS
SCREWS
RETENTION
RING
LED
PLATE
GRILLE
Discover other home shop on our website.