QUICK START GUIDE
Getting Started
1. Always remove hopper
extension ring from our
bowl before milling.
2. FIRST TIME USE: Mill at least
2 cups of wheat or other hard
grain, then discard the our
and clean the bowl. This will
eliminate any contaminates
the mill may have obtained in
the manufacturing process.
3. Attach separator cup. After
milling, empty the separator
cup each time.
4. Insert air lter on top of bowl
lid. Make sure the lter is thor-
oughly dry before using.
5. Twist bowl lid counterclockwise
onto top of our bowl.
6. Lock on hopper extension
ring, found packed in the our
bowl. To attach: with mill facing you, insert tab at the front right then move clockwise
and insert the next two tabs.
7. Fill with grain and replace hopper lid.
8. Plug in machine and turn on by turning lower knob to the right. Always start the mill
on high speed for the top knob.
9. Let run. When milling is done, let mill run for 5 seconds.
We are excited you joined the Family. These simple tips will help you
use, care for, and maintain your new NutriMill Classic for many years to come!
Welcome to the Family!
How to Clean Your Mill
1. Remove bowl and tap lid a few times
to help settle the our in the bowl
and release our from the bottom of
the lid. Twist lid to release.
2. Unplug the mill and wipe or brush
away any our residue from the mill.
3. Hand-wash the plastic bowl and lid.
DO NOT put them in the dishwasher.
High-heat dishwashers can warp the
plastics.
4. Relubricate the bowl lid gasket after
washing.
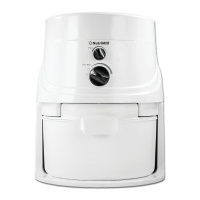
Hopper Lid
Hopper
Extension Ring
(stored in our bowl)
Grain Inlet Cover
Hopper
Circuit Reset Button (Red)
Separator Cup
Flour Bowl (Canister)
Air Filter*
Base
Milling Module Unit
Variable Motor Speed
Control Knob
Variable Texture
Control Knob
Bowl Lid
Rubber Gasket
Inlet Grommet*