Do you have a question about the NUVOO NVO-SF40BK and is the answer not in the manual?
Covers electrical safety, proper usage, placement, cord management, child safety, and maintenance.
Detailed steps for assembling the fan base, pole, motor assembly, and grills.
Instructions for setting up, plugging in, and using the fan's speed control.
Guide on inserting batteries and using the remote control functions.
Procedures for cleaning the fan blade, grills, and motor housing safely.
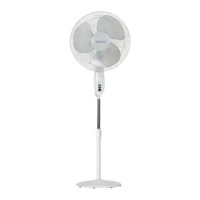
Diagram and list identifying all components of the stand fan.
This document describes a 16-inch (40cm) stand fan, model NVO-SF40BK, designed for residential use. It provides essential instructions for assembly, operation, cleaning, and safety.
The fan's primary function is to provide air circulation for cooling purposes. It features multiple speed settings and a timer function, allowing users to customize its operation according to their preferences. The fan is designed to oscillate, distributing air across a wider area, or it can be set to a stationary position. It is controlled via a control panel on the motor assembly and also comes with a remote control unit for convenient operation from a distance.
Assembly: The fan requires assembly before use. The process begins by placing the base on a flat surface. The locking mechanism is removed from the pole, and the pole is inserted onto the base. The base is then turned over, and the locking mechanism is secured by turning it clockwise until it is fully fastened. Next, the motor assembly and control panel are placed onto the extension pole and secured by turning the assembly knob clockwise.
The rear grill assembly follows: the rear grill mounting nut is removed by turning it counter-clockwise. The rear grill is then placed onto the motor housing, aligning its three raised knobs with the three holes on the grill. The rear grill mounting nut is replaced and tightened clockwise. The blade is aligned onto the shaft and secured by tightening the blade knob counter-clockwise. Finally, the front grill and rear grill are fixed together with the circlip, and the ring around the grill is fastened until a click sound is heard. The fasten clip is then used to tighten the fan grill, and a screw is used to further secure it with a screwdriver.
Operation: To operate the fan, it should be placed on a level surface, ensuring the speed control is in the OFF position. The power cord is then plugged into a socket.
Remote Control: The fan includes a remote control for added convenience. To use the remote, the battery compartment cover is pressed down and slid out. Two AAA batteries (not included) are inserted, ensuring the positive terminals are facing the correct way. The cover is then replaced. The remote control unit allows users to switch the fan on/off, adjust speed, and set the timer from a distance.
Safety Instructions: The manual emphasizes several safety precautions:
Cleaning: Regular cleaning is essential to maintain the fan's performance and longevity.
Removal of Front Grill for Cleaning: For thorough cleaning of the fan blade and grills:
These instructions ensure safe and effective use, as well as proper maintenance of the stand fan.
| power | 50W |
|---|---|
| voltage | 220-240V |
| frequency | 50-60Hz |
| speeds | 3 |
|---|---|
| blades | 5 |
| timer | 1 hour up to 12 hours |