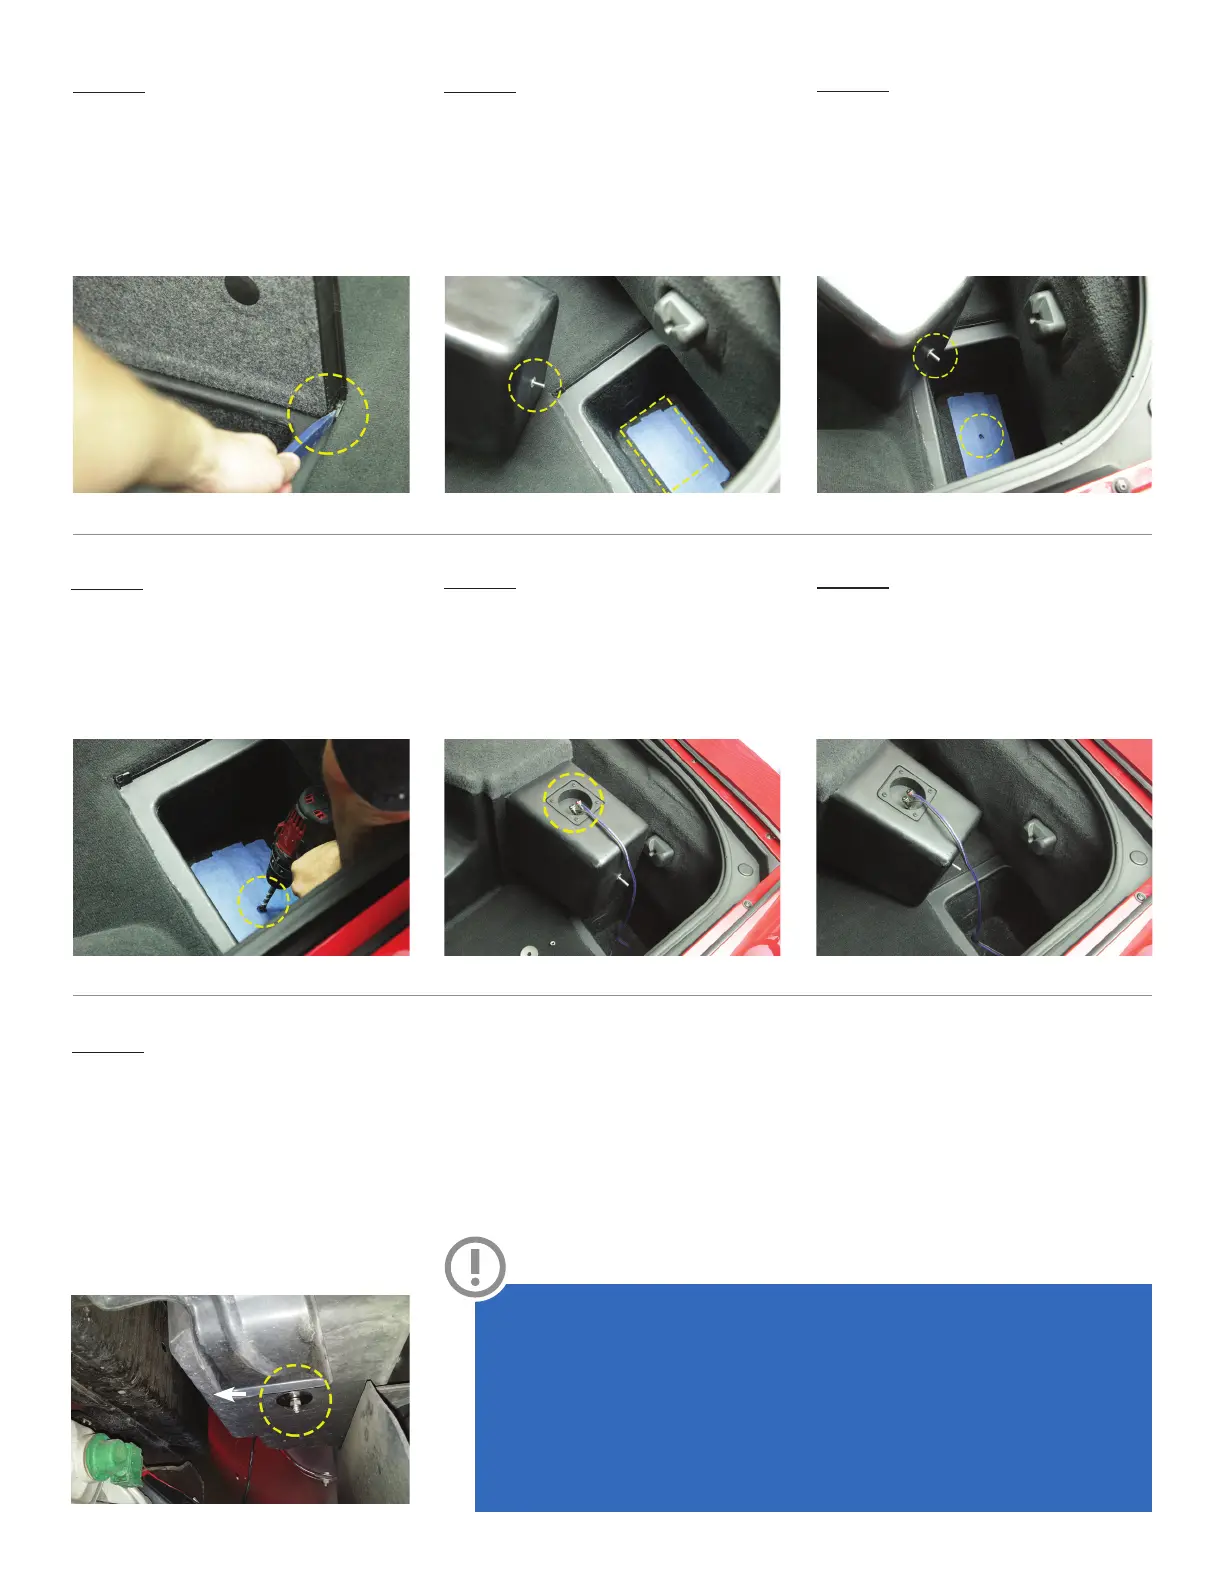
Step 1
A) Remove all the contents in the driveside
storage compartment.
B) Using a nylon pry tool, carefully pry the
compartment door off the hinges.
Take note: these hinges are plastic and
can break with too much force.
Step 2
A) Place the supplied threaded rod into the
bottom of the B.O.O.S.T Box, leaving
about a ½” exposed. The exposed
threaded rod will be used to mark the
location to drill for the mounting point.
B) Using masking tape, tape the bottom of the
compartment. (illustrated in picture below)
Step 3
A) Place the B.O.O.S.T box into the vehicle,
pressing down firmly. This will make an
impression in the masking tape. (remove
B.O.O.S.T box)
B) After removing if there is no impression
made on the masking tape, back out the
threaded rod and repeat step 3.
Step 4
Now with the impression made use a 1/2”
drill bit to drill a hole in the floor. Before
drilling be sure to check for any fuel lines,
brake lines, wire harnesses, or anything that
could be damaged.
Step 5
Run wire from the amplifier location to the
location of the B.O.O.S.T box and connect
it to the terminal.
Step 6
Back out threaded rod to expose about 2”.
Place B.O.O.S.T box back in the vehicle
and guide the threaded rod into the hole
drilled in Step 4.
Step 7
A) With the B.O.O.S.T box in place and the
threaded rod visible from the bottom side
of the car, place the supplied fender wash,
lock washer and nut onto the threaded rod.
B) Tighten the assembly but be sure to not
over tighten. This may result in damage to
the B.O.O.S.T box.
Congratulations
on the newly found bass using the NVX B.O.O.S.T enclosure
DIFFICULTY LEVEL: 4 out of 10 being the most difcult.
We recommend the installation of the NVX BE-GM-VETC6-NSW10-4V2
to be performed by a professional that will have the skills and tools to
ensure the job is done correctly. Please follow the steps above to get the
best performance out of the NVX BE-GM-VETC6-NSW10-4V2. Installing
and mounting NVX BE-GM-VETC6-NSW10-4V2 improperly can present
a serious safety hazard in the event of a collision. If you have any
questions regarding installation of this product please feel free to contact
NVX directly for further guidance and installation techniques.
 Loading...