DIY INSTRUCTIONS
This document gives detailed instructions that assume you have purchased a complete Turing
Machine kit from www.thonk.co.uk after April 2016, it also assumes no previous knowledge of
electronics.
To learn to solder try https://www.youtube.com/watch?v=IpkkfK937mU and the Adafruit guide to
excellent soldering – http://bit.ly/1l77tF4
Watch and understand that whole YouTube video! If you’re not achieving the results shown in the
video then you need to buy new tools or seek advice. You will not end up with a working unit
otherwise.
TOOLS REQUIRED
Soldering iron, snipe nose pliers, wire strippers, small flat head screwdriver and diagonal cutters AKA
snips AKA side-cutters. A Digital Multimeter is always helpful for checking for bad solder joints and
continuity. Thonk sell a range of inexpensive tools here - http://bit.ly/1jxqF3n
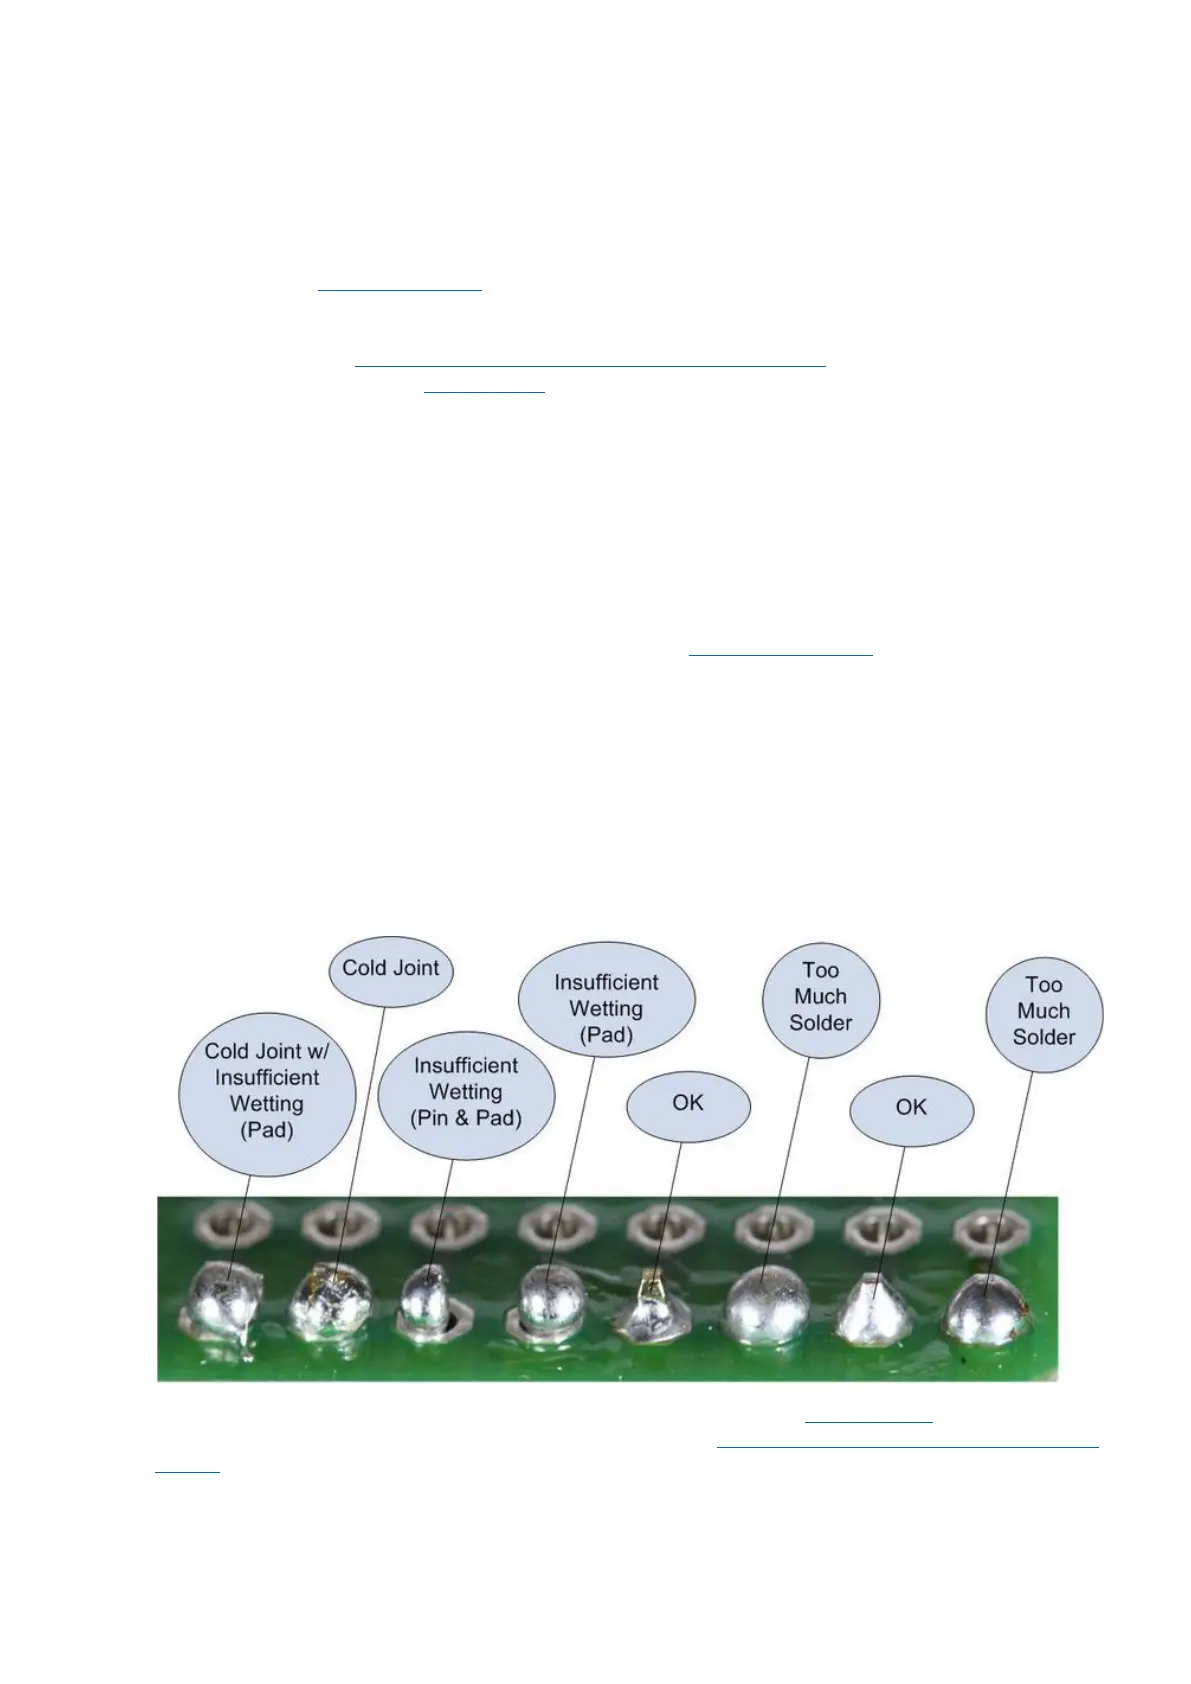
SOLDER JOINTS
Your solder joints should look like those shown as ‘OK’ below, they should have that neat conical shape
on BOTH sides of the PCB. If they don’t look the same on both sides then stop! Work out why from the
soldering guides linked and don’t continue until you are getting those results.
This isn’t about perfectionism, you are very likely to end up with a destroyed, damaged or defective
unit if you’re not hitting that standard.
This photo is from the Adafruit guide to excellent soldering - http://bit.ly/1l77tF4 and is reproduced
under an Attribution-Sharealike creative commons license - http://creativecommons.org/licenses/by-
sa/3.0/
 Loading...