Do you have a question about the Oase PONDOVAC 2 and is the answer not in the manual?
Details on connecting the device safely to the power supply, including qualified electricians and RCDs.
Loosen container release and remove motor casing. Remove all parts from the collection tank.
Replace and lock the motor casing; it can only be locked in one position.
Insert hose end piece into tank opening and lock by turning lightly to the right.
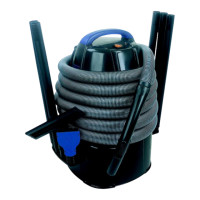
Insert the suction hose onto the hose end piece.
Attach extension tubes, insert backflow flap (optional) and floor nozzle.
Insert the discharge hose's open end into the rear discharge opening of the collection tank.
Switch off the device using the main switch and unplug the power plug.
Remove all hoses and the motor housing.
Rinse the collection tank until all residues are removed.
Dismantle and wash the foam filter and sludge collection bag with clear water.
Always check the float for ease of movement.
Check discharge hose mounting and water level difference for suction issues.
Inspect suction hose and flap area for lodged sludge causing loss of power.
Ensure no kinks in discharge hose, check for dirt in tank/hose, and slight incline.
Verify the float is not obstructed and can move freely.
Minimize tube friction by keeping lines flat and removing the backflow flap.
| Max Suction Depth | 2.4 m |
|---|---|
| Max Flow Rate | 4000 l/h |
| Hose Length | 3 m |
| Intended Use | Pond Cleaning |
| Power Source | Electric |
| Suction Hose Length | 3 m |
| Cable Length | 10 m |
| Type | Pond Vacuum |