4
Operating Instructions and Parts Manual 24936
11/18
2018 OEMTOOLS
™
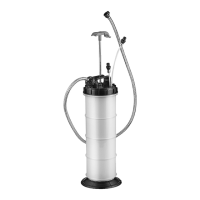
MANUAL FLUID EVACUATOR
2 GALLON (8 L)
3. Insert the appropriate diameter Suction Hose Adapter into the
master cylinder reservoir.
NOTE: DO NOT bend the Suction Hose Adapter while inserting the
hose adapter into the reservoir.
4. Connect the Main Suction Hose to the inserted Suction Hose Adapter.
NOTE: Ensure that the hose connections are tight to prevent leakage
during the extraction process.
5. Press the Main Suction Hose into the Reservoir Cap as described in
the assembly instructions.
NOTE: Ensure that the Vacuum Release Plug is fully inserted in the
lower receiving hole prior to operation. If the Vacuum Release Plug is
not inserted, a vacuum will not be created.
6. Pump the Evacuator Handle several times to create a vacuum. The
brake fluid will flow through the Suction Hose Assembly into the
Reservoir until it has all been extracted OR until maximum reservoir
capacity has been reached.
7. Disconnect the Main Suction Hose from the Suction Hose Adapter.
8. Disconnect the Main Suction Hose from the Reservoir Cap. Pour the
used brake fluid from the Reservoir into a suitable container. Dispose
of used coolant in accordance with federal, state and local regulations.
EXTRACTING POWER STEERING FLUID FROM
THE POWER STEERING FLUID RESERVOIR
1. See “Preparing for Operation” instructions above.
2. Clean the exterior of the power steering fluid reservoir and
reservoir cap to prevent dirt and debris from entering the master
cylinder when the cap is removed.
3. Insert the appropriate diameter Suction Hose Adapter into the
master cylinder reservoir.
NOTE: DO NOT bend the Suction Hose Adapter while inserting the
Hose Adapter into the reservoir.
4. Connect the Main Suction Hose to the inserted Suction Hose Adapter.
NOTE: Ensure that the hose connections are tight to prevent leakage
during the extraction process.
5. Press the Main Suction Hose into the Reservoir Cap as described in
the assembly instructions.
NOTE: Ensure that the Vacuum Release Plug is fully inserted in the
lower receiving hole prior to operation. If the Vacuum Release Plug is
not inserted, a vacuum will not be created.
6. Pump the Evacuator Handle several times to create a vacuum. The
power steering fluid will flow through the Suction Hose Assembly
into the Reservoir until it has all been extracted OR until maximum
reservoir capacity has been reached.
7. Disconnect the Main Suction Hose from Suction Hose Adapter.
8. Disconnect the Main Suction Hose from the Reservoir Cap. Pour
the used power steering fluid from the Reservoir into a suitable
container. Dispose of used coolant in accordance with federal, state
and local regulations.
PARTS LIST
MAINTENANCE
1. Always store the Manual Fluid Evacuator in a well-protected
area where it will not be exposed to inclement weather, corrosive
vapors, abrasive dust, or any other harmful elements.
2. Keep the Manual Fluid Evacuator clean for better and safer
performance.
3. Inspect Reservoir, Hoses, Caps, Gaskets, Seals, Gauge and Adapters
periodically and, if damaged, replace them.
4. Rinse the evacuator reservoir, pump, adapter, and tubes with clean
solvent or engine degreaser, and allow them to dry thoroughly.
OEMTOOLS
TM
ONE YEAR WARRANTY
For up to one year from the date of purchase of this OEMTOOLS™ product, if you find any defect in material or workmanship (through normal usage), return it to the place of
purchase or to OEMTOOLS™ for repair or replacement at our discretion. In order to obtain this service, send the product and proof of purchase (transportation pre-paid) to:
OEMTOOLS™ Q.A. Dept, 3580 E. Raines Road #3, Memphis, TN 38118.
We will not be responsible for lost or damaged goods during transportation; please insure your package. If our inspection verifies the defect, we will either repair or replace the
product, or we may elect to refund the purchase price if we cannot readily and quickly provide you with a replacement. We will return repaired products at our expense, but if
we determine there is no defect, or that the defect resulted from causes not within the scope of our warranty, then you must bear the cost of returning the product.
OEMTOOLS™ does not provide warranty for products labeled other than OEM
®
or OEMTOOLS™. OEMTOOLS™ will not provide any warranty for products subjected to
abnormal use. Abnormal use includes (but is not limited to) abuse, accident, alteration, neglect, and unauthorized or unreasonable use or repairs. This warranty does not cover
bits, blades, files, batteries, or calibration. We recommend that you maintain your tools and sharpen or replace blades, bits, files, and batteries as necessary. OEMTOOLS™
reserves the right to make any changes in construction or design at any time without any obligation in incorporating such changes to tools or equipment previously sold.
OEMTOOLS™ makes every effort to ensure that its products meet high quality and durability standards, and warrants to the original purchaser that this product is free from
defects in materials and workmanship for the period of one year from the date of purchase. This warranty does not apply to damage due directly or indirectly to misuse, abuse,
negligence or accidents, repairs or alterations outside our facilities, criminal activity, improper installation, normal wear and tear, or to lack of maintenance.
We shall in no event be liable for death, injuries to persons or property, or for incidental, contingent, special or consequential damages arising from the use of our product.
Some states do not allow the exclusion or limitation of incidental or consequential damages, so the above limitation of exclusion may not apply to you. THIS WARRANTY IS
EXPRESSLY IN LIEU OF ALL OTHER WARRANTIES, EXPRESS OR IMPLIED, INCLUDING THE WARRANTIES OF MERCHANTABILITY AND FITNESS. This warranty gives you specific
legal rights, and you may also have other rights, which vary from state to state.
Don’t forget to register your new OEMTOOLS™ product at www.oem-tools.com.
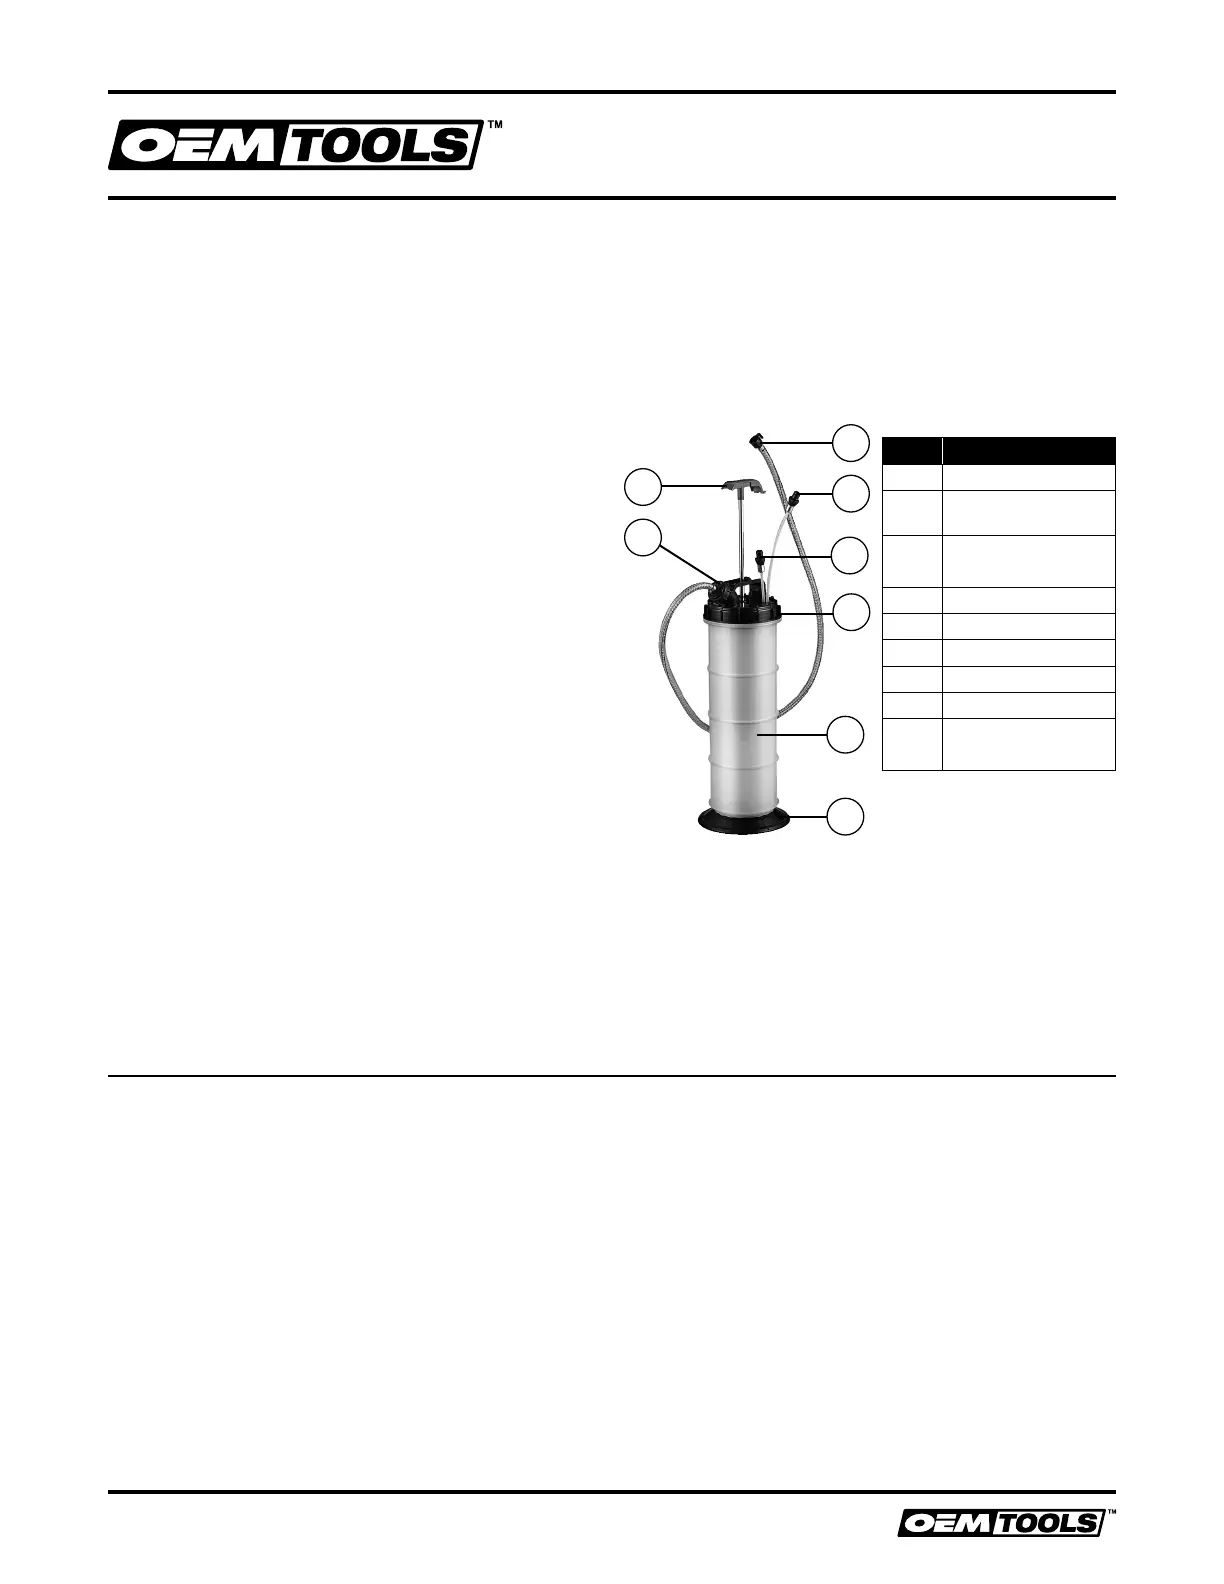
Figure Description
A
Extraction Reservoir
B
Extraction Reservoir
Cap
C
Main Suction Hose
Receiving Hole
D
Main Suction Hose
E
Dipstick Tube Adapter
F
Suction Hose Adapter
G
Manual Pump Handle
H
Base
I
Vacuum Release Plug
(not shown)
A
H
E
D
B
F
C
G
 Loading...