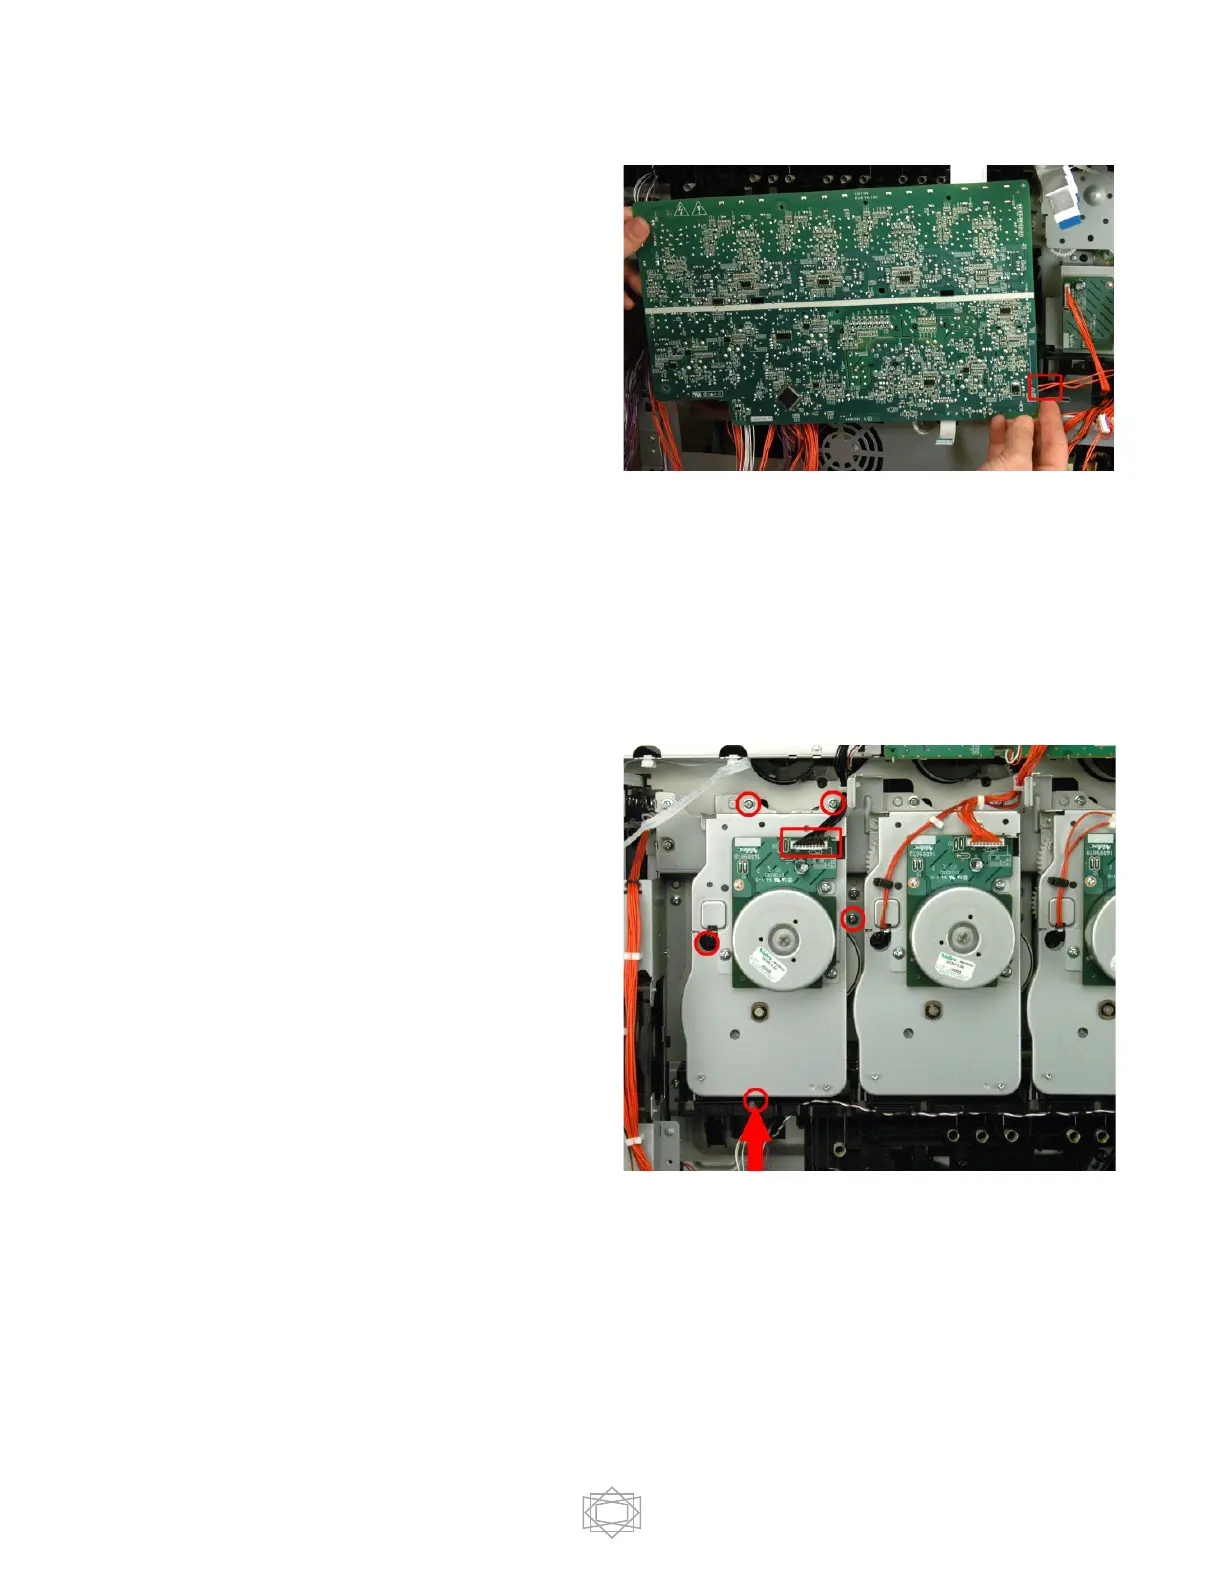
Unplug 2 Red wire cable connector form
the board.
Note there is still a ribbon cable attached
to the board. Unplug this ribbon connector
and remove the HVPS board from the
printer.
On the front of the printer, gently pull the drum door frames into the open position. This will lift
the motors to allow access to the screw securing them to the printer.
Each motor is held in place by 5 screws and has 2 wire harnesses attached – except
black, which only has one 10 pin wire harness connector.
On the left most motor (black) disconnect
the 10 pin connector from the motor
board.
While supporting the drum motor, remove
5 screws that secure the motor to the
frame.
NOTE: DO NOT SPIN THE
FLYWHEELS WHEN THE
ASSEMBLY IS REMOVED FROM
THE PRINTER! IT WILL CAUSE A
DRUM LIFT FAILURE IN ANY OF

 Loading...