2
- close the protection of the board (g. 21 ref. A)
- ret the front cover of the machine with the six screws
- ret the two wedged-in covers (upper and lower).
CAUTION: these operations should be performed with the machine already positioned on the bracket. Read the instructions
carefully before completely the electric connection.
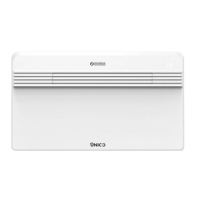
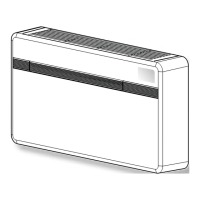
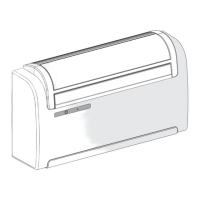
2.1.11 Top/bottom installation conguration
This unit may be installed either at the bottom of the wall (adjacent to the oor) or at the top (adjacent to the ceiling). The air jet
can be modied to optimize air distribution and room well-being by changing the position of the air outlet ap.
Figure 22 refers to a machine congured for installation near the oor in which air ows upwards. The same conguration may also
be used to install the unit near the ceiling with the cooling function. This permits to increase the air ow inside the room (Coanda
effect).
Figure 23 refers to a machine congured for installation near the ceiling in which air ows downwards.
OPERATION TO BE PERFORMED WHEN THE MACHINE IS SWITCHED OFF AND THE POWER SUPPLY IS DISCONNECTED.
CHANGING THE CONFIGURATION OF THE AIR OUTLET FLAP FROM BOTTOM TO TOP OF WALL
- delicately open the air outlet ap
- unhook the ap (side and central hooks on the bafes) (g. 22)
- remove the pin (g. 22 ref. A)
- turn the ap 180° (g. 22)
- insert the pin (g. 23 ref. A) on the right-hand side of the ap
- insert the ap into the machine by inserting the pin (g. 23 ref. B) into the top hole that is on the right-hand side in the opening
(g. 23 ref. C), and the ap’s left-hand hole on the upper pin that is on the left-hand side in the opening (g. 23 ref. D).
CHANGING THE CONFIGURATION OF THE AIR OUTLET FLAP FROM TOP TO BOTTOM OF WALL
- delicately open the air outlet ap
- unhook the ap (side and central hooks on the bafes) (g. 22)
- remove the pin (g. 22 ref. A)
- turn the ap 180° (g. 22)
- insert the pin (g. 23 ref. A) on the right-hand side of the ap
- insert the ap into the machine by inserting the pin (g. 23 ref. B) into the bottom hole that is on the right-hand side in the opening
(g. 23 ref. C), and the ap’s left-hand hole on the lower pin that is on the left-hand side in the opening (g. 23 ref. D).
After having performed the mechanical operations to change the air outlet ap position, it is necessary to congure the control
electronics of the machine by following the instructions listed in the paragraph Operating tests and anomaly diagnosis.
IMPORTANT: FOR CORRECT OPERATING OF THE APPLIANCE, EVERY TIME THAT THE CONFIGURATION OF THE AIR
OUTLET FLAP IS MODIFIED, THERE MUST ALWAYS BE A CORRESPONDING RESPECTIVE ELECTRONIC CONTROL
SETTING.
2.1.12 UNICO MASTER running tests and troubleshooting
The conditioner is able to perform a brief auto-diagnosis cycle to check that the internal components are operating normally and
during which it is possible to perform the conguration of the electronic control based on whether installation of the appliance was
performed to the upper part (to the ceiling) or lower part (to the ground) of the wall.
To activate the self-diagnosis function, proceed as follows:
- power the appliance by connecting it to a socket or by acting on the master switch of the system;
- ensure that the machine is on stand-by (no LED should be lit on the console);
- Press the micro-key positioned underneath the hole to the left side of the console (g. 24 ref. H) with a pointy object for at least
10 seconds. The acoustic signal emitted indicates that the self-diagnosis function has been activated.
At this point the current conguration of the machine will be displayed for a few moments as indicated below:
LED A (red) on: appliance tted with heat pump function;
LED B (green) on: installation to the lower part of the wall (to the ground) (factory installation);
LED C (yellow) on: installation to the upper part of the wall (to the ceiling);
LED D (green) on: reset settings function after an active black-out (factory setting).
Then, all of the LEDs on the console will start ashing simultaneously for 10 seconds. During this phase, through the micro key
(g. 24 ref. H), it is possible to modify the previously displayed setting related to the type of appliance installation.
NB: Conguration of the electronic control for installation to the upper part of the wall determines an automatic correction of the
room temperature detected of 3°C.
At this point the self-diagnostic function activates the appliance in heating mode (if tted with the heat pump function) for approx.2
minutes and then in cooling mode for another 2 minutes.
It is possible to terminate the function prematurely simply by switching the appliance off using the remote control.
2
 Loading...