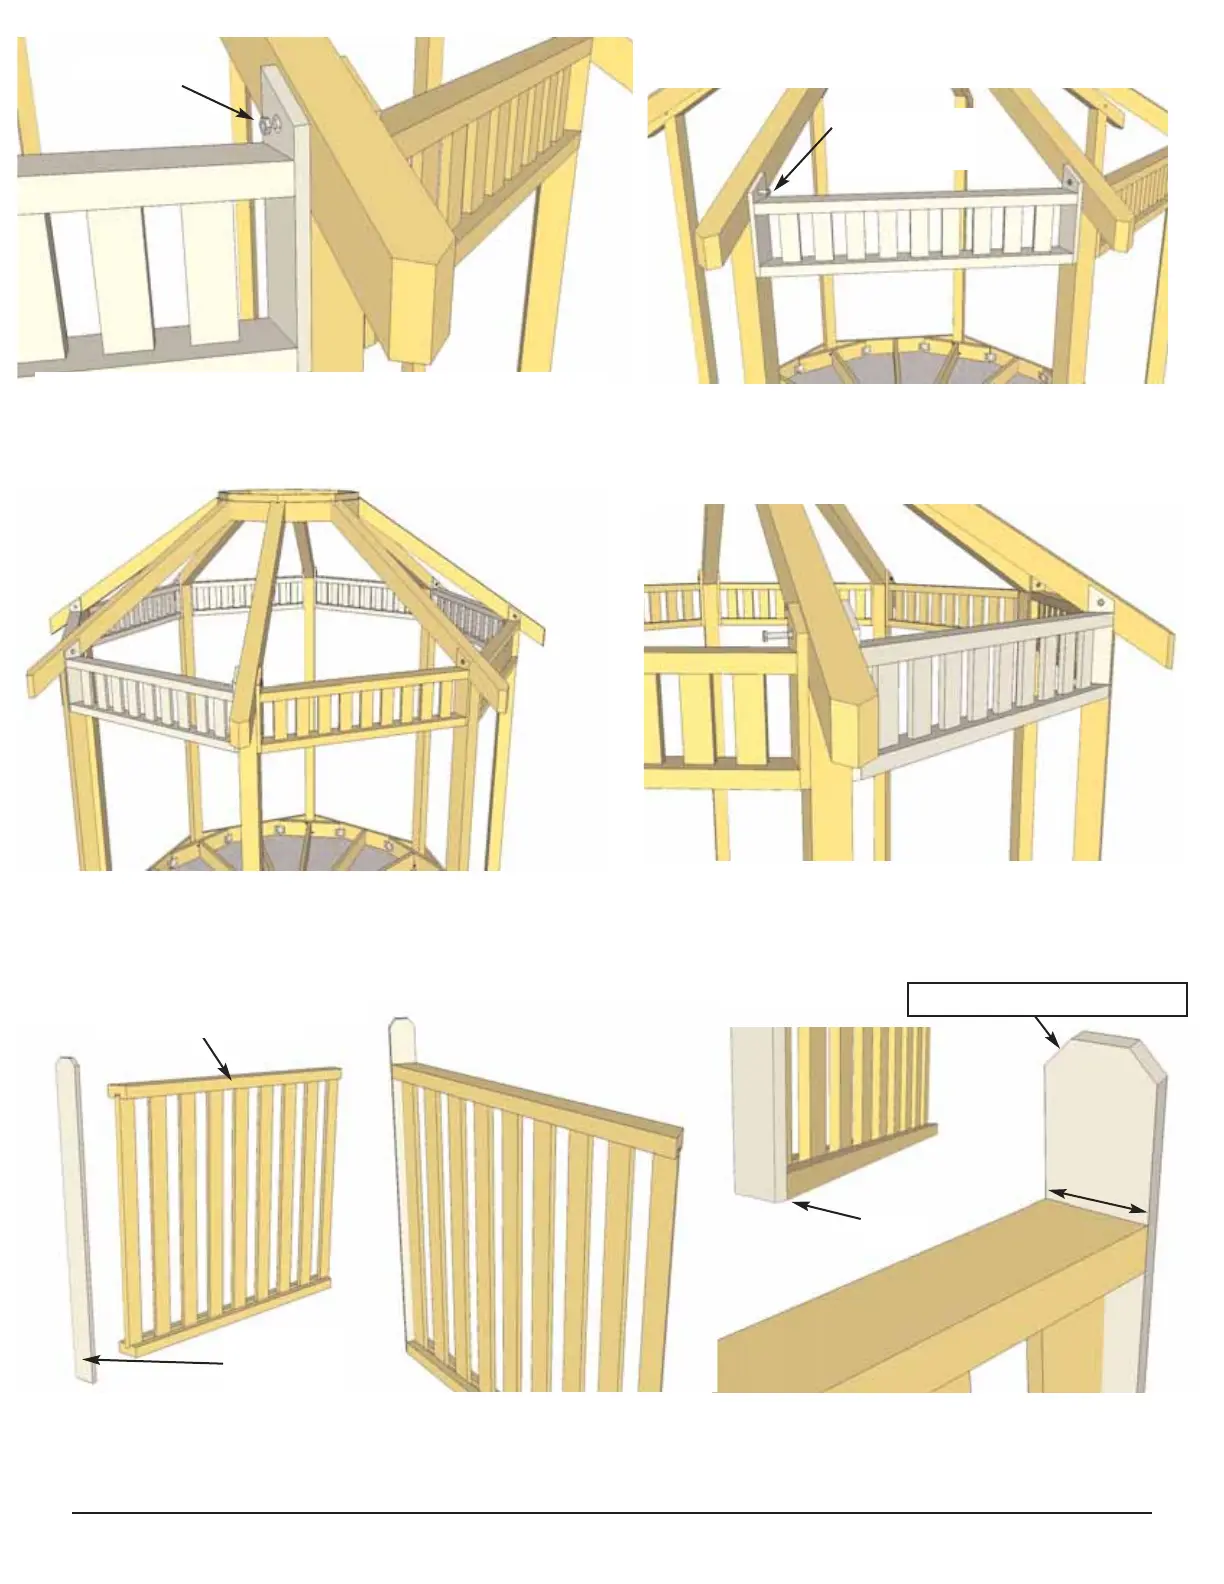
41. To complete Handrail Sections, locate Hand Rails and Hand Rail End Caps. Position End Cap
flush with Bottom Rail. Evenly space End Caps from side to side with both Top and Bottom Rails.
Align rounded corners of End Caps against rail.
Flush
39. Lift up, position and secure all remaining Upper
Rail Sections using Steps 36-38. Important -
Snug Bolts down but don’t over-tighten.
40. On your last Upper Rail Section, use Carriage
Bolt from the first section to secure. Use Wood
Clamps or have assistant push Rail / Rafter together.
37. Lift a second Upper Rail Section into place and
slide carriage bolt through End Cap hole. Place a
flange nut over bolt and snug nut down.
38. Hammer in 3rd Carriage Bolt into left side of
second Upper Rail Section as per Step 36.
Flange Nut.
3rd Carriage
Bolt
Toll Free 1-888-658-1658 www.outdoorlivingtoday.com sales@outdoorlivingtoday.com
Page 16
2nd Upper Rail Section
Hand Rail Section
Hand Rail
End Caps
Rounded edge to inside.