46. With both the Upper Rail and Handrail Sections complete, go back and tighten all the Carriage
Bolts in the “T” Post Mount Plate and Rafter with a Wrench. Be careful not to over tighten bolts.
Complete one side and then the opposite side. This will create an equal tightening of all the
components.
Tighten with
Wrench
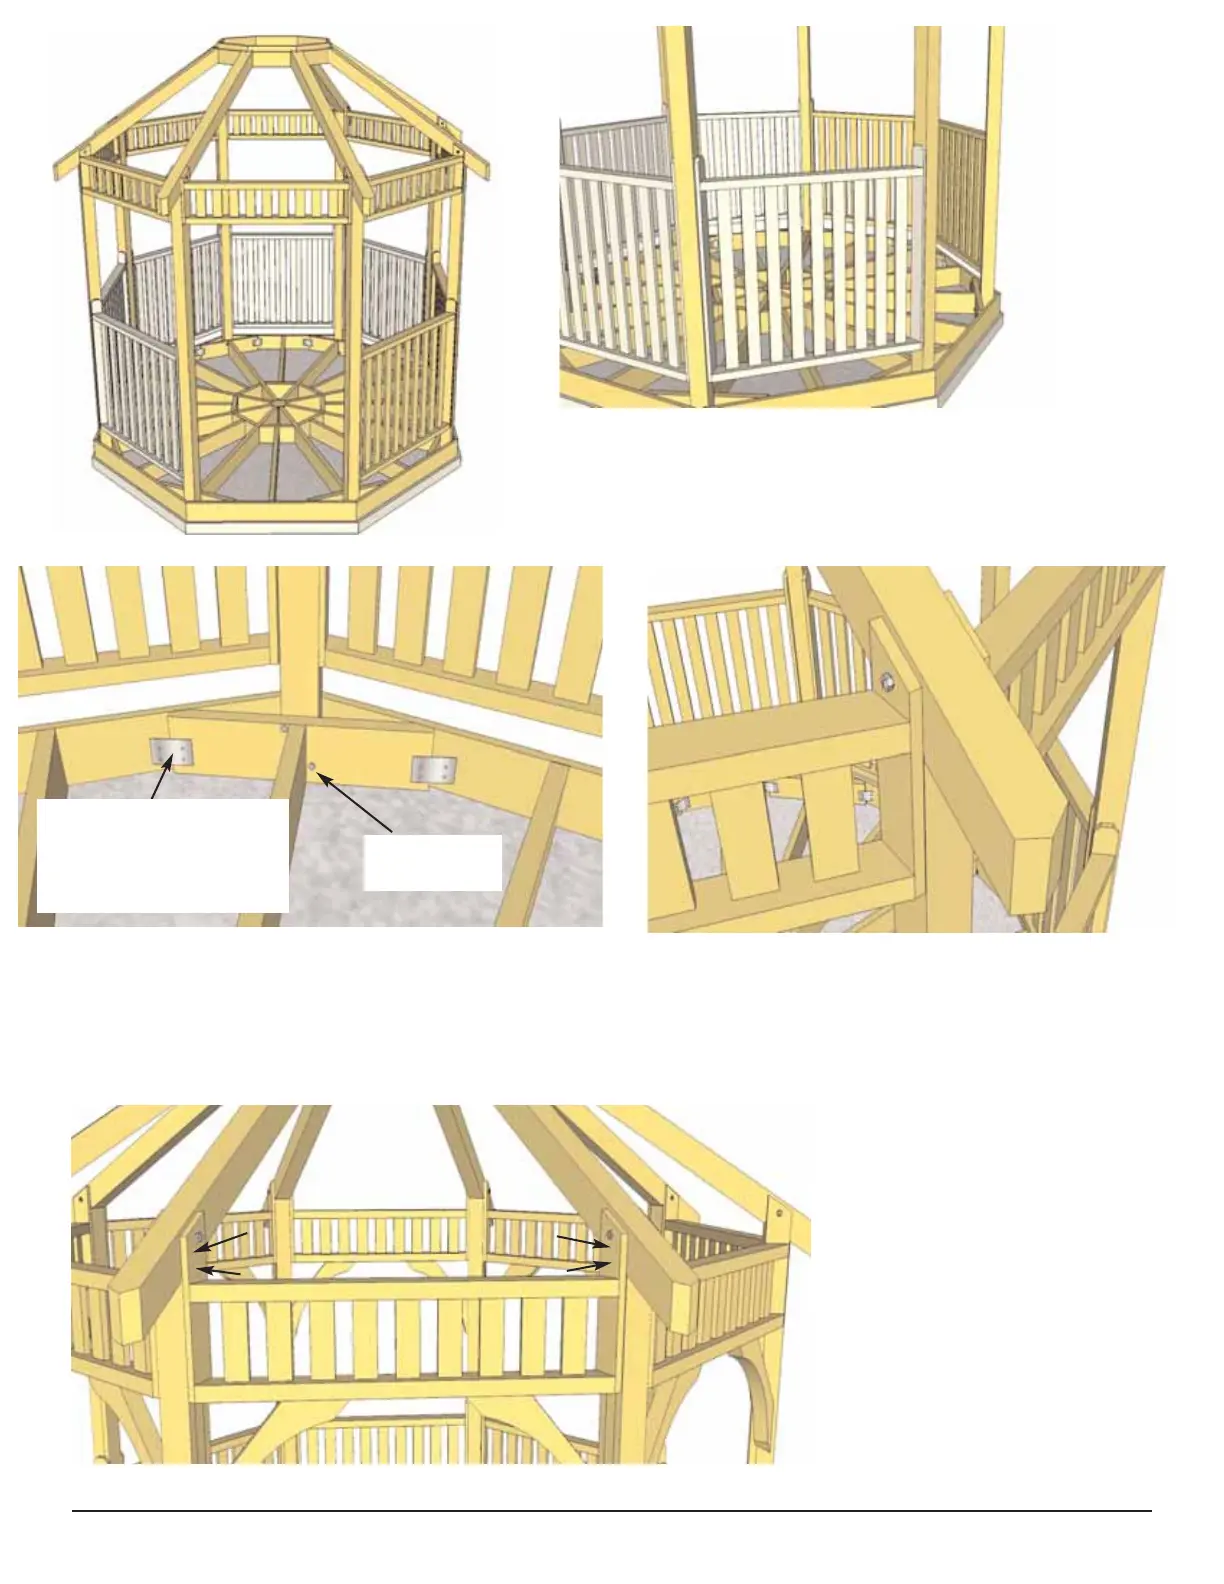
47. To completely secure
Rafter / Post and Upper Rail
Sections, place 2 - 2” screws
from the side framing of Upper
Rail Section into Posts.
In Florida, additional hardware
may be required that is not
included in kit due to hurricane
winds. Please check with local
building code to confirm.
45. Complete remaining Handrail Sections
positioning and securing as per Step 44.
Toll Free 1-888-658-1658 www.outdoorlivingtoday.com sales@outdoorlivingtoday.com
Page 18