Toll Free 1-888-658-1658 www.outdoorlivingtoday.com sales@outdoorlivingtoday.com
Page 13
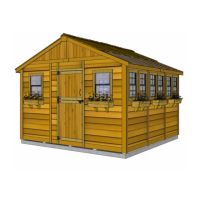
Flush with inside
of wall stud and
outside siding.
21. Locate Vertical Door Jamb (1 1/2” x 3 1/8” x 73”) and position flush against right wall panel stud.
The Jamb is 3 1/8” wide and will sit flush to outside of wall siding. When positioned correctly, secure
Jamb using 4 - 2 1/2” screws.
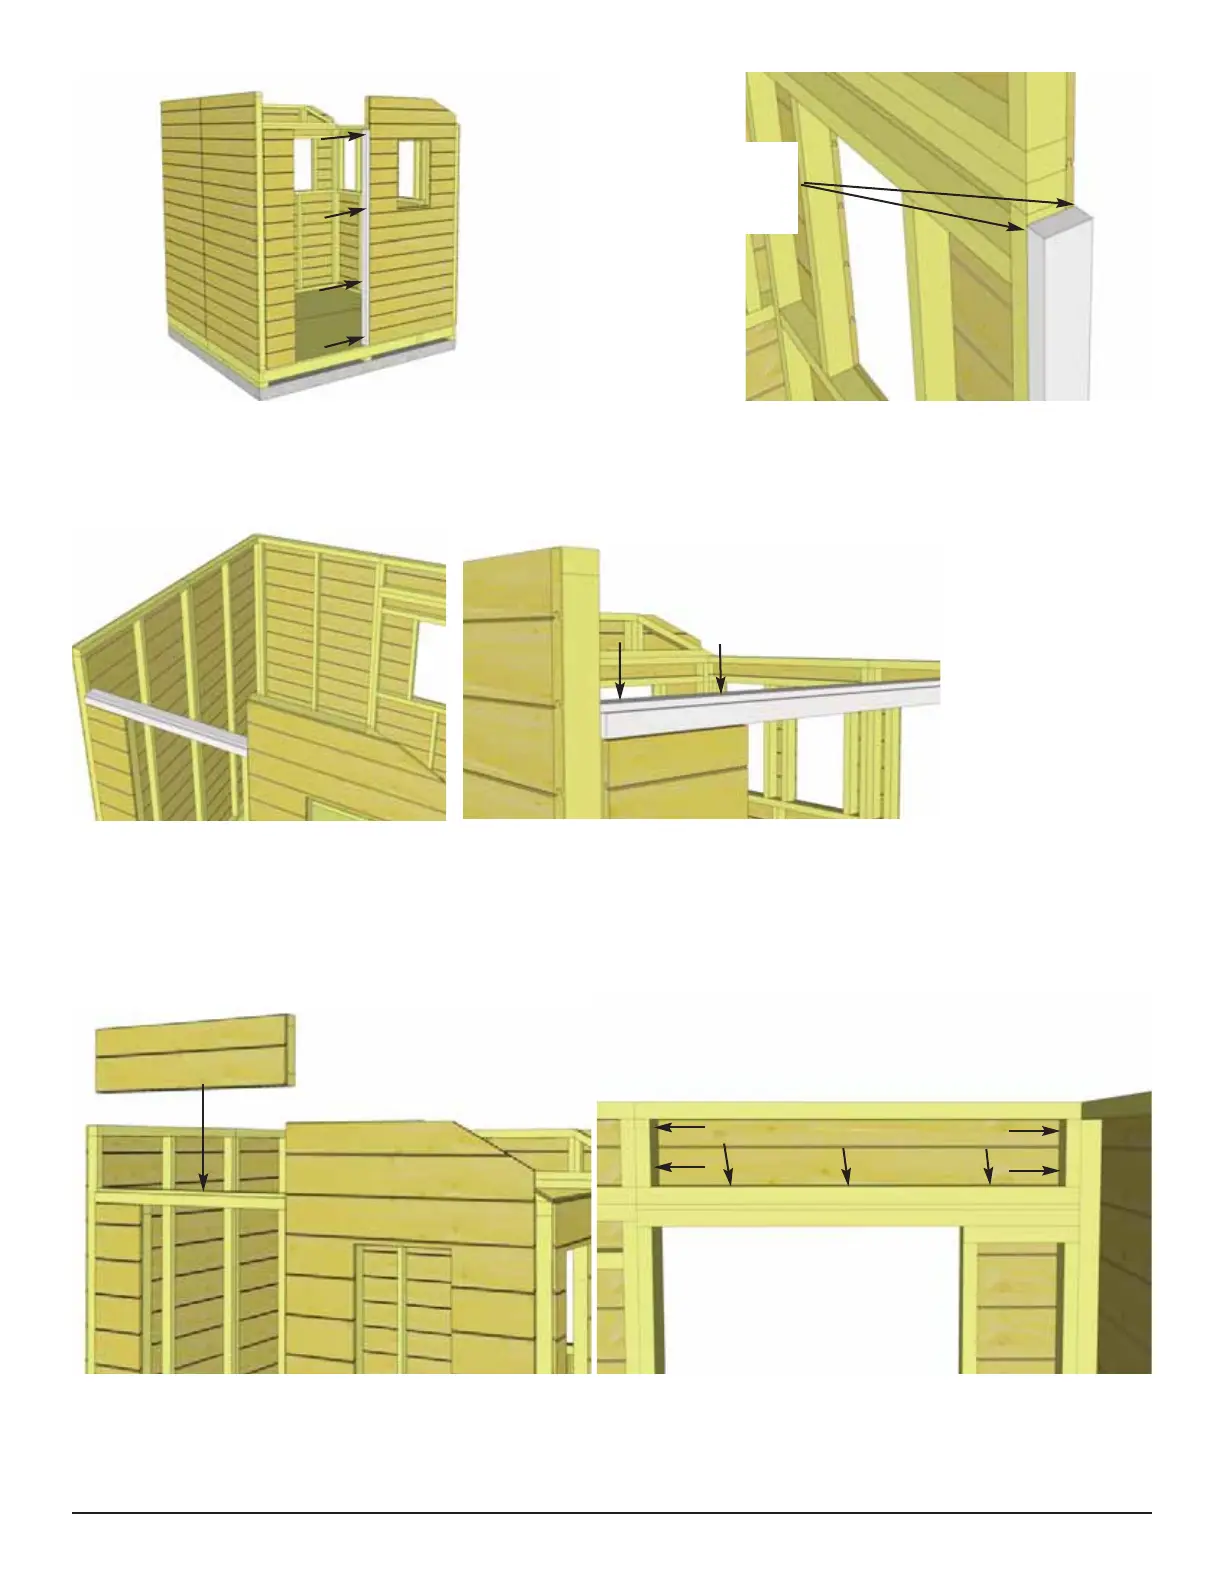
22. Position and attach the Door Header (2” x 3 1/8” x 45 1/2”) to Door Jamb and Narrow Wall Panel
top framing. Header should sit flush with Door Jamb and Outside of Narrow Wall Panel Siding. Attach
with 4 - 2 1/2” screws.
23. Locate and place Wall Extendor on top of Door Header. Align so 2x3 framing lines up with fram-
ing of walls. When correctly in place, secure with 3 - 2 1/2” screws in bottom
framing. Secure vertical wall framing of extendor with 2 - 2 1/2” screws.
Note: Door Header
has cleat attached,
place with cleat on top
and “notch” facing
outward.
 Loading...