Do you have a question about the Olympia ProHome series and is the answer not in the manual?
Covers warnings related to batteries, electric shock, suffocation, and explosion risks for safe operation.
Details precautions for children's use, hearing protection, and preventing property damage from batteries or environment.
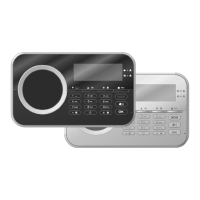
Details the front panel components, including display, loudspeaker, control lamps, and keys.
Illustrates and labels the rear panel components such as ports, SIM card compartment, and battery compartment.
Explains the meaning of various icons and indicators shown on the base unit's display screen.
Details the functions assigned to each key on the front of the base unit for user interaction.
Describes the operation of control lamps on the base unit based on power source and operating mode.
Guidance on optimal placement and mounting of the base unit for effective wireless communication and operation.
Step-by-step instructions for inserting a SIM card into the base unit for mobile network communication.
Instructions for inserting batteries as a safeguard against power failure, including battery type and orientation.
Procedure for connecting the power adapter to supply continuous power to the base unit.
Instructions on how to deactivate the key lock function for immediate access to base unit operations.
Details on the four-digit entry code for base unit security and how to change the predefined code.
Guide on selecting the desired language for the base unit interface from available options.
Procedure for setting the current date and time on the base unit for accurate logging and operation.
How to define a time period after which the key lock function is automatically activated.
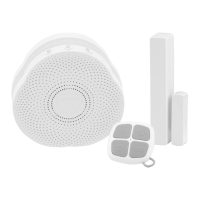
Instructions on how to register up to 64 sensors with the alarm system base unit.
Steps to remove a sensor from the alarm system base unit when it is no longer required.
Procedure to rename registered sensors for easier identification and personalized use.
How to record custom voice messages for specific sensors to be played during an alarm event.
Details on establishing a connection between the base unit, alarm system, and mobile network via SIM card.
Steps to unlock a SIM card using its PIN when it is used for the first time with the base unit.
Procedure to check the SIM card status on specific dates, ensuring proper mobile network connectivity.
Instructions to save up to 10 phone numbers that will be called automatically when an alarm is triggered.
How to store an emergency call number that is dialled first upon pressing the SOS key for immediate help.
Procedure to test the telephone unit's response to alarms, including verifying stored numbers and voice messages.
Configures the delay before an actual alarm is triggered, allowing time to disarm the system.
Allows setting a delay for arming the system, providing time to leave the premises after activation.
Defines the duration of the siren's warning signal, from 1 to 10 minutes.
Enables switching the warning signal of the base unit on and off for flexible alarm management.
Option to switch the key tone feature of the base unit on and off for auditory feedback.
Allows adjustment of the voice output volume level on the base unit or switching it off.
Procedure to adjust the display contrast of the base unit to one of five different settings.
Details on activating Alarm mode, which triggers both acoustic and telephone alerts upon alarm.
Instructions for activating At Home mode, which triggers only an acoustic alarm signal.
How to activate Silent mode, which triggers only the telephone unit without an acoustic warning.
Explanation of Disarmed mode, where the alarm system is deactivated, allowing free movement.
Procedure for triggering an immediate panic alarm for deterrence or immediate assistance.
How to trigger an SOS call to send for help by pressing a dedicated key.
Describes the three methods available to end an active emergency call (SOS) function.
How to optionally deactivate motion detectors in At Home mode to prevent false alarms.
Setting up the base unit for water leak and smoke detectors to trigger alarms in Disarmed or Silent modes.
Programming how the base unit responds to the SOS key press on the remote control for panic and emergency calls.
Instructions for downloading and installing the ProHome app from app stores on smartphones and tablets.
Prerequisites and initial steps for configuring the base unit using the ProHome app.
Steps to connect the base unit to your network, including scanning QR codes or manual UID input.
Guide on adding the base unit as a new device or to an existing ProHome gateway.
Instructions to connect your smartphone/tablet to the base unit's WiFi network (SSID) for configuration.
Procedure to set a new password for the ProHome gateway, with requirements for password complexity.
Process to confirm the successful connection of the base unit to the ProHome app, indicated by a steady blue LED.
| Brand | Olympia |
|---|---|
| Model | ProHome series |
| Category | Security System |
| Language | English |