Warning:
Do not switch the camera off or pull out a connection cable while CAMEDIA Master is starting up or running. These
actions can cause malfunctioning of the camera and applications.
* For other regions, refer to the “Authorized Distributors List”.
● Olympus is a registered trademark of OLYMPUS OPTICAL CO., LTD. Tokyo.
● Windows
®
is a registered trademark of Microsoft Corporation.
● Macintosh™, Apple, and QuickTime are trademarks of Apple Computer Inc.
● Acrobat Reader is a registered trademark of Adobe Systems, Inc.
● All trademarks and registered marks mentioned herein are recognized as the property of their respective holders and
are hereby acknowledged.
To take full advantage of the Olympus CAMEDIA Master image editing and manipulation features, refer to the help
manual provided under the Help icon in the CAMEDIA Master application.
The help manual and PDF manual are used in common for CAMEDIA Master 4.0 and CAMEDIA Master Pro. The symbol
indicates functions which can only be used in the Pro version. Functions indicated with this symbol are not
available in version 4.0.
http://www.olympus.com/
OLYMPUS OPTICAL CO., LTD.
San-Ei Building, 22-2, Nishi Shinjuku 1-chome, Shinjuku-ku, Tokyo, Japan
Customer support (Japanese language only): Tel. 0426-42-7499 Tokyo
OLYMPUS AMERICA INC.
Two Corporate Center Drive, Melville, NY 11747-3157, U.S.A. Tel. 631-844-5000
Technical Support (USA):
24/7 online automated help: http://support.olympusamerica.com/
Phone customer support: Tel. 1-888-553-4448 (Toll-free)
Our phone customer support is available from 8 am to 10 pm (Monday to Friday) ET
E-Mail: distec@olympus.com
Olympus software updates can be obtained at: http://olympus.com/digital/
OLYMPUS OPTICAL CO. (EUROPA) GMBH.
Premises/Goods delivery: Wendenstrasse 14-18, 20097 Hamburg, Germany Tel. 040-237730
Letters: Postfach 10 49 08, 20034 Hamburg, Germany
Hotline numbers for customers in Europe:
Tel. 01805-67 10 83 for Germany
Tel. 00800-67 10 83 00 for Austria, Belgium, Denmark, France, Netherlands, Norway, Sweden,
Switzerland, United Kingdom
Tel. +49 180 5-67 10 83 for Finland, Italy, Luxembourg, Portugal, Spain, Czech Republic
Tel. +49 40-237 73 899 for Greece, Croatia, Hungary, and the rest of Europe
Our Hotline is available from 9 am to 6 pm (Monday to Friday)
E-Mail: di.support@olympus-europa.com
Copyright 2002 OLYMPUS OPTICAL CO., LTD.
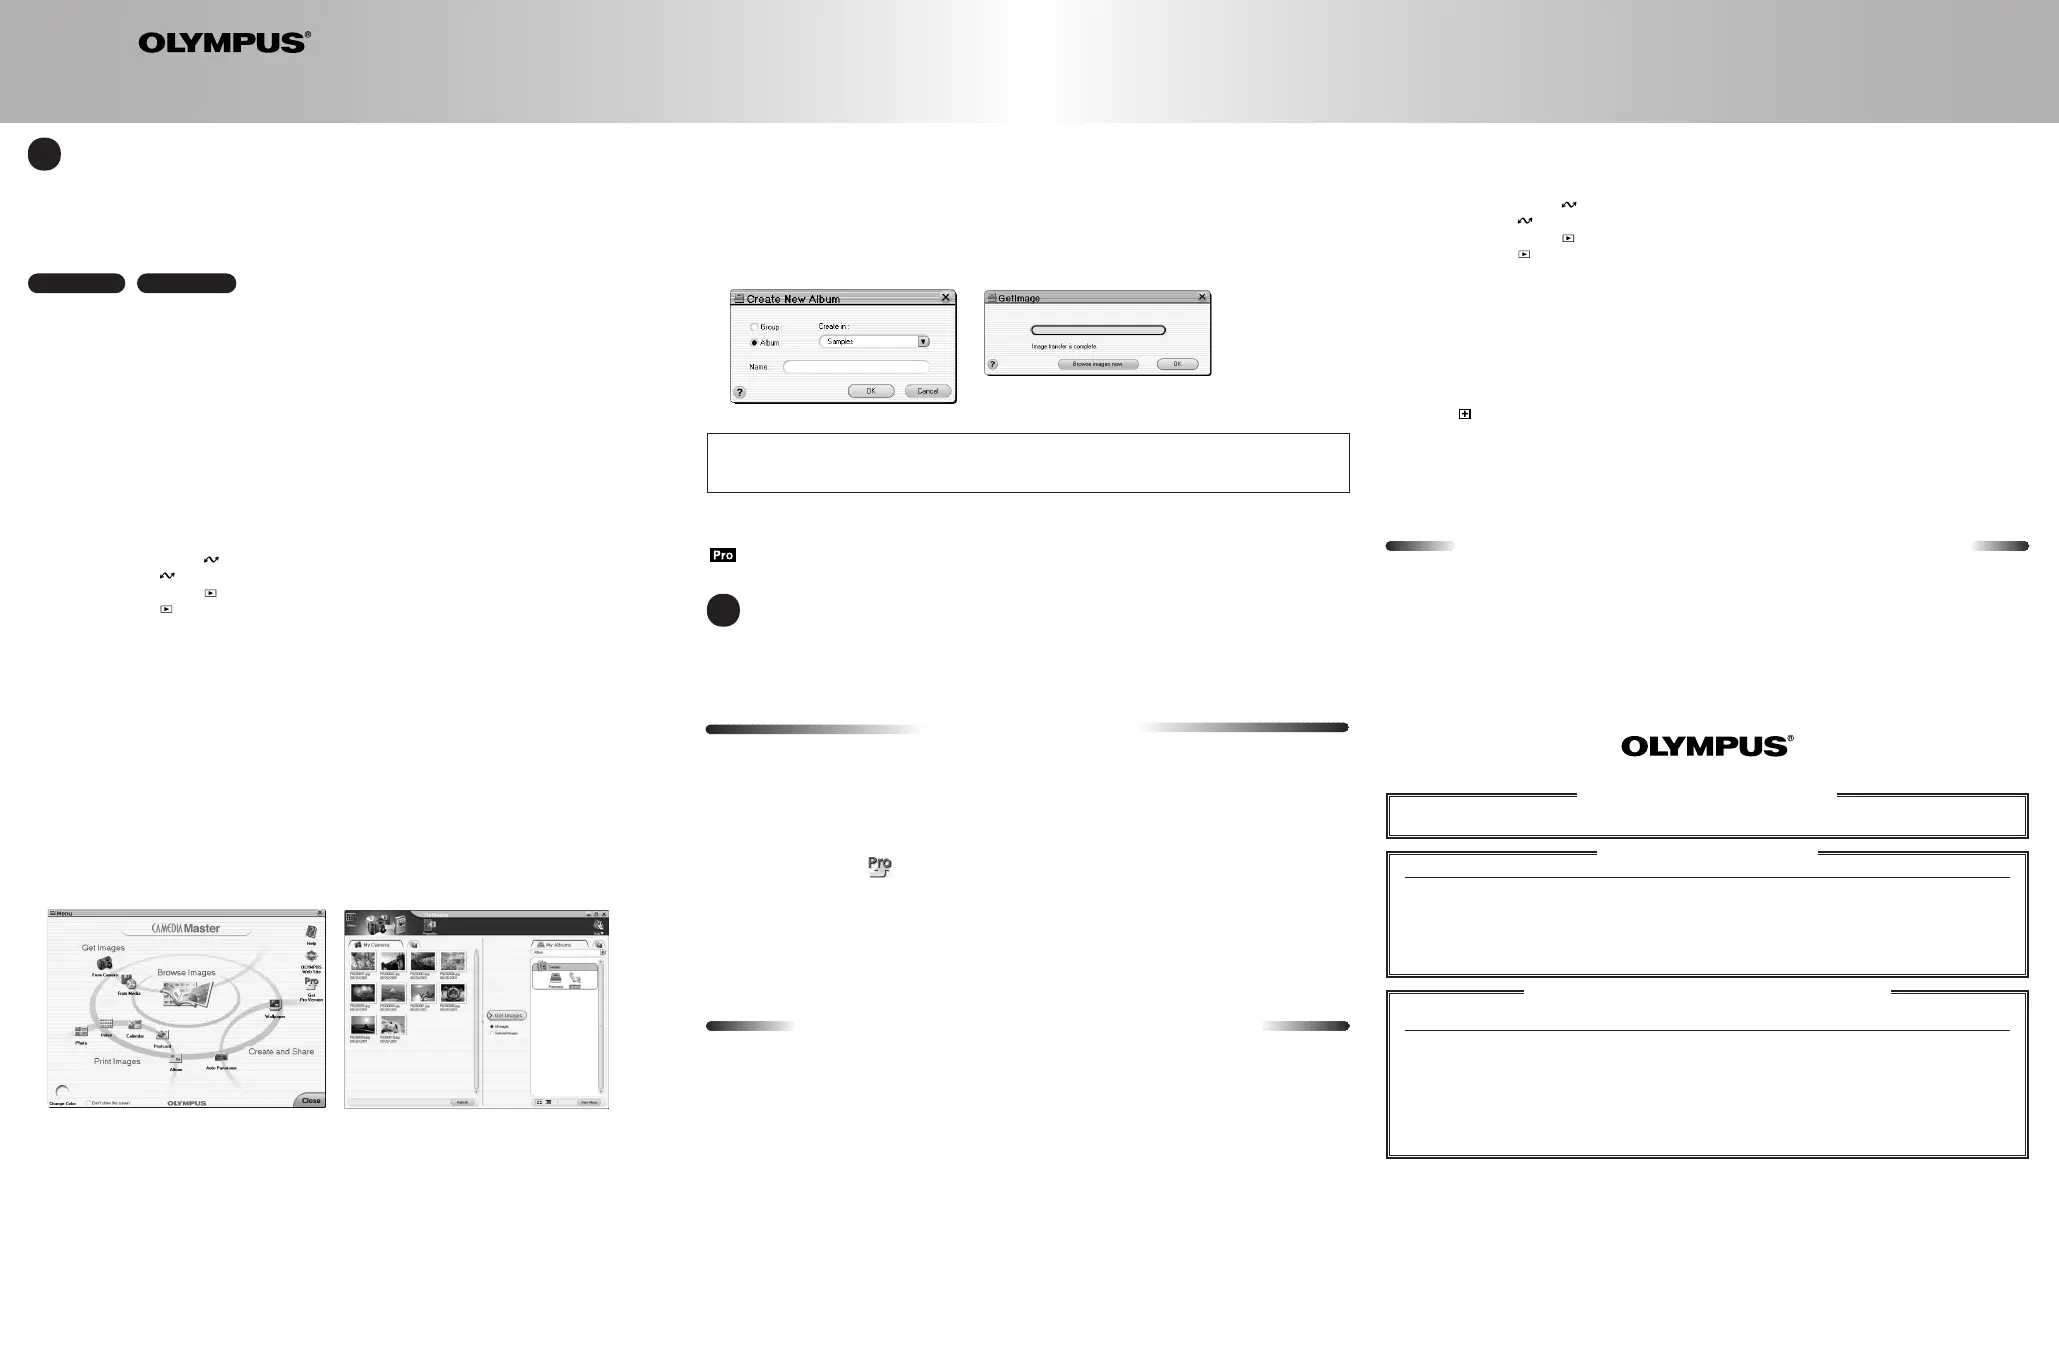
11. Click Get Images. Copying of all the images to the new album starts.
To copy only selected images
Click Selected Images, then select the thumbnails by any of the following methods, and click Get Images.
● To select a single image
Click on the image.
● To selectively add images to the selection
Hold down the Ctrl key (for Windows) or command key (for Macintosh), and click on the images.
12. When all of the images have been copied, a confirmation message appears. Click OK.
If you want to see the copied images now, click Browse images now instead of OK.
Create New Album dialog box
Confirmation message
5 ENJOY YOUR IMAGES
Once you have downloaded your images into a computer, your photographic creativity is limited only by your imagination.
You can reorder, retouch, and enhance any saved image. Merge them with other graphic elements to design never-
before-seen imagery or panoramic scenes. Create greeting cards, calendars, catalogs, postcards, and newsletters with
brilliant colors. Produce visual presentations. With an Olympus CAMEDIA Master software, you can do it all!
4 DOWNLOADING YOUR IMAGES
Note for Mac OS X users:
● PC freezes if camera is incorrectly disconnected.
● Date and time information of image files is not accurately displayed.
● If the camera card cover is opened while the camera is connected to the PC, the Untitled camera icon will not
disappear from the desktop.
Windows Macintosh
1. Turn off the camera. The process used to turn off the camera varies depending on the camera model. Refer to the
camera manual for detailed instructions, or use the reference notes below.
~~
Olympus camera with a lens barrier
Close the lens barrier.
~~
Olympus camera without a lens barrier
● If the mode dial has an OFF position T Set the mode dial to OFF.
● If the mode dial has no OFF position T Turn the power switch to OFF or press the power button.
2. Connect the optional A/C adapter or make certain that the batteries are fresh.
3. Connect one end of the USB cable to a USB port available on the computer.
Note:
If you are using a serial download camera, replace the term "USB" used in this section with "serial".
4. Connect the other end of the USB cable to the USB connector on the camera (located under the side cover).
5. Turn the camera on. The process used to turn on the camera varies depending on the camera model. Refer to the
camera manual for detailed instructions, or use the reference notes below.
~~
Olympus camera with a lens barrier
Open the lens barrier fully. A green lamp next to the viewfinder will blink.
~~
Olympus camera with a mode, without a lens barrier
Set the mode dial to and turn the power switch to ON.
~~
Olympus camera with a mode, without a lens barrier
Set the mode dial to .
● If the mode dial has an OFF position T The camera automatically turns on.
● If the mode dial has no OFF position T Turn the power switch to ON or press the power button.
Note for Windows XP users:
When connected to PC, a screen to select the operations of the file appears. Click Cancel to finish this screen.
Note for Mac OS X users:
When connected to PC, the Apple Image Capture software dialog appears. Select File and then Close to exit this
software.
6. To start up CAMEDIA Master, double-click its icon on the desktop. The CAMEDIA Master main menu appears.
Note for Macintosh users:
The first time you start the program, the registration dialog will appear before the CAMEDIA Master main menu. Enter
User Name and Serial Number and click Next.
* Serial Number is printed on the seal attached to the CD package.
7. In the main menu, click From Camera. The thumbnails of all images in the camera appear on the left-hand side of
the screen.
Note:
Downloading images via From Camera can only be done with an Olympus digital camera using a SmartMedia card.
If your digital camera is a non Olympus brand camera, and is instead recognized as a removable disk, images are
downloaded via From Media.
8. On the right-hand screen shown above, click New Album. Check Group and enter a group name, then click OK. A
new group is created. (Creating a new group)
9. Click New Album again. Check Album and select the new group, then enter an album name. When you click OK, a
new album is created. (Creating a new album)
10. To download images to the new album, click on the new group and then click the new album shown on the right-hand
side of the screen. (Specifying the destination album)
SOFTWARE INSTALLATION GUIDE
for Windows
®
& Macintosh™
CAMEDIA Master CD-ROM
Congratulations on your purchase of an Olympus
®
Digital Camera, one of the finest digital photography systems available today.Your complete satisfaction is very important to us.
When you connect your Olympus Digital Camera to a computer, you open the door to unlimited creativity. Your system comes bundled with a complete suite of software to view, retouch and customize images, incorporate pictures into documents, and print.
And it's all as easy as...
CAMEDIA Master Pro
In addition to the functions in version 4.0, CAMEDIA Master Pro allows you to use extra functions, including movie
editing, contact sheet printing, E-mail, HTML album, free image stitching, and slide show. With the Pro version, you can
become more expert in using your digital camera.
To purchase the Pro version and upgrade from version 4.0, use the following procedure.
Purchasing the CAMEDIA Master Pro Upgrade
To perform the following procedure requires that you can use the Internet with your computer.
1. Click the Get Pro Version in the main menu. The Registration dialog box appears.
2. Click Get. The web browser starts and the web page for upgrade to the Pro version appears.
3. Follow the directions on the web page to purchase a license number.
* Be sure to
carefully write down the purchased license number before leaving the web site.
4. In the Registration dialog box, enter your name and license number, then click OK. Your CAMEDIA Master 4.0 is
upgraded to CAMEDIA Master Pro automatically.
* CAMEDIA Master Pro 4.0 CD Package will also be available online at the Olympus Emporium
(http://www.emporium.olympus.com), or at Olympus Authorized retail stores.
Important information for Olympus Standard USB and
Serial connection camera users
If you are using an Olympus Standard USB connection camera (C-3000Z, C-3030Z, C-2100UZ, C-211Z) or an
Olympus serial connection camera, note the following changes to these instructions.
● SYSTEM REQUIREMENTS
For Windows: Windows 95/98/98 SecondEdition/Me/2000 Professional/NT 4.0 SP3 or later/XP (Serial port)
For Macintosh: Mac OS 8.6 - 9.2 (Serial port)
● Installing the camera’s USB driver
Users with a Serial connection camera do not need to perform a separate driver installation. Driver installation
automatically takes place during CAMEDIA Master software installation.
Users with a Standard USB connection camera (C-3000Z, C-3030Z, C-2100UZ, or C-211Z) can install the driver from
the provided CD-ROM using the following procedure. The procedure for Standard USB driver installation is the same for
all operating systems.
1. Connect the PC end of the USB cable to the USB port on the PC.
2. Connect the camera end of the USB cable to the USB connector on the camera.
3. Turn the camera on. The process to turn on the camera varies depending on the camera model. Refer to the camera
manual for detailed instructions, or use the reference notes below.
~~
Olympus camera with a lens barrier
Open the lens barrier fully. A green lamp next to the viewfinder blinks.
~~
Olympus camera with a mode, without a lens barrier
Set the mode dial to and turn the power switch to ON.
~~
Olympus camera with a mode, without a lens barrier
Set the mode dial to .
● If the mode dial has an OFF position T The camera automatically turns on.
● If the mode dial has no OFF position T Turn the power switch to ON or press the power button.
4. An Add New Hardware Wizard dialogue box appears indicating that the camera is recognized by the PC. Click Next.
5. After making sure Search for the best driver for your device (Recommended) is selected, click Next.
6. Make sure the CAMEDIA Master software CD is inserted in the CD-ROM drive of your PC. (When the CD is inserted
into the CD-ROM drive, the CAMEDIA Master Setup screen may automatically appear. Click Close to exit this
window.)
7. Uncheck Floppy disk drives, Microsoft Windows Update, and CD-ROM drive. Then check Specify a location and
click Browse. The Browse for Folder screen appears.
8. Click the on the left of the CD-ROM drive icon and then the USB folder icon. Click the folder that matches your
operating system, then click OK.
Note: Users running Windows 98/Me choose the Win98Me folder.
Users running Windows 2000/XP choose the Win2kXP folder.
9. When the Browse for Folder screen disappears, click Next. Then click Next again. USB driver installation starts.
10. When a screen appears telling you that installation is complete, click Finish. Disconnect both ends of the USB cable
and turn off the camera.
For CD-ROMs other than the CAMEDIA Master software CD
This guide is only for the CAMEDIA Master software CD. For other CDs, refer to their instructions.
1 CM4.0SIG(B)-EN 02.3.26 0:43 PM Page 2
 Loading...