25
Chapter 1: Getting the Lay of the Land
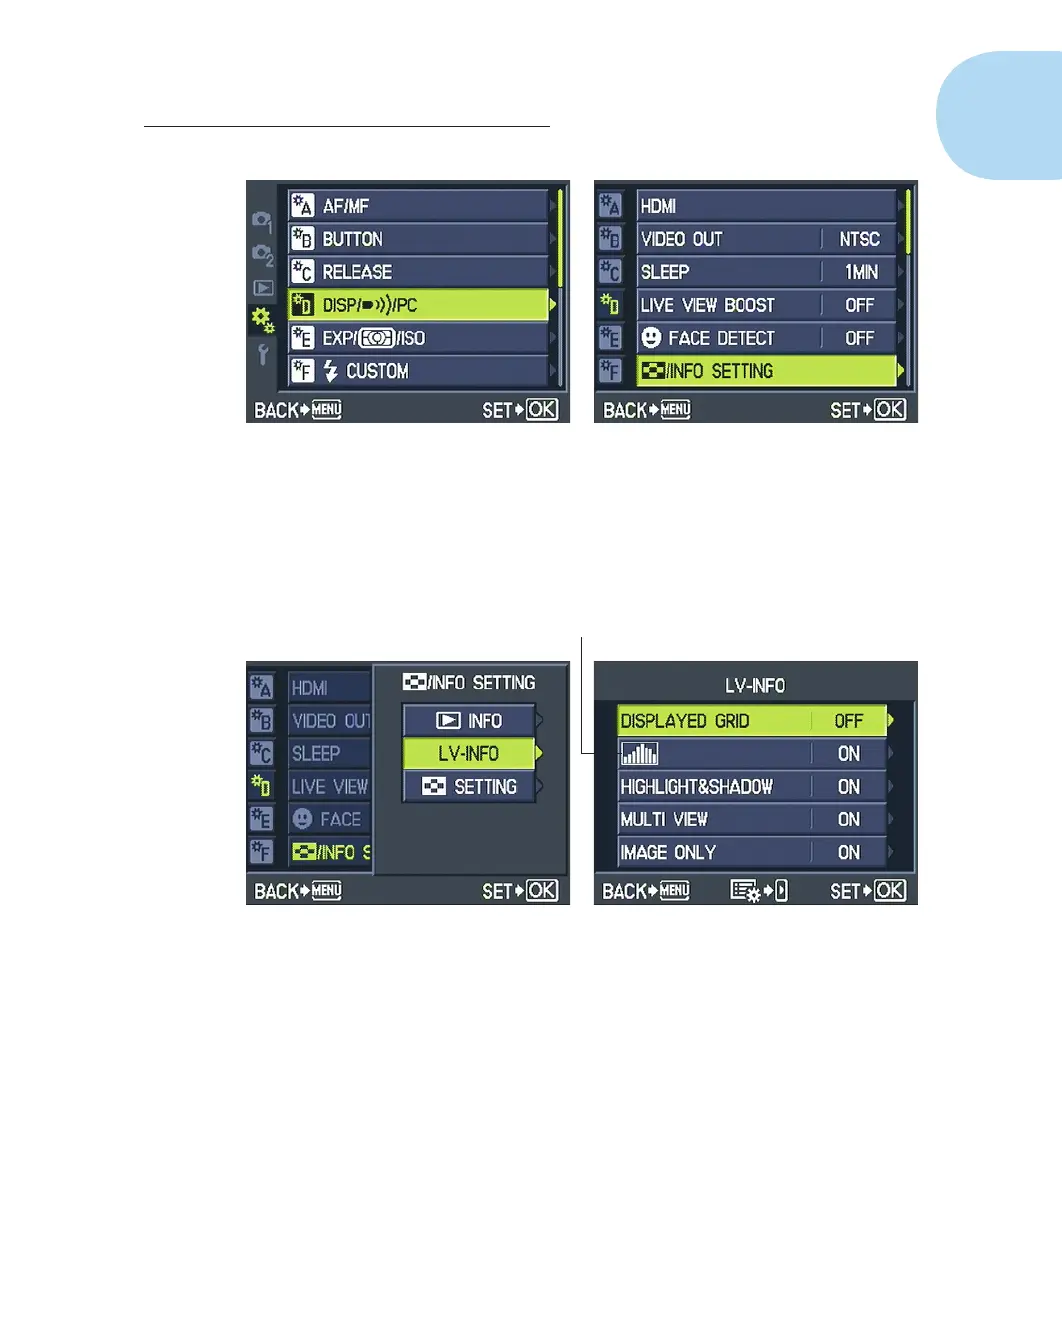
Figure 1-19: Choose which displays to enable through this option on Custom Menu D.
2. Choose the Thumbnails/Info Setting option, as shown on the right in
Figure 1-19, and press OK.
You see the screen shown on the left in Figure 1-20.
Figure 1-20: You can control which of these five displays are enabled.
3. Select LV-Info and then press OK.
(The LV is a reference to live view, which is what the monitor displays
when you shoot with the E-PL1 — a live view of the scene before the lens.)
After you press OK, you see a list of display options that you can enable
or disable, as shown on the right in Figure 1-20. In some shooting modes,
not all display options are available; you can choose from all displays
only in P, A, S, and M modes.
4. Enable the display options you want to use; turn off the others.
05_879504-ch01.indd 2505_879504-ch01.indd 25 6/28/10 1:31 PM6/28/10 1:31 PM