EasyManua.ls Logo

Olympus Stylus 1000 - User Manual

Olympus Stylus 1000
1 page
Print Icon
Loading...
© 2006
Printed in Japan
1AG6P1P3252-- VH705401
Pull the strap tight so that it does not come loose.
a. Charge the battery
Battery comes partially charged.
b. Insert the battery in the camera
For details on inserting an optional xD-Picture Card™, please refer to
the advanced manual.
This explains how to turn on the camera in shooting mode.
a. Set the mode dial to K.
Still picture shooting modes
b. Press the o button
To turn off the camera, press the o button once again.
Quick Start Guide
S
tart
Here
For more information, please refer to the Basic & Advanced Manuals
or visit: www.olympusamerica.com/support
Gather these items (box contents)
Digital Camera Strap LI-12B Lithium Ion
Battery
LI-10C Battery
Charger
USB Cable AV Cable OLYMPUS Master
Software CD-ROM
Items not shown: Advanced Manual (CD-ROM), Basic Manual, and warranty
card. Contents may vary depending on purchase location.
Attach the strap
Prepare the battery
1
Light On (Red): Charging
Light On (Green): Charging complete
(Charging time: Approx. 2 hours)
AC Wall Outlet
Power Cable
Battery Charger
Lithium Ion Battery
3
W
2
Charging Indicator
1
2
4
5
To remove the battery, slide
the battery lock knob in the
direction of the arrow.
Battery lock knob
Make sure to insert the battery in
the direction of the symbol
until locked in place.
3
K This function allows you to shoot with the camera's automatic settings.
s This function allows you to shoot pictures by selecting a scene according
to the shooting condition.
g This function allows you to set the target items by following the
shooting guide displayed on the screen.
When the date and time
have not yet been set, this
screen will appear.
Turn the camera on
When viewing pictures
(playback mode)
When shooting movies
(shooting mode)
When shooting still pictures (shooting mode)
o Button
MENU
CANCEL
X
Y/M/D
Y / M / D
Y
Y
M D
D
TIME
T I M E
----.--.-- --:--
----.--.-- --:--
1
2
34
Hint
The directions of the arrow pad (1243) is indicated
with 1243 in the supplied instruction manual.
a. Press the
1F
button and the
2Y
button to select
[Y].
The first two digits of the year are fixed.
b. Press the 3# button.
c. Press the 1F button and the
2Y button to select [M].
d. Press the 3# button.
e. Press the 1F button and the
2Y button to select [D].
f. Press the 3# button.
g. Press the 1F button and the
2Y button to select “hour”,
“minute”.
The time is displayed in the 24-hour format.
h. Press the 3# button.
i. Press the 1F button and the
2Y button to select [Y/M/D].
j. After all items have been set, press the o button.
For precise time setting, press the
o
button as the time signal strikes 00 seconds.
a. Hold the camera
c. Shoot
a. Set the mode dial to q.
a. As described in a. above, display the picture you
want to erase.
b. Press the
S
button.
c. Press the 1F button to select [YES] and press the
o
button to erase the image.
Set date and time
About the date and time setting screen
MENU
CANCEL
X
Y/M/D
Y / M / D
Y
Y
M D
D
TIME
T I M E
----.--.-- --:--
----.--.-- --:--
Y-M-D (Year-Month-Day)
Exits a setting.
Minute
Date formats (Y-M-D, M-D-Y, D-M-Y)
Hour
2Y Button
1F Button
CANCEL
MENU
2006
2006
.--.-- --:--
.--.-- --:--
X
Y
Y
M
D
D
TIME
T IM E
Y/M/D
Y / M / D
3# Button
2006
2006
.
11
11
.-- --:--
.-- --:--
CANCEL
MENU
X
Y
Y
M
D
D
TIME
T IM E
Y/M/D
Y / M / D
2006
2006
.
11
11
.
26
26
--:--
--:--
CANCEL
MENU
X
Y
Y
M
D
D
TIME
T IM E
Y/M/D
Y / M / D
CANCEL
MENU
OK
SET
2006
2006
.
11
11
.
26
26
12
12
:
30
30
X
Y
Y
M
D
D
TIME
T IM E
Y/M/D
Y / M / D
CANCEL
MENU
OK
SET
2006
2006
.
11
11
.
26
26
12
12
:
30
30
X
Y/M/D
Y / M / D
Y
Y
M
D
D
TIME
T IM E
o Button
P
P
HQ
HQ
3648
3648
×
2736
2736
[
IN
IN
]
44
[ ]
Horizontal grip Vertical grip
b. Focus
The card access lamp blinks.
Take a picture
(Pressed
halfway)
Shutter
Button
P
P
HQ
HQ
3648
3648
×
2736
2736
[
IN
IN
]
44
[ ]
The green lamp indicates the
focus and exposure are locked.
The number of remaining
still pictures is displayed.
Place this mark over your subject.
(Pressed
completely)
Shutter
Button
Review your pictures
12:30
12:30
'06.11.26
'06 . 11.26
100-0001
1 0 0 - 0 0 0 1
1
HQ
HQ
[
IN
IN
]
t
Mode Dial
Arrow Pad
Next Picture
Prev. Picture
Erase pictures
S Button
OK
SET
MENU
BACK
YES
NO
[IN]
ERASE
1F Button
OK
SET
MENU
BACK
YES
NO
ERASE
d4331_e_qsg_7.fm Page 1 Tuesday, August 8, 2006 12:58 PM

Other manuals for Olympus Stylus 1000

Question and Answer IconNeed help?

Do you have a question about the Olympus Stylus 1000 and is the answer not in the manual?

Overview

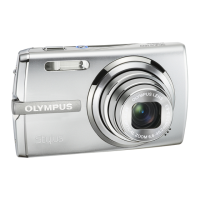
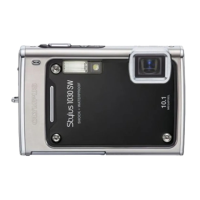
The Olympus Stylus 1000 is a digital camera designed for ease of use, offering a straightforward approach to capturing still pictures and movies, as well as reviewing them. This quick start guide outlines the essential steps to get the camera up and running, from initial setup to basic operation.

Function Description

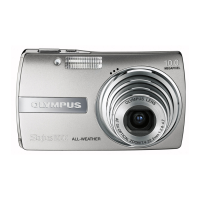
The primary function of the Olympus Stylus 1000 is to capture digital images and video. It features various shooting modes to accommodate different photographic situations, including a fully automatic mode for general use, a scene mode for specific conditions, and a guide mode to assist users with settings. The camera is equipped with a mode dial that allows users to quickly switch between still picture shooting, movie shooting, and picture playback.

Usage Features

Initial Setup and Powering On:

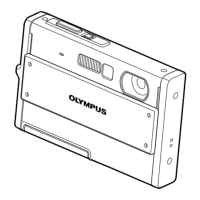
To begin using the camera, users must first gather the included items, which typically consist of the digital camera, a strap, a Lithium Ion Battery (LI-12B), a battery charger (LI-10C), a USB cable, an AV cable, and the OLYMPUS Master Software CD-ROM. The battery needs to be charged before first use. The charging indicator light on the charger will be red during charging and turn green when charging is complete (approximately 2 hours). The battery comes partially charged. After charging, the battery is inserted into the camera, ensuring it's oriented correctly and locked into place. The strap can then be attached to the camera for secure handling.

To turn the camera on, the mode dial is set to the desired shooting mode (e.g., for still pictures). Following this, the POWER button is pressed. The camera will display a date and time setting screen if these have not been set previously. To turn the camera off, the POWER button is pressed once again.

Setting Date and Time:

Upon powering on for the first time, or if the date and time have not been set, a "Y MD TIME" screen will appear. Users navigate this screen using the arrow pad.

  • To select the year [Y], the up/down buttons are used. The first two digits of the year are fixed.
  • To confirm the year and move to the month, the right button is pressed.
  • To select the month [M], the up/down buttons are used.
  • To confirm the month and move to the day, the right button is pressed.
  • To select the day [D], the up/down buttons are used.
  • To confirm the day and move to the hour, the right button is pressed.
  • To select the hour, the up/down buttons are used. The time is displayed in 24-hour format.
  • To confirm the hour and move to the minute, the right button is pressed.
  • To select the minute, the up/down buttons are used.
  • To confirm the minute and move to the date format, the right button is pressed.
  • To select the date format (Y-M-D, M-D-Y, D-M-Y), the up/down buttons are used.
  • After all items have been set, the "SET+OK" button is pressed to confirm the settings. For precise time setting, pressing the "SET+OK" button as the time signal strikes 00 seconds is recommended.

Taking Pictures:

To take a picture, the camera is held with a horizontal or vertical grip. The subject is framed, and the shutter button is pressed halfway to focus. The green lamp indicates that focus and exposure are locked. Once focus is achieved, the shutter button is pressed completely to capture the image. The card access lamp blinks during image processing and saving. The number of remaining still pictures is displayed on the screen.

Reviewing Pictures:

To review captured images, the mode dial is set to the playback mode. Users can navigate through pictures using the arrow pad (left for previous, right for next).

Erasing Pictures:

To erase a picture, first, the desired image is displayed in playback mode. Then, the erase button is pressed. An "ERASE [IN]" confirmation screen will appear with "YES" and "NO" options. The up/down buttons are used to select "YES," and then the "SET+OK" button is pressed to erase the image.

Maintenance Features

While the quick start guide does not delve deeply into maintenance, it implies certain aspects:

  • Battery Management: Regular charging of the Lithium Ion Battery is essential for continued operation. The charging indicator provides clear feedback on the battery's status.
  • Strap Attachment: The guide emphasizes pulling the strap tight to ensure it does not come loose, which is a basic safety and handling measure to prevent accidental drops and damage to the camera.
  • Storage Media: The guide mentions that for details on inserting an optional xD-Picture Card™, users should refer to the advanced manual, indicating that proper handling and insertion of storage media are part of routine maintenance.
  • Software: The inclusion of the OLYMPUS Master Software CD-ROM suggests that users might need to install this software on a computer for image management, transfer, and potentially firmware updates, which are forms of digital maintenance.
  • Documentation: The guide repeatedly refers to the "Basic & Advanced Manuals" and the Olympus website for more information, highlighting the importance of consulting these resources for comprehensive maintenance instructions and troubleshooting.

The Olympus Stylus 1000 is designed to be user-friendly, providing a quick and easy way for individuals to capture and manage their digital photos and videos with minimal fuss.

Olympus Stylus 1000 Specifications

General IconGeneral
Image Sensor1/1.8" CCD
Optical Zoom3x
Screen Size2.5 inches
Video Resolution640 x 480
Battery TypeLi-Ion
TypeCompact
Digital Zoom5x
Storage MediaxD-Picture Card
Effective Pixels10.0 Megapixels
Sensor Size1/1.8 inches

Related product manuals