3/4
MAINTENANCE
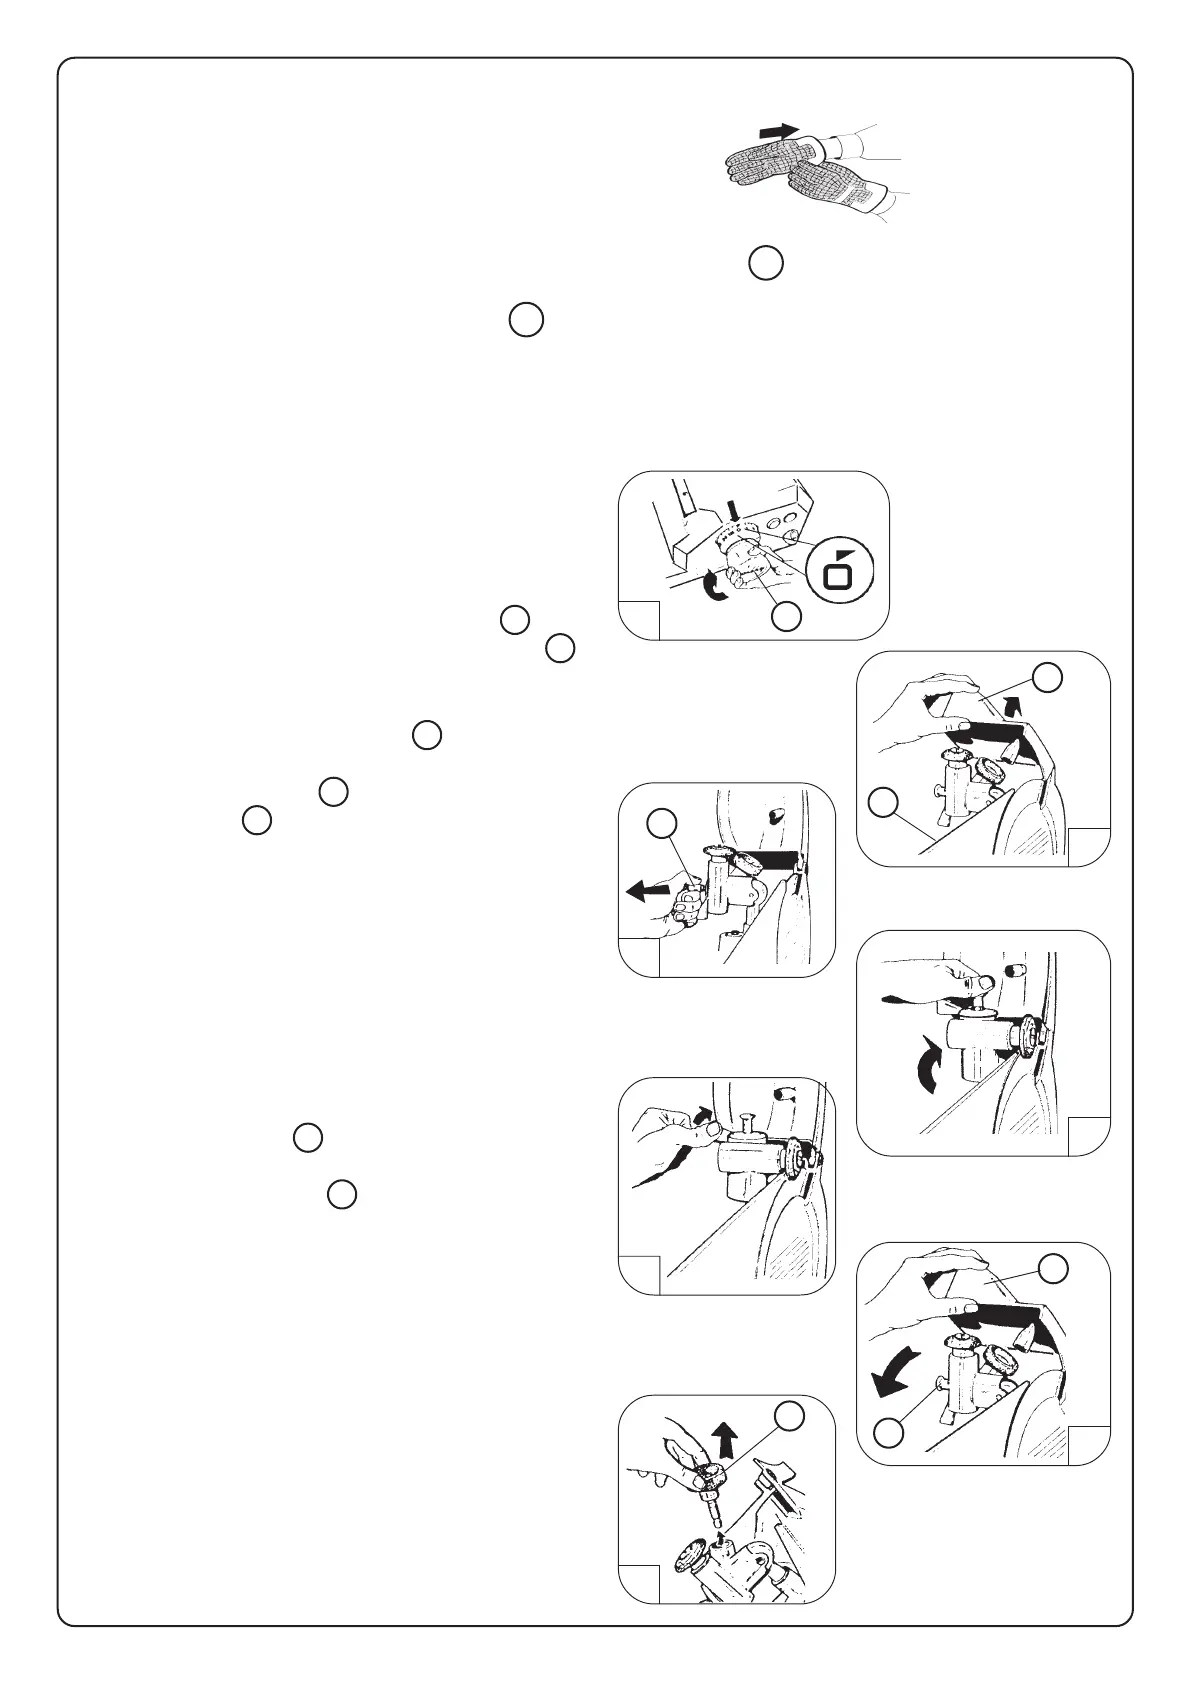
ATTENTION
Use protection gloves
ELECTRICAL SAFETY
When the slicer is running the eventual removal of the blade cover 6 , or the default of electric power,
causes the stop of the machine.
To restart the slicer press the on-off switch 9 .
SHARPENING OPERATION
Your slicer blade will provide long service in normal deli, food store, or commercial kitchen use.
However, in high volume applications where it is a practice to sharpen the blade frequently or even
daily, the blade will be expended in a shorter time.
Before using sharpener, be sure the front and back
side of the knife edge is clean and free of grease.
The sharpen knife:
a) be sure that the slicer has been switched off
b) rotate the slice thickness control (item 4 ) into
"O" position, sothat the thickness plate ( item 5 )
protects the knife fig.2
Lift up the sharpener cover ( item 1 ) fig. 2
Disengage the pin (item 7 ) and rotate the
sharpener ( item 3 ) fig. 3
So that the sharpener goes into its sharpening
position (fig. 4 )
To sharpen, first turning the switch in on position, so
that the knife turns, the slowly rotate the lever which
lets both stones go in contact with the knife; shar-
pening and trimming are made in same time fig. 5
Replace the sharpener to normal horizontal position,
by lifting the pin (item 7 ) and close the cover fig. 6
The grinding stone (item 6 ) , fitted on its pin, can be
easily removed, by just drawing it fig. 7
To get a nice sharpening, the grinding stone must be
clean and free of grease.
The sharpening time depends on the wear of the
knife. To get a good result the time needed is 10 to
15 seconds. A longer sharpening reduce the duration
of the knife and gives no advantage.
Wipe the slicer with a clean damp cloth to remove
any grinding particles.
2
4
5
7
1
3
5
1 4
7
1
6
7
6
 Loading...