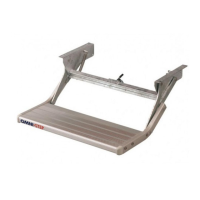
- Die Markise darf nicht ohne Stützfüße aufgestellt werden.
Gebrauchsanleitung:
1. Schlieβen Sie alle Türen. Die Kurbel in die Bajonettfassung der Markise
einbringen und die Markise öffnen. Die Kurbel beim Drehen stets nach
unten halten (Fig. 6).
2. Maximal 0,5m auskurbeln (Fig.7 und 10). Dann die Stützfüβe aus dem
Frontprofil herausnehmen(Fig.8), die Stützfüβe bis auf die gewünschte
Höhe ausschieben(Fig.9) und weiter auskurbeln. Bemerkung: Die
Stützfüβe nie so hoch ausschieben, dass das Tuch zwischen der
Oberkante der Arme und dem Kasten klemmt.
3. Klemmen Sie die Stützarme fest (Fig.9).
4. Die Kurbel etwas zurückdrehen, bis das Tuch gespannt ist.
5. Bei Regen und Wind: Stellen Sie einen Stützfuß bedeutend tiefer
(Fig.11), als den anderen, so daß das Wasser leichter vom Tuch
abfließen kann. Befestigen Sie die Stützfüße mit Heringen im Boden
(Fig.12). und montieren Sie ein Sturmband: Bestellnr. 50 0000 38 (Fig.11).
6. Das Tuch darf nicht für längere Zeit naß aufgerollt werden.
7. Das Tuch nur mit Wasser oder mit OMNI-CLEANER reinigen.
Read these instructions carefully. No guarantee will be
allowed for wrong installation.
Contents installation kit:
A. Duo bolt plate...................................................................3
B. Wood bolts DIN603 – M6x16 .................................................4
C. Security nuts DIN985 ..............................................................4
D. Screw caps M6 ........................................................................4
E. Hexagon bolts DIN933 – M6x20 ............................................2
F. Nylon washer ..........................................................................2
G. Adapter 120mm......................................................................1
H. Adapter 216mm......................................................................1
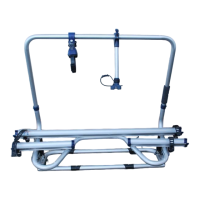
Installation
1. Slide the duo bolt plates with the wood bolts in the correct order into
the roof rail on the passengers side (fig.1) to the position as shown
(fig.2).
2. Apply SIKA 252 glue on the ribbed surfaces (fig.3). Remove the
grease from the roof with SIKA activator.
3. Put the adapters in place (fig.2), tighten with the nuts and position
the screw caps.
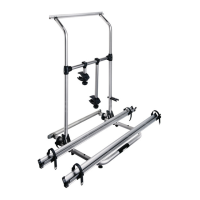
4. Hook the awning onto the adapters (fig.4),close all the doors, and
rotate the awning outwards for 30cm (fig.6 en 7).
5. Slide the awning until the hole in the awning is in accordance with the nut
on the first adapter. Tighten using the bolt and the nylon washer (fig.5).
6. Slide the support arms out of the front profile (fig.8) and adjust them
to the required height (fig.9). Unroll the awning until the second bolt
can be positioned.
7. Whilst the glue is drying, leave the awning open for ±5cm in order
not to torsion the adapters against each other.
General remarks:
- An awning is a sun and not a rain protection. The awning should be
closed in case of storm, snow or heavy rainfall.
- The awning cannot be used without putting out the support arms.
Users instructions:
1. Close all the doors. Introduce the crank arm into the bayonet joint
(fig.6) and unroll the awning while keeping the crank down (fig.7).
2. Unroll till 0,5 m max. (fig.10). Slide the support arms out of the front
profile (fig.8) and adjust them to the required height (fig.9) before
further unrolling. Remark : Never put out the support arms too high,
so that the fabric jams between the arms and the box.
3. Fasten the support arms (fig.9).
4. After completely unrolling, the fabric can be tensioned by winding
back a little.
5. In rainy or windy conditions: Lower one side of the awning in such a
way that the water can run down the fabric (fig.11). Fix the support
arms with pegs to the ground (fig.12) and install the hold down kit:
Order nr. 50 0000 38 (fig.11).
6. The fabric should not be re-wound and stored when wet for a long period.
7. Clean the fabric only with water or OMNI-CLEANER.

 Loading...