Do you have a question about the OmniTek OTR 1001 and is the answer not in the manual?
Provides an overview of the OTR 1001's capabilities and design considerations.
Outlines essential safety precautions to prevent injury and equipment damage.
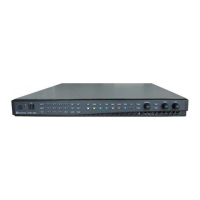
Summarizes the main features and instrument options available with the OTR 1001.
Details the steps for installing the OTR 1001, including checking contents, mounting, and cabling.
Explains the procedure for powering up the OTR 1001, including applying power and startup.
Describes the choice between Windows and Full Screen display modes for the OTR 1001.
Guides on updating the software options by installing new licence files.
Outlines the steps to update the OTR 1001 software to the latest available version.
Provides recommendations for general care, cleaning, and battery replacement of the OTR 1001.
Describes the front panel controls, mouse and keyboard operation, and menu navigation.
Explains configuration of OTR 1001 operations via a collapsible hierarchy.
Details the four top-level window displays and the Status Bar.
Explains capturing and recalling combinations of settings as Presets for easy reuse.
Describes how to select files stored on disk using a file selector.
Details the process of saving files to disk, including location and filename selection.
Explains the View window's division into 'Tiles' and 'Categories' for analysis results.
Covers selecting Views, switching displays, and setting properties.
Details selecting video streams from sources like SDI inputs or generator.
Explains freezing the current display for inspection and capture.
Introduces creating new screen layouts by modifying the current one in 'Edit mode'.
Guides on entering and leaving 'Edit mode' for tile manipulation.
Explains changing Views, removing tiles, and adding new tiles.
Describes resizing and repositioning tiles using handles and snapping.
Explains recording new layouts as View Presets for future use.
Outlines general steps for working with Views: displaying, configuring, interpreting results.
Explains limiting analysis using Region of Interest or crosshair cursor.
Describes high-resolution displays of YCbCr/RGB components and composite waveforms.
Explains vector representation of waveform for color comparison.
Details bar graphs showing value ranges for color components.
Provides real-time status on video signal and errors.
Offers background information on video parameters appearing in status displays.
Describes x,y plot of chrominance in XYZ color space for assessing color depth.
Presents color histograms, indicating signal parts outside the required gamut.
Defines key terms like Disparity and Depth for 3D analysis.
Explains Stereo 3D principles and OTR analysis of parallax and color.
Details steps to enable 3D monitoring and camera alignment features.
Describes methods like checkerboard, sum, difference for comparing S3D images.
Covers tools for analyzing depth information from left/right image streams.
Explains Depth Map using color to show feature distances.
Provides depth views: Plan, Elevation, and Disparity.
Plots disparity value distribution in Stereo 3D images.
Details camera alignment assistance using '3D Meters' and '3D Chroma Sabres'.
Describes tools for assessing gain/lift differences in color components.
Explains limits on 3D video aspects and error reporting.
Describes the Event Log's response to conditions, including live and session logs.
Covers recording Momentary and Short-Term Loudness values for analysis.
Provides a record of closed captions, sequence information, and timecode data.
Details remote control using SNMP protocol for test sequences and monitoring.
Lists possible sources for audio analysis: embedded, AES/EBU, and Dolby-encoded audio.
Explains PPM meters for audio levels and phase in stereo pairs.
Describes analysis of 5.1 or 7.1 audio inputs and stereo downmix generation.
Details loudness measures and recommendations for US/Europe standards.
Shows phase relationship between audio channels as Lissajous figures.
Displays phase relationships between surround sound channels.
Provides audio status alongside video status.
Covers analysis of AES/EBU audio, requiring an AES card.
Explains audio playback via headphones, speaker, or AES card.
Explains Dolby-encoded audio delivery and packet structure.
Guides OTR configuration for Dolby E and Dolby Digital analysis.
Shows Dolby audio PPMs in bar chart or surround sound arrangements.
Describes Dolby loudness display using Loudness View, History, Surround Sound.
Introduces Dolby metadata and viewing in Status Overview.
Explains playing back extracted audio via headphones, speaker, or AES card.
Describes tools for video integrity assessment and jitter location.
Details setup for transport layer measurements: signal connection and OTR configuration.
Explains Jitter display as amplitude vs time graph showing signal jitter.
Presents the data carrier signal for signal quality assessment.
Explains cable loss implying cable length estimation.
Describes measuring delay on SDI/Eye inputs against reference or other input.
Explains measuring audio/video relative delay using test sequences or 'In-Service'.
Details measuring delay in video/audio components via a signal path.
Explains View window showing results from analyzing two input channels simultaneously.
Guides enabling/disabling simultaneous monitoring via Config window System page.
Describes setting the input analyzed in a specific tile for simultaneous monitoring.
Introduces Gen window facilities for image capture and test signal generation.
Details configurable aspects: output video standard and Genlock.
Explains capturing frames and video sequences from the SDI input.
Describes basic test pattern generation: color bars and pathological patterns.
Adds test signals like stills, sequences, zoneplates, line patterns from disk.
Details creating zoneplates and line patterns within the Gen Window.
Guides on preserving patterns on disk using 'Save pattern' and 'Save pattern as'.
Explains deleting patterns from Gen window or managing disk files.
Covers play-out preparation: adding items, audio, setting output standards.
Describes applying modifiers like gain, noise, bounce to patterns.
Details setting general rules and individual interpretations for image files.
Explains generating and applying simple audio tones to test sequences.
Describes inserting ATC timecode packets into output video.
Guides on inserting pixel bit errors into video signal for testing.
Explains saving and recalling pattern selections using Gen Presets.
Details using two generators simultaneously for Stereo 3D video output.
Covers capturing frames and video sequences from live input.
Explains the RVF file format for storing full frame video data.
Describes playing out video sequences from files.
Details steps for loading, playing out, and saving Stereo 3D video components.
Introduces 'Full-reference' Picture Quality Analysis (PQA) for live and stored video.
Guides on switching to PQA Mode and configuring operating modes.
Explains assessing picture quality differences using Difference images and Edge Maps.
Describes meters measuring differences between Reference and Test images.
Details main reporting medium for PQA measurements: graphs and parameter selection.
Provides real-time status on Reference and Test signals in PQA mode.
Explains driving Picture Quality Monitoring remotely via SNMP.
Concerns system-level aspects: installed software, channel details.
Details video analysis, error reporting, and customizable settings.
Covers metering in Audio PPM displays and reference level settings.
Provides version, license, and basic system settings overrides.
Gives details of video services, physical inputs, and identified standards.
Details audio analysis: embedded, AES, Dolby, surround sound.
Explains transferring settings, presets, and generator patterns between systems.
Describes accessing the 'Manage User Files' dialogue for file management.
Details saving user files to a chosen location like a USB stick.
Explains importing user files from a USB memory stick into the OTR.
Guides on deleting unwanted user files from default or other directories.
Covers managing the Configuration User file (CCF) for system setup transfer.
Explains managing System Settings (.OTX) files, including presets.
Details support for HD/HSDL dual-link video, analysis, and generation.
Covers support for 3Gb/s Level A video signals for analysis and generation.
Explains support for 3G Level B dual-link video analysis and generation.
Details support for 3G Level B dual-stream video, analysis, and generation.
Covers support for Digital Cinema video via 3G or HD Dual-link.
Introduces XML files for identifying and interpreting ANC packets.
Guides on creating XML files for packet identifiers and data locations.
Describes syntax of statements (Protocol, PacketType) in descriptor files.
Explains BitField elements describing groups of bits in packet info.
Specifies bits as flags to determine BitField element application.
Describes Switch elements using bit fields to select actions.
Specifies data selection and display based on bit field values.
Used to terminate lines and insert labels in data presentation.
Explains data presentation from ANC packets using XML statements for positioning.
Details PC and OTR connection for remote control via SNMP.
Explains remote control using Get/Set commands defined by a MIB file.
Provides steps to recover from blank screen or select resolution using a utility.
| Brand | OmniTek |
|---|---|
| Model | OTR 1001 |
| Category | Recording Equipment |
| Language | English |