3-37
3-5-4 Resolver and Machinery Connection
Once the cam programs have been completed, turn OFF the power supply (for safety)
and connect the Resolver and the machinery.
H Resolver and Machinery Connection
• Turn OFF the system power supply before connecting the Resolver and machinery.
• Follow the directions in 2-2-3 Mounting the Resolver and attach the Resolver correctly.
3-5-5 Origin Compensation
Once the Resolver and machinery have been connected, turn ON the power supply and
execute origin compensation.
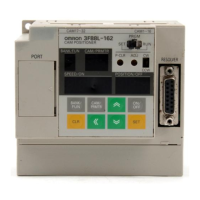
H Origin Compensation Execution (SET Mode)
• Once the Resolver and machinery have been connected, turn ON the system power supply.
• Switch the Cam Positioner to SET mode and use the ADJ switch to execute origin compensation. (The
Resolver present position is set to “0” at this point.)
Note 1. Origin compensation will not be executed if the Resolver speed is 4 r/min or greater.
Note 2. If the origin compensation value is set to a value other than “0,” parameter settings (origin
compensation value settings) must be made at function level 2. (Refer to 3-6-4 Origin Com-
pensation and Origin Shift.)
D Procedure
Operation Display Explanation
Use the mode selection switch to change to SET mode.
(Manual operation
of the machinery)
Rotate the machinery to the position to be set to zero.
Press the ADJ switch. Origin compensation will be executed.
The absolute angle (electrical angle of the Resolver) will be
flashing in the POSITION/OFF display until origin
compensation has been completed.
(After origin
compensation has
been completed)
The original display will appear when origin compensation has
been completed.
Note If the bank number appears in the Bank/Function display
and “0” appears in the Cam/Parameter No. display, the
absolute angle for origin compensation will be displayed
in the SPEED/ON display.
Use the mode selection switch to change to RUN mode.
The speed display will be “0” and present angle will be “0” if the
machinery is not moving.
Operation Chapter 3
 Loading...