seating on the cylinder
wall.
Fit
each
ring
to the cylinder
wall
at the bottom of its' travel, using the piston to
square
the
ring
in the bore. Check the gap
with
a feeler
gage.
It
should
be .010" to .020". If the gap is too small,
file
the
butt
ends
of the rings. Do not use rings that need a lot
of
filing,
they
will
not
seat
right
on the cylinder
wall.
If an
oversize piston is used, use the correct oversize rings.
CONNECTING
RODS
Clean the connecting rod and check for defects. Check the
connecting rod bushings for proper
clearance
with
the piston
pin.
Clearance should be .0002" to .0007".
If
the bushings are excessively
worn,
press
them out and
install
one new bushing
from
each
side of the bushing bore.
Press
the new bushings
only
until
flush
with
the
sides
of
the rod to leave 1/16" to 7/64" oil groove in the center
(Fig.
12-2).
CONNECTING
ROD
BEARINGS
Inspect the connecting rod bearings for burrs, breaks, pits
and wear. Measure the
clearance
between bearings and the
crankshaft
journal.
The
clearance
should be
.001"
to .003".
If
necessary,
replace
with
new standard or oversize pre-
cision
bearings.
For
information
about the crankpin journals, see Engine
Disassembly Section.
ASSEMBLY
AND
INSTALLATION
1.
Install
the connecting rod on the piston
with
the pin
and retaining rings. If new bushings were installed,
check to see that the
ends
are
flush
with
the connect-
ing
rod to provide for the
oil
recess
in the center.
.
2.
Install
the rings on the piston.- Tapered rings
will
be
marked top or
identified
in
some
pther manner.
Place
this
mark toward the closed end of the piston.
Space
the
ring
gaps
1/4 gap of the way around the piston
from
one another. No gap should be in
line
with
the piston
pin.
Oil
the rings and piston.
3. Position a bearing
half
in the connecting rod. Be
sure
there is no
dirt
under the bearing. This could
cause
high
spots
and early bearing
failure.
4.
Oil the cylinder
wall.
Install
the piston in the cylinder
using
a suitable installer. The assembly should be in-
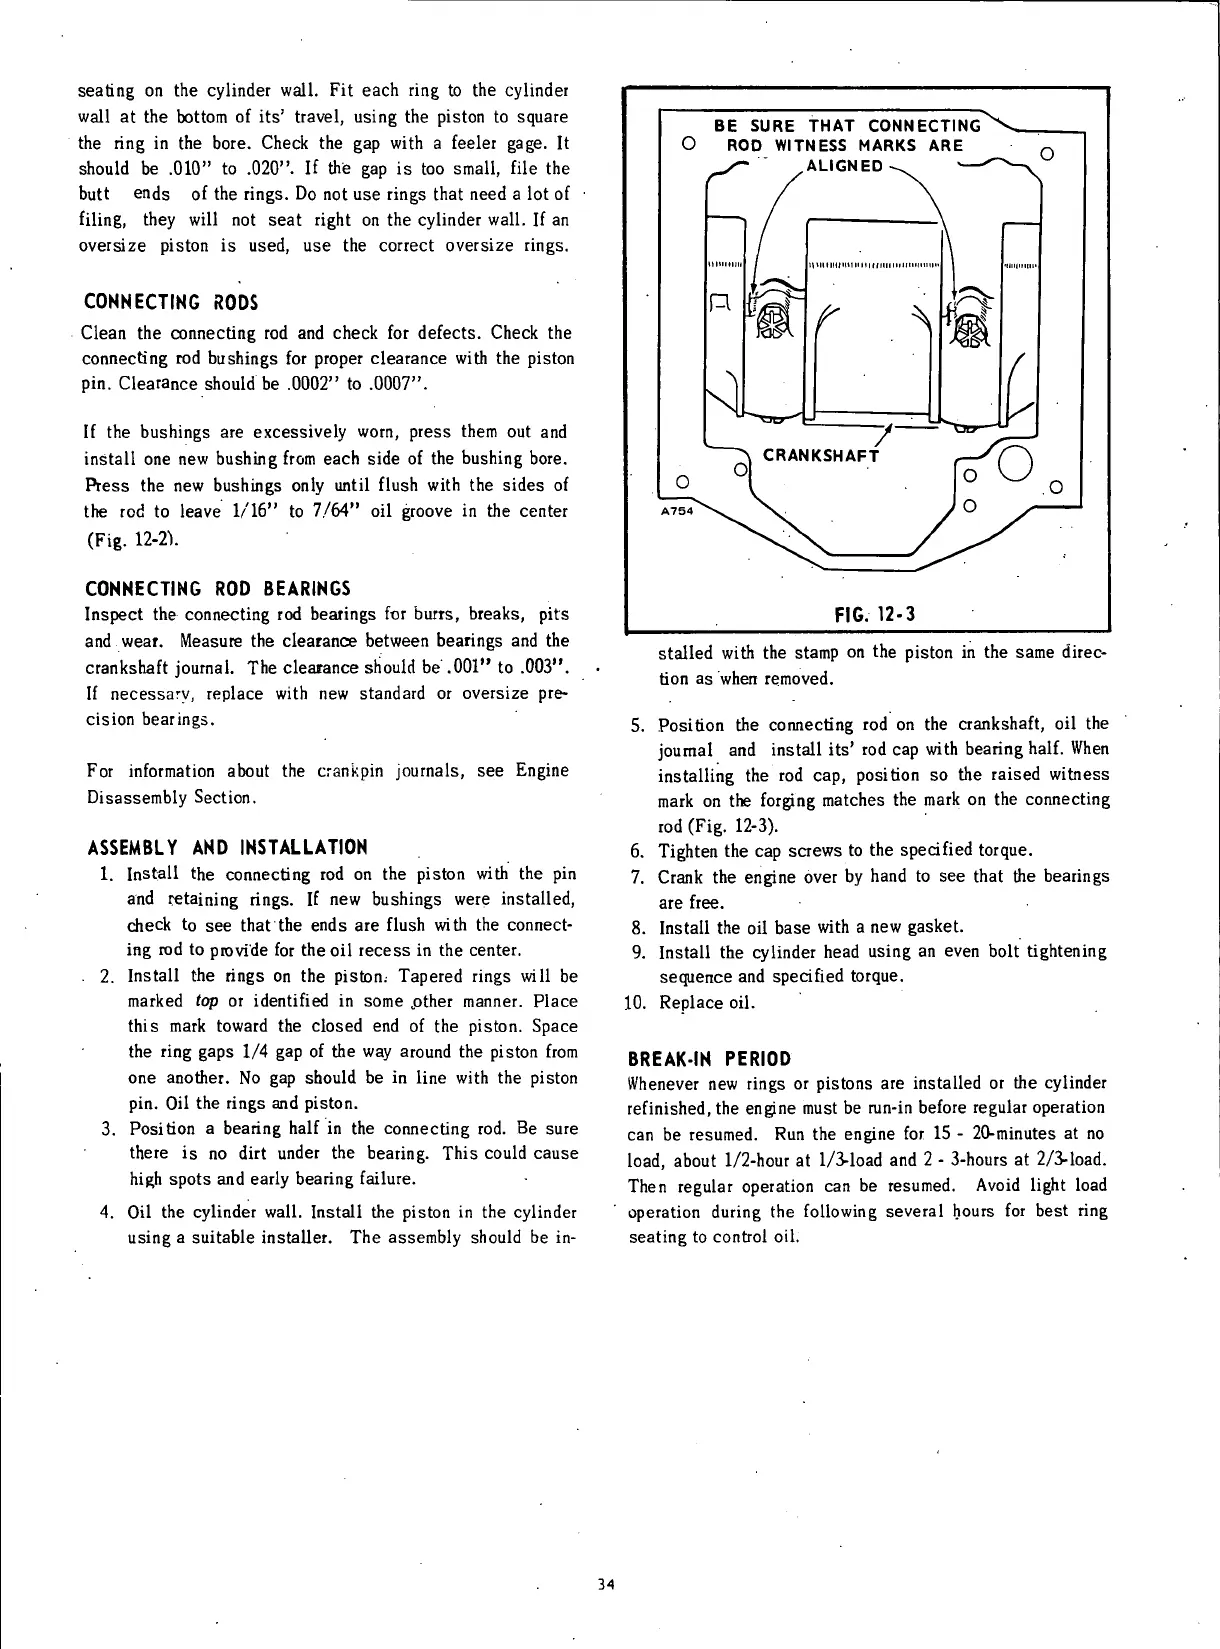
BE
SURE
THAT
CONNECTING
O
ROD
WITNESS
MARKS
ARE
ALIGNED
nmillU'ltlllllHimillil
y-
o
CRANKSHAFT
FIG.
12-3
stalled
with
the stamp on the piston in the
same
direc-
tion
as when removed.
5. Position the connecting rod on the crankshaft, oil the
joumal
and
install
its' rod cap
with
bearing
half.
When
installing
the rod cap, position so the raised witness
mark
on the
forging
matches
the mark on the connecting
rod
(Fig.
12-3).
6. Tighten the cap screws to the specified torque.
7. Crank the engine over by hand to see that the bearings
are free.
8.
Install
the oil
base
with
a new
gasket.
9.
Install
the cylinder head using an even
bolt
tightening
sequence
and specified torque.
10.
Replace
oil.
BREAK-IN
PERIOD
Whenever new rings or pistons are installed or the cylinder
refinished,
the engine must be
run-in
before regular operation
can be resumed. Run the engine for 15 - 20-minutes at no
load,
about
1/2-hour
at 1/3-load and 2 - 3-hours at 2/3-load.
Then
regular operation can be resumed.
Avoid
light
load
operation during the
following
several hours for
best
ring
seating to control oil.
34
 Loading...


