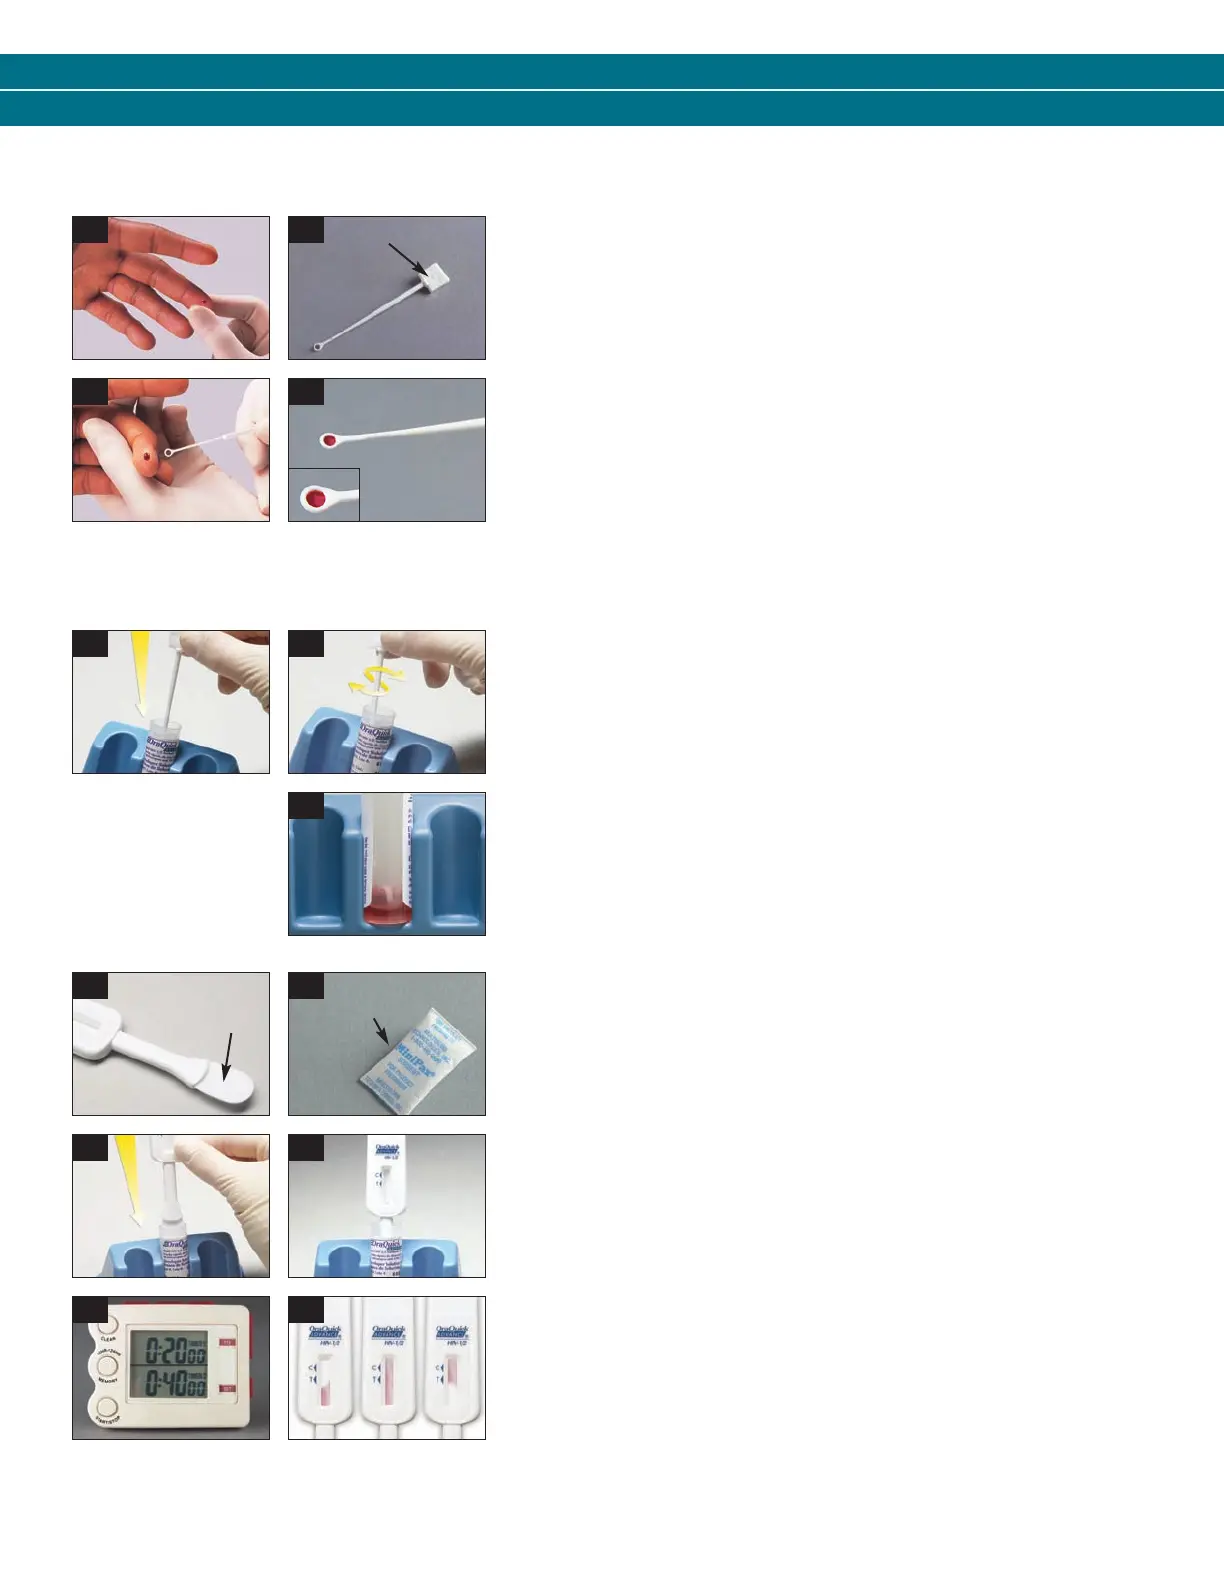
Step 1 – COLLECT
• Using an antiseptic wipe, clean the finger of the person being tested. After
cleansing the skin puncture site, allow the area to air dry, so the antiseptic
action of the alcohol can take effect.
• Using a sterile lancet, puncture the skin just off the center of the finger pad.
• Hold the finger downward. Apply gentle pressure beside the point of the
punctur
e. Avoid squeezing the finger to make it bleed (see picture B1).
• Wipe away this first drop of blood with a sterile gauze pad. Allow a new
dr
op of blood to form.
• Pick up an unused Specimen Collection Loop (“Loop”) by the thick “handle”
end (see picture B2).
• Put the “rounded” end of the Loop on the drop of blood (see picture B3).
Make sure that the Loop is completely filled with blood (see picture B4).
Step 2 – MIX
• Immediately insert the blood-filled end of the Loop all the way into the Vial
(see picture B5).
• Use the Loop to stir the blood sample in the Developer Solution (“Solution”)
(see picture B6).
• Remove the used Loop from the Solution. Throw the used Loop away in a
biohazar
d waste container.
• Check the Solution to make sure that it appears pink. This means that the
blood was correctly mixed into the Solution (see picture B7). If the Solution is
not pink, discard all the test materials in a biohazard waste container. Start
the test over. Use a new Pouch and a new blood sample.
Step 3 – TEST
• Remove the Device from the Pouch. DO NOT touch the Flat Pad
(see picture B8).
• Check to make sure that an Absorbent Packet is included with the Device
(see picture B9). If no Absorbent Packet is present, discard the Device and
obtain a new Pouch for testing.
• Insert the Flat Pad of the Device all the way into the Vial containing the
blood sample (see picture B10). Make sur
e that the Flat Pad touches the
bottom of the Vial. The Result Window on the Device should be facing
towards you (see picture B11).
• Start timing the test (see picture B12). DO NOT r
emove the Device from the
Vial while the test is running. Pink fluid will appear and travel up the Result
Window. The pink fluid will gradually disappear as the test develops (see
picture B13).
• Read the results after 20 minutes but not more than 40 minutes in a fully
lighted ar
ea.
• Refer to the Reading T
est Result and Interpretation of Test Result sections on
the back of these instructions.
Handle
NOTE: If the Loop is dropped or comes in contact with
any other surface, discard it in a biohazard waste
container. Get a new Loop for the collection of the
blood sample.
FINGERSTICK WHOLE BLOOD – SPECIMEN COLLECTION AND TESTING PROCEDURE
B1 B2
B3 B4
Flat
Pad
Absorbent
Packet
B5 B6
B7
B8 B9
B10 B11
B12
B13
3001-1216_0912 OQA SBS EN-ES_OQA SbS 1/4/13 10:01 AM Page 5
 Loading...