Step 1 – COLLECT
• Using standard venous phlebotomy procedures, collect a whole blood
sample using a tube containing EDTA (lavender top) anticoagulant. Other
anticoagulants have not been tested and may give an incorrect result.
If the specimens are not tested at the time of collection, the specimen may
be stored as whole blood for up to 5 days at 2°– 30°C (36°– 86°F) or as
plasma for up to 7 days at 2°– 8°C (36°– 46°F).
• Centrifuge the tube of blood (1000-1300 x g, for appr
oximately 5 minutes,
no refrigeration required) to separate the cells from the plasma.
• Carefully uncap the tube by gently rocking the stopper towards you so that
it vents away fr
om you.
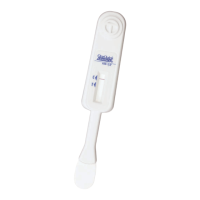
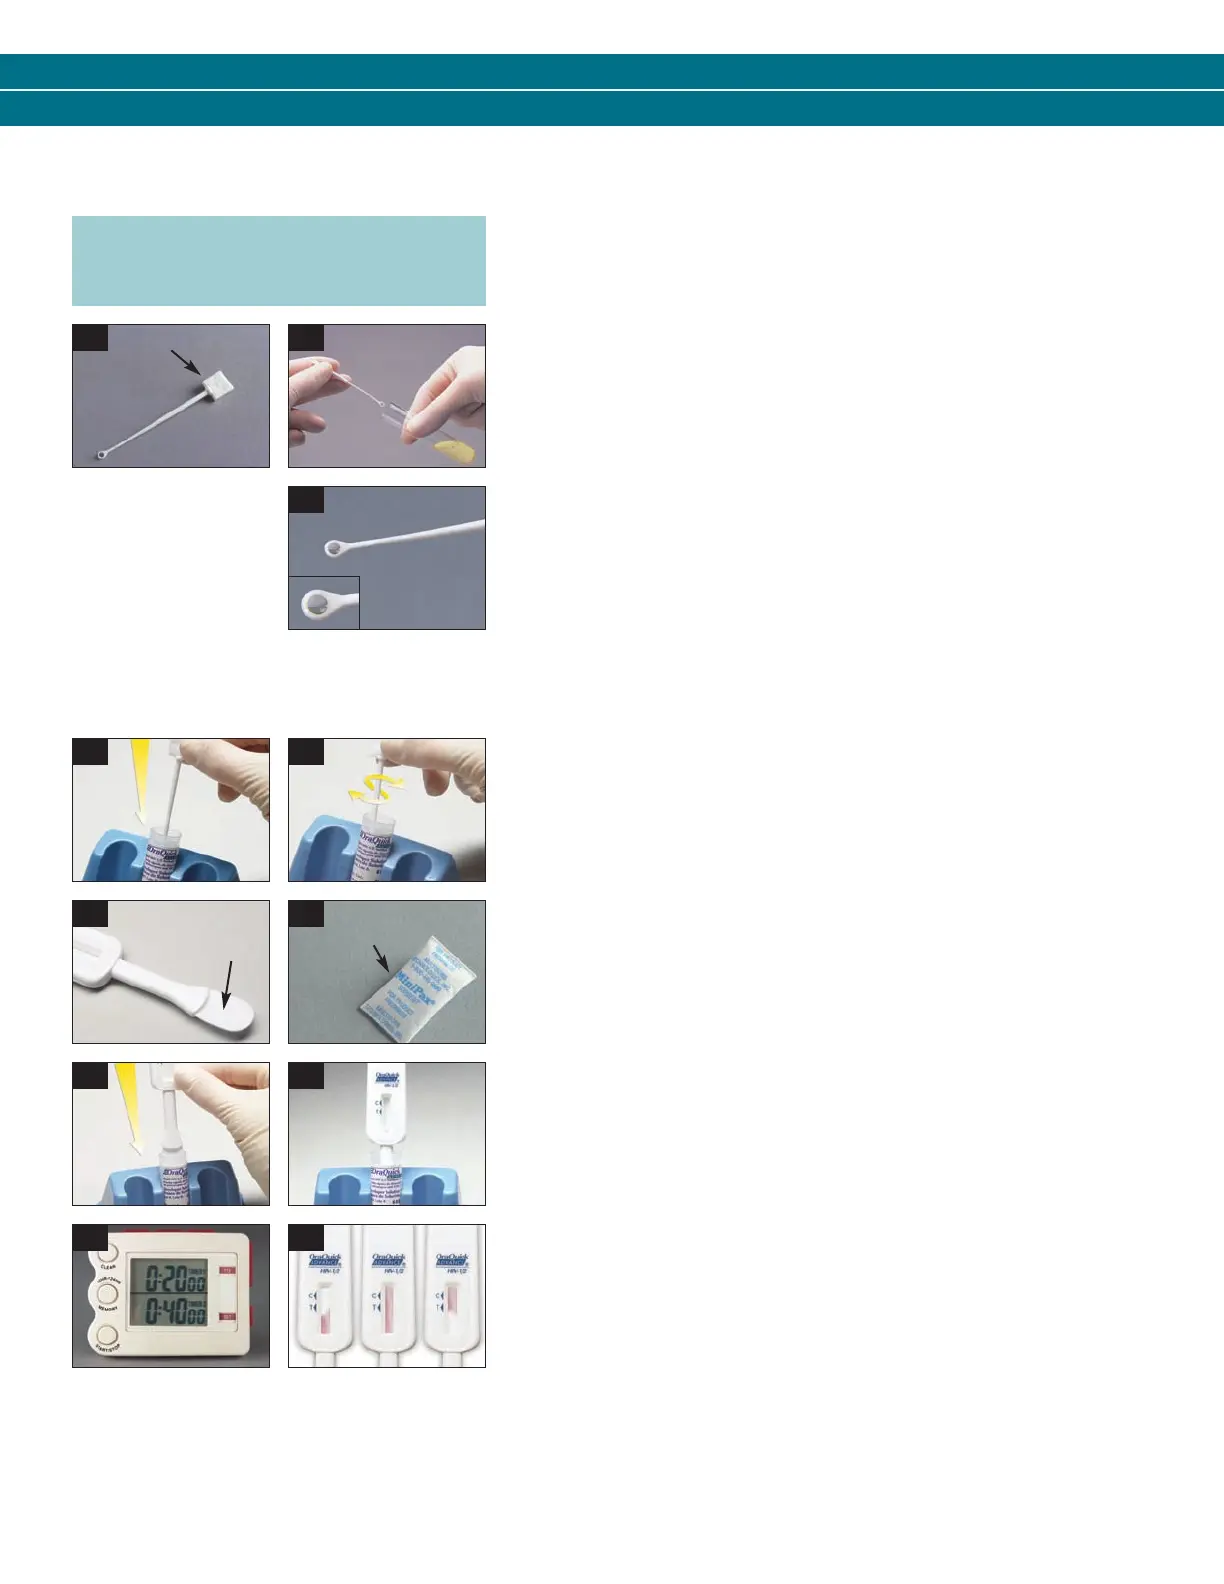
• Pick up an unused Specimen Collection Loop (“Loop”) by the thick “handle”
end (see picture D1).
• Put the “rounded end” of the Loop into the tube of plasma (see picture D2).
• Make sure that the Loop is completely filled with plasma (see picture D3).
Step 2 – MIX
• Immediately insert the plasma-filled end of the Loop all the way into the Vial
(see picture D4).
• Use the Loop to stir the plasma sample in the Developer Solution (“Solution”)
(see picture D5).
• Remove the used Loop from the Solution. Throw the used Loop away in a
biohazar
d waste container.
Step 3 – TEST
• Remove the Device from the Pouch. DO NOT touch the Flat Pad (see picture D6).
• Check to make sure that an Absorbent Packet is included with the Device
(see picture D7). If no Absorbent Packet is pr
esent, discard the Device and
obtain a new Pouch for testing.
• Insert the Flat Pad of the Device all the way into the Vial containing the
blood sample (see picture D8). Make sur
e that the Flat Pad touches the
bottom of the Vial. The Result Window on the Device should be facing
towards you (see picture D9).
• Start timing the test (see picture D10). DO NOT r
emove the Device from the
Vial while the test is running. Pink fluid will appear and travel up the Result
Window. The pink fluid will gradually disappear as the test develops (see
picture D11).
• Read the results after 20 minutes but not more than 40 minutes in a fully
lighted ar
ea.
• Refer to the Reading Test Result and Interpretation of Test Result sections on
the back of these instructions.
Handle
NOTE: If the Loop is dropped or comes in contact with
any other surface, discard it in a biohazard waste
container. Get a new Loop for the collection of the
blood sample.
PLASMA – SPECIMEN COLLECTION AND TESTING PROCEDURE
D1
D3
Flat
Pad
Absorbent
Packet
D4 D5
D6 D7
D8 D9
D10
D11
D2
NOTE: Testing of plasma samples may only
be performed by laboratories certified to
perform moderate complexity tests.
GENERAL TEST CLEANUP
• Dispose of the used test materials in a biohazard waste container.
• When using gloves, change your gloves between each test to prevent contamination. Throw away the used gloves in a biohazard waste container
.
• Use a freshly prepared 10% solution of bleach to clean up any spills.
3001-1216_0912 OQA SBS EN-ES_OQA SbS 1/4/13 10:01 AM Page 7
 Loading...