INSTRUCTIONS FOR USE INSTRUCTIONS FOR USE
Spark
™
Headlight Spark
™
Headlight
8 9
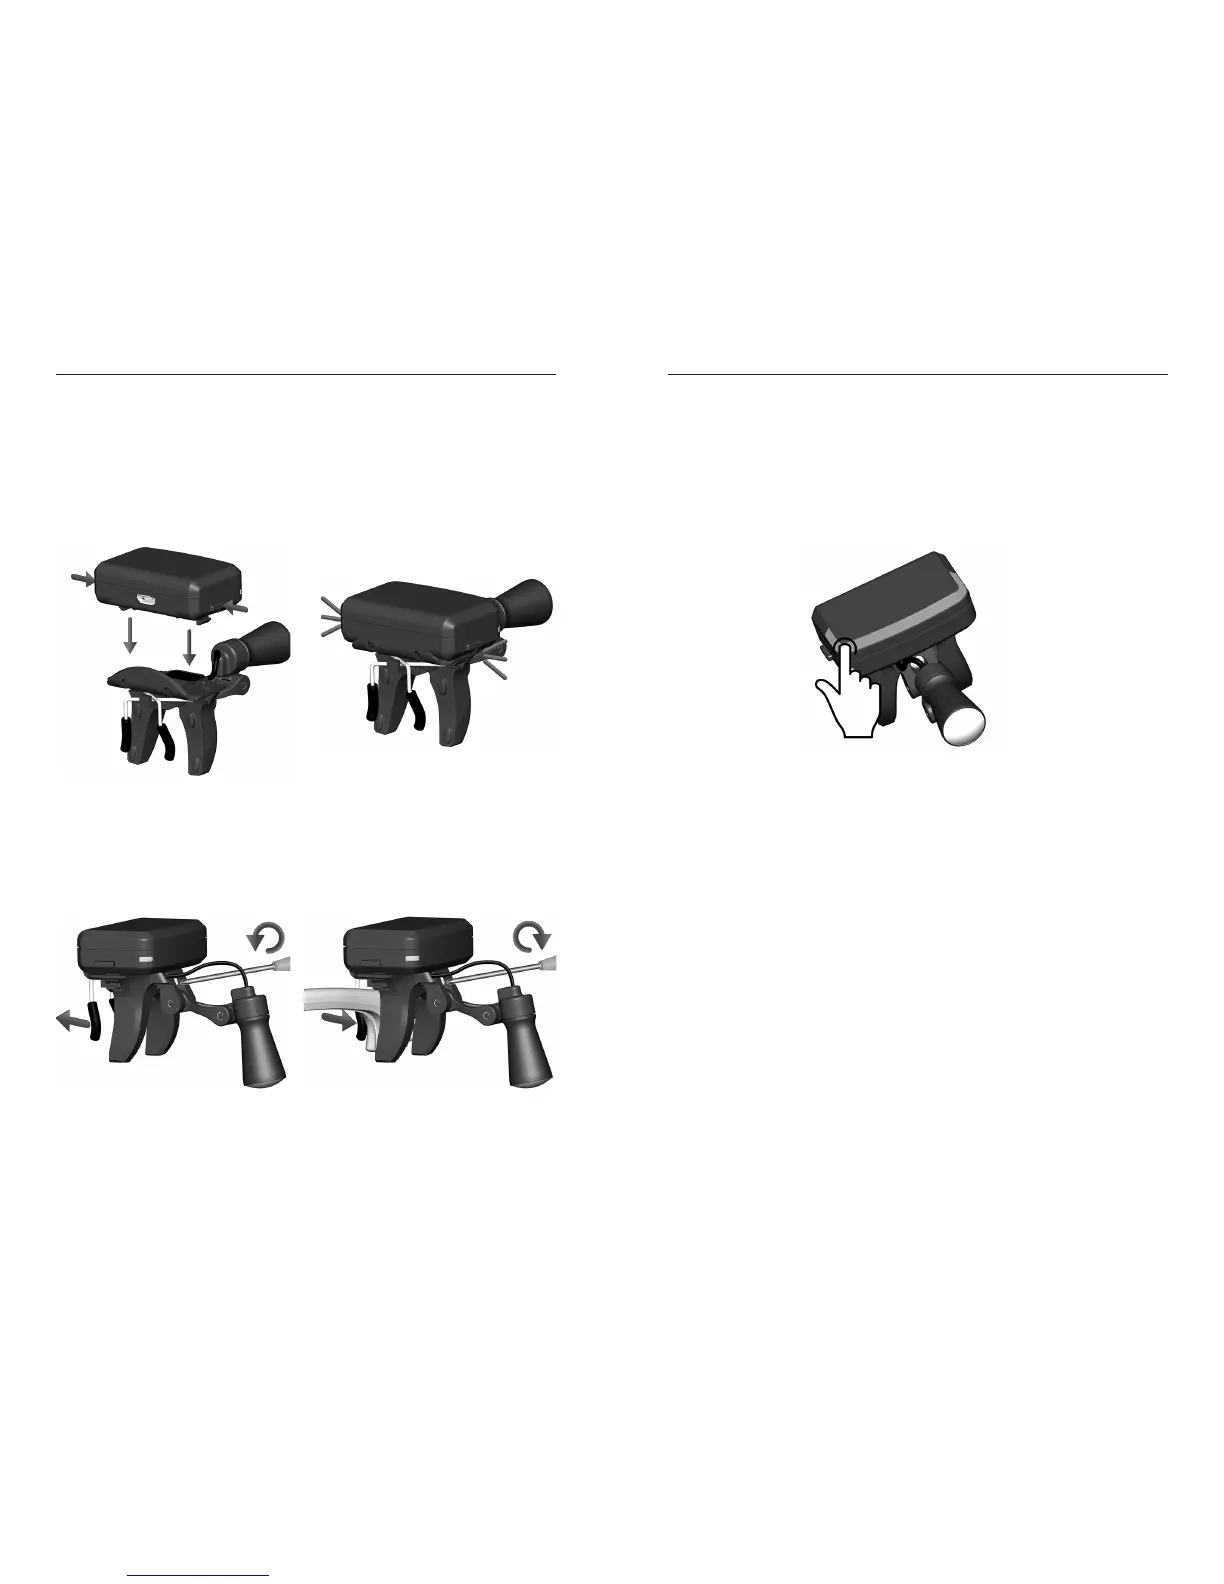
Installing the Battery Pack
The Battery Pack is held into place on the mounting clip by locking tabs on each side of the Battery Pack. Depress both locking
tabs when installing or removing the Battery Pack. The locking tabs will ‘click’ into place when the Battery Pack is secure.
Operating the Headlight
1. The front and side textured beveled areas of the battery pack serve as a capacitive touch control. Firmly touch anywhere
in the textured area to turn the headlight on and off.
2. Rotate the headlight up or down to center within your field of view.
NOTE: You may tighten the screws to lock the headlight in the desired vertical position.
3. When the battery pack charge becomes low, the battery indicator will illuminate SCARLET and begin to blink periodically.
This LOW battery state will result in approximately 20 minutes of headlight usage before it can no longer power the headlight.
Note: The battery indicator will stop blinking when removed from the headlight.
Cleaning Instructions
Your headlight is a precision optical-electrical instrument manufactured from high quality components. With proper care, it
will provide a long and useful life. You should adhere to the following instructions for proper cleaning and disinfection, or
damage may result.
• DO NOT RUN UNDER WATER
• DO NOT SPRAY THE DEVICE
• DO NOT SUBMERGE IN ANY LIQUID OR ULTRASONIC CLEANER
• DO NOT PULL ON THE EXPOSED CABLE DURING CLEANING
• DO NOT USE AUTOCLAVE OR CHEMICLAVE
• DO NOT USE GLUTARALDEHYDE OR IDOPHOR
• DO NOT USE A CLEANER WITH ALCOHOL CONCENTRATION GREATER THAN 70%
You may disinfect using a low-alcohol disinfectant or soap and water. We recommend CaviCide
™
, CaviCide1
™
, CaviWipes
™
, or
CaviWipes1
™
brands of surface disinfectants. Follow the instructions on the disinfectant product label to satisfy a thorough
sanitizing process. Never directly spray the headlight. First, apply the liquid to a soft wipe or cloth, and then wipe the
product. Be sure to squeeze excess fluid out of the cloth/wipe before using.
If your eyewear is heavily soiled, first remove the headlight, and then clean your eyewear. Be sure to dry your eyewear
thoroughly before reinstalling the headlight.
Attaching the Spark
NOTE: Access to the mounting screw is located behind the LED headlight assembly. The assembly is designed to only rotate
down to be parallel to the battery pack and no further. DO NOT try force it down further than shown in the image below.
1. Swing the LED headlight downward to the 90° position as shown in the picture.
2. Using the screwdriver provided, loosen the mounting screw to allow the mounting clip to open enough to slip over the top
of your eyewear frame.
3. Center the Spark on your frame and tighten the mounting screw until the unit is secure on the frame.