The HERU
®
T should be installed with the duct connections upwards (A) but can also be placed decumbently (B).
We do not recommend installing the unit on one side (C), with the duct connections (D) or lid downwards (E).
Allowances must be made to access the unit for servicing or maintenance.
PLACING THE HERU
®
T UNIT
FREE SPACE FOR SERVICE AND MAINTENANCE
73
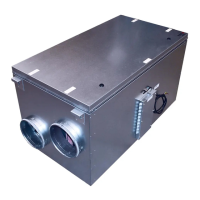
PLACING THE HERU
®
S UNIT
The HERU
®
S should be installed with the lid upwards (A) or on the side (B), we do not recommend
installing the unit vertically (C) or with the lid downwards (D). Allowances must be made to access the unit for
servicing or maintenance.
HERU
®
62 T, 90 T,
90 T EC 2
Max aperture
angle 90°.
HERU
®
115 T,
130 T EC, 140 T
Max aperture
angle 130°.
C D E
A B
OK! OK!
A B C D
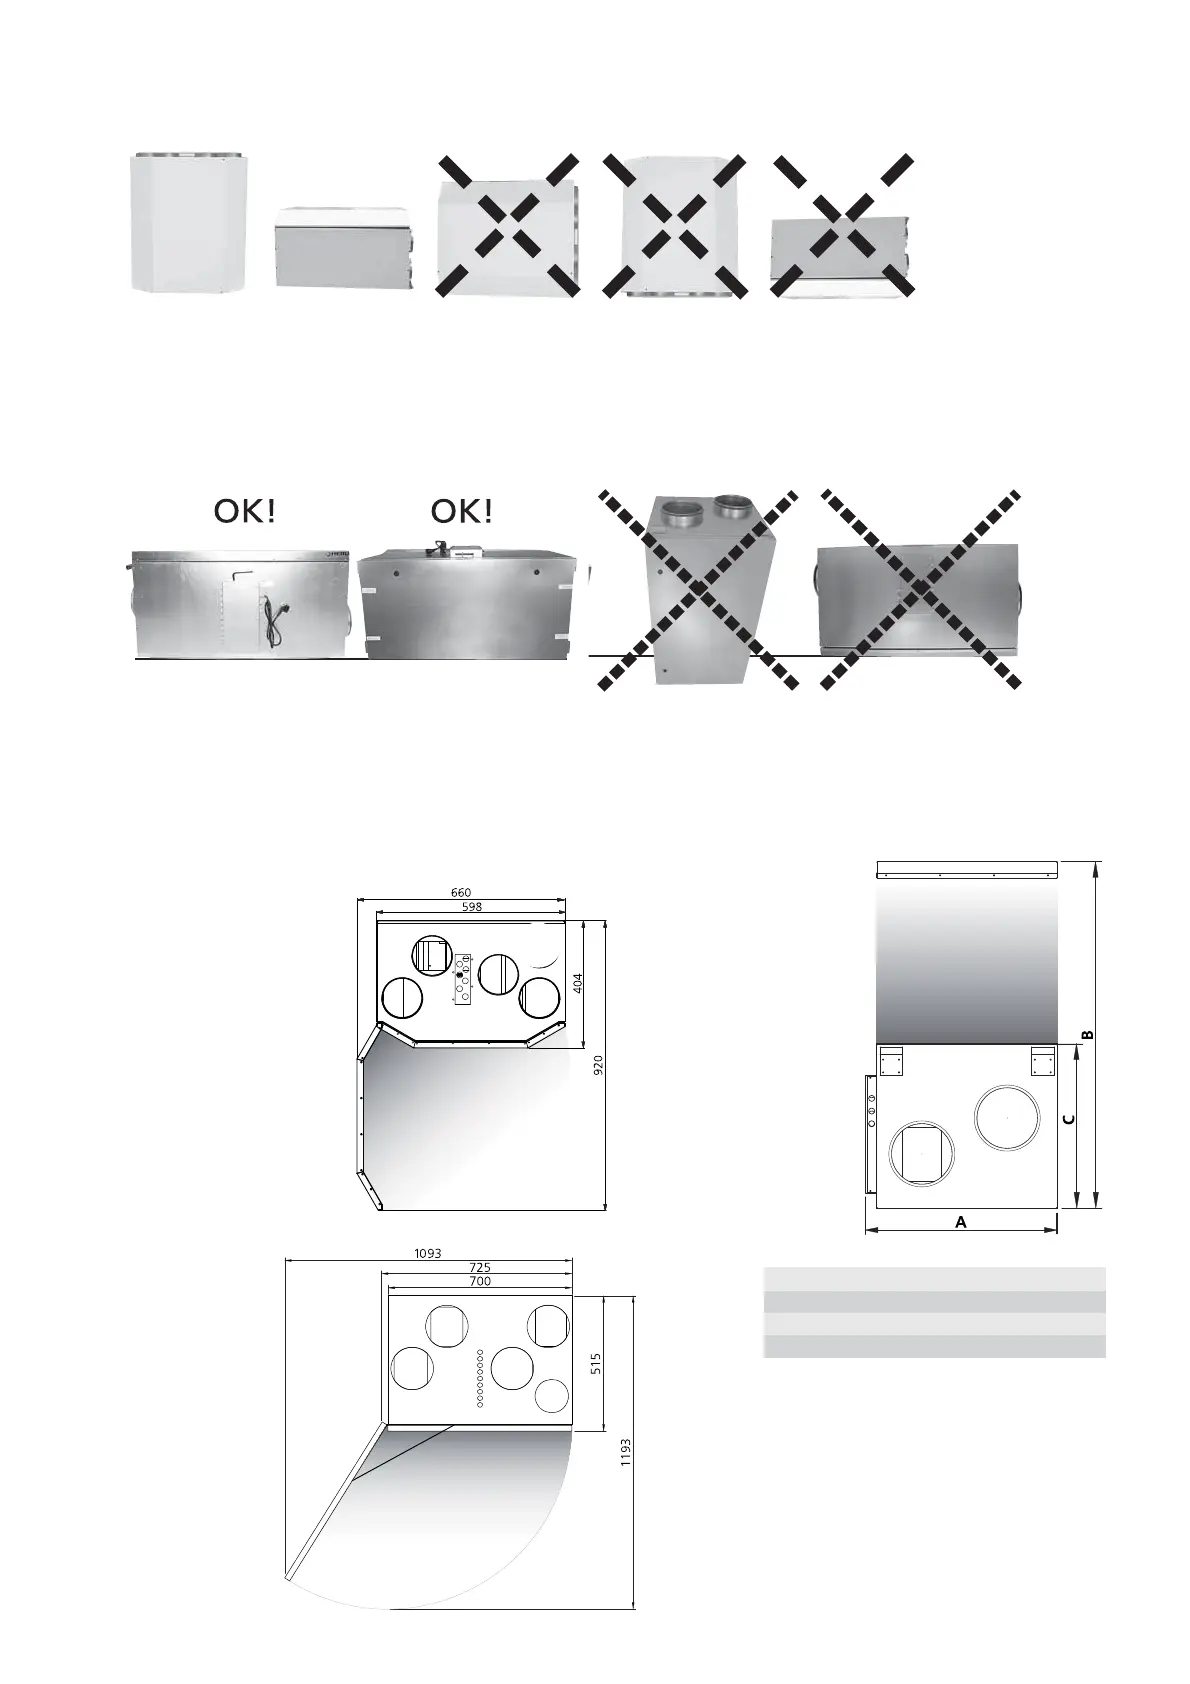
HERU
®
S
Fee space
for service
and
maintenance.
mm A B C
H E R U
®
50 S 2A, 75 S 2A, 90 S EC 2A 555 800 420
H E R U
®
130 S 2A, 130 S EC 2A 605 1000 521
H E R U
®
180 S 2A, 180 S EC 2A 715 1220 631
 Loading...