EasyManua.ls Logo

Otto NoizeBarrier Micro Comms Kit - User Manual

Otto NoizeBarrier Micro Comms Kit
4 pages
Print Icon
To Next Page IconTo Next Page
Loading...
FOLD IN HALF
QUICK REFERENCE
NoizeBarrier® Micro Comms Kit
INTRODUCTION
The NoizeBarrier
®
Micro Comms Kit comes in three different Surveillance Kit
options; Single Ear Kit and optional ear plug, Enhanced Single Ear Comms
Kit with transducer, or Enhanced Dual Ear Comms Kit with transducer.
INSTALLATION
EARTIPS
All options come with eartips designed
specically to work with OTTO’s NoizeBarrier
®
Micro electronic earplugs. There are two stems
in the back of each eartip, a STRAIGHT stem,
and an ANGLED stem.
1
Install the eartip of the NoizeBarrier
®
Micro by
inserting it into the STRAIGHT stem of the eartip.
2
a.
In option A install the OTTO acoustic tube to the
ANGLED stem of the eartip. The tube should be
rotated until it points upward at a right angle from
the Micro body.
b.
In option B-for wired kits, install the transducer
to the ANGLED stem of the eartip. The wire
should be rotated until it points upward at a
right angle from the Micro body and ts securely
around the outer ear.
3
When the Micro is inserted into the ear, the larger portion of the Micro
body should angle towards the rear of the cochlea, with the curved
windscreen facing forward to the user’s face.
Designed, Manufactured and Engineered
in the U.S.A. for More Than 50 Years
©2020 OTTO Engineering, Inc. All Rights Reserved
You may also contact Customer Service
M-F, 7:30 - 5:00 (CST)
Toll-free: +1-888-234-6886 | Direct: +1-847-428-7171
PRODUCT REGISTRATION
Register to receive email alerts whenever updates or mission critical
information regarding your product becomes available.
https://go.otto-comm.com/product-registration
This product can expose you to chemicals including lead, which is known to the
State of California to cause cancer & other reproductive harm. For more information
go to www.P65Warnings.ca.gov
804479 | 10/2020
STRAIGHT
stem
ANGLED
stem
Option 2a
Option 2b
Question and Answer IconNeed help?

Do you have a question about the Otto NoizeBarrier Micro Comms Kit and is the answer not in the manual?

Overview

The OTTO NoizeBarrier® Micro Comms Kit is a surveillance kit designed to provide hearing protection and communication capabilities. It is available in three configurations: a Single Ear Kit with an optional earplug, an Enhanced Single Ear Comms Kit with a transducer, and an Enhanced Dual Ear Comms Kit with a transducer.

Function Description:

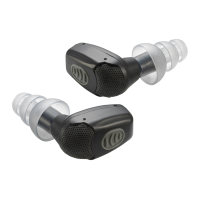
The primary function of the NoizeBarrier® Micro Comms Kit is to integrate communication into electronic earplugs while offering hearing protection. The kit allows users to receive audio communications from a radio or surveillance system. The electronic earplugs are designed to work with specific eartips that feature two stems: a STRAIGHT stem and an ANGLED stem, facilitating different connection methods for acoustic tubes or transducers. The device is intended to be inserted into the ear, with the larger portion of the Micro body angled towards the rear of the cochlea and the curved windscreen facing forward.

Important Technical Specifications:

While specific technical specifications like frequency response or noise reduction ratings are not detailed in the provided text, the kit is designed to work with OTTO's NoizeBarrier® Micro electronic earplugs. The audio output level is designed to operate at maximum rated power. The cable for the transducer features two pins of different sizes, ensuring correct orientation during installation.

Usage Features:

Eartip Installation:

  1. Eartip Placement: All kits come with eartips specifically designed for OTTO's NoizeBarrier® Micro electronic earplugs. Each eartip has two stems: a STRAIGHT stem and an ANGLED stem.
  2. Micro Body Connection: The NoizeBarrier® Micro body is installed by inserting it into the STRAIGHT stem of the eartip.
  3. Acoustic Tube Connection (Option A): For the Single Ear Kit, the OTTO acoustic tube is connected to the ANGLED stem of the eartip. The tube should be rotated so it points upward at a right angle from the Micro body.
  4. Transducer Connection (Option B - Wired Kits): For wired kits, the transducer is installed to the ANGLED stem of the eartip. The wire should be rotated to point upward at a right angle from the Micro body and fit securely around the outer ear.
  5. Proper Ear Insertion: When inserted into the ear, the larger part of the Micro body should angle towards the rear of the cochlea, with the curved windscreen facing forward.

Single Ear Kit Usage:

  1. Acoustic Tube Adjustment: The acoustic tube should be adjusted to rise vertically over the top of the ear, curve over, and direct back towards the nape of the neck.
  2. Integration: The acoustic tube is then installed into an earphone or surveillance kit as usual.
  3. Volume Control: The volume of received communications can be controlled via the radio.

Enhanced Single and Dual Ear Kits Usage:

  1. Eartip Placement: Users should refer to the Eartip Installation section to ensure proper eartip placement.
  2. Acoustic Tube Installation: Follow the Single Ear Acoustic Tube Installation directions.

Transducer Changing (for Enhanced Kits):

  1. Disconnection: Hold the earphone assembly cable and rotate it down and out of the strain relief holder, pulling it straight out of the transducer.
  2. Access Slot: Push the clothing clip out to a 90° angle to reveal an open slot.
  3. Prying Off: Insert a flat object (such as a flat-head screwdriver) into the opening and gently pry the transducer off.
  4. New Transducer Installation: Snap the new transducer into its place.
  5. Cable Reconnection: Plug the cable into the new transducer. Note that the two pins on the cable are different sizes, ensuring it only fits one way. Rotate the wire back into the strain relief holder securely.

Powering On/Off:

Users should consult the NoizeBarrier® Micro user guide for specific instructions on how to properly power on and off the Micro device.

Maintenance Features:

The manual does not explicitly detail maintenance features beyond the process of changing the transducer. However, the design for transducer replacement suggests a modular approach, allowing for easy repair or upgrade of this component.

Safety and Warnings:

Hearing Protection Warning: OTTO products are designed to produce a specific audio output level at maximum rated power. Modifying these devices (e.g., adding/removing components or accessories) can alter the audio output and potentially cause PERMANENT HEARING DAMAGE. Users are warned that compliance with hearing protection regulations varies by country and depends on factors like duration of exposure, audio output level, and ambient noise. The end-user is SOLELY RESPONSIBLE for determining applicability and compliance with local hearing protection regulations. When purchasing OTTO accessories that use earphone kits, the user is SOLELY RESPONSIBLE for ensuring proper fit. Caution should always be exercised when inserting any products into the ear.

Product Registration: Users are encouraged to register their product online at https://go.otto-comm.com/product-registration to receive email alerts regarding updates or critical information.

Customer Service: Customer service is available Monday-Friday, 7:30 AM - 5:00 PM (CST) via toll-free number: +1-888-234-6886 or direct number: +1-847-428-7171.

California Proposition 65 Warning: The product may expose users to chemicals including lead, which is known to the State of California to cause cancer and other reproductive harm. More information is available at www.P65Warnings.ca.gov.

The OTTO NoizeBarrier® Micro Comms Kit is designed, manufactured, and engineered in the U.S.A. by OTTO Engineering, Inc., with over 50 years of experience.

Otto NoizeBarrier Micro Comms Kit Specifications

General IconGeneral
BrandOtto
ModelNoizeBarrier Micro Comms Kit
CategoryMicrophone system
LanguageEnglish

Related product manuals