Do you have a question about the Outdoor Gourmet FSOGBG4300 and is the answer not in the manual?
| Brand | Outdoor Gourmet |
|---|---|
| Model | FSOGBG4300 |
| Category | Boiler |
| Language | English |
Safe practices for handling LP gas cylinders, including removal, transport, and outdoor storage.
Specifications for LP gas tanks, including size, DOT/CSA markings, QCC Type 1 outlet, and safety relief valve.
Step-by-step guide for safely connecting the regulator to the LP gas tank, ensuring a secure fit.
Procedure for testing the LP tank connection for gas leaks using a soap and water solution.
Detailed instructions for applying soapy solution and checking for bubbles to identify gas leaks.
Instructions for inspecting the regulator hose assembly for abrasion, wear, cuts, or leaks before use.
Procedure for safely turning off and disconnecting the regulator from the LP tank.
Detailed steps and safety precautions for safely lighting the appliance's burner outdoors.
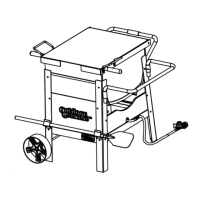
Slide wheel axle through body, add spacer, secure wheel with cotter pin, and repeat for the other wheel.
Insert the back handle into the designated slots on the main body of the appliance.
Attach lid handles to the lid using bolts and acorn nuts, repeating for the other handle.
Install basket handles onto the basket using hex nuts and a hex wrench.
Open the lid, lift the basket, and insert the side handle into the side holes.
Slide the stainless steel paddle into the bottom slot on the appliance for storage.
Guidance on filling the cooker with the correct amount of water to avoid overfilling and ensure safety.
Recommendations for adding spices to the cooking water for desired flavor.
Instructions on how to bring the water to a rolling boil, noting time may vary.
Procedures for safely adding seafood to boiling water and cooking times for various items.
Detailed steps for cleaning the appliance after use, including suggested materials and specific cleaning tips.
Details of the manufacturer's one-year limited warranty, coverage, and exclusions.
